Bad decisions and more socks

So the Finished project I am featuring today took me nearly a year to complete and not a single bit of it was the fault of the pattern.  So let’s just jump in to how I made some poor decisions that still ended up looking amazing!

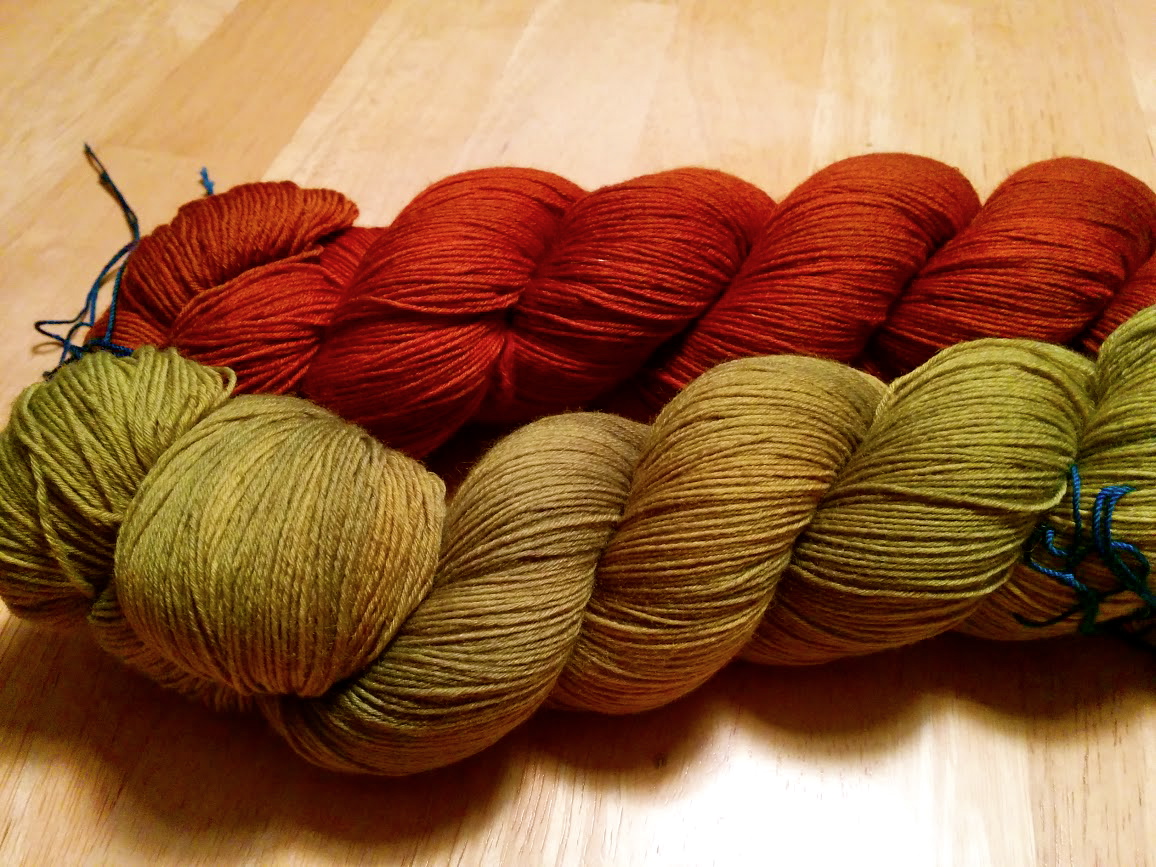
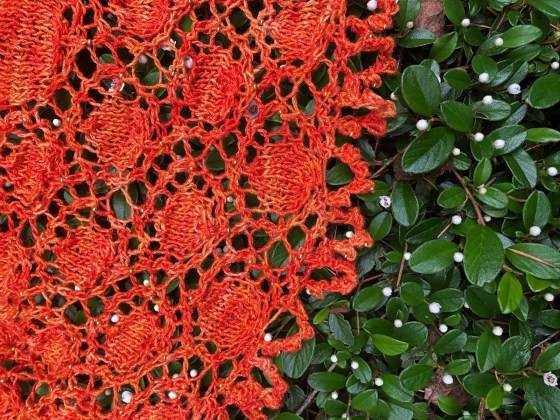
I found this amazing flame orange tonal yarn with gold sparkle thread in it at the yarn stores sales bin (yes, I am still thrifty).  There were two skeins; one perfectly presentable and one more of a loose almost tangle. It was color saturation love.  Check this out:

file-3

Inspired by the gold I decided the ideal choice was finding some solid gold colored beads.  I looked high and low and there were lots of options in semi-transparent golden beads and I bought some but still…. this needed the solid gold bling and I went online and found some metal seed beads and based on the listed hole dimension I thought they were roughly a 6/0 bead.  They were not.  They were more like an 8/0 bead and that made putting them on a heavier than fingering weight yarn was a significant challenge… as in get out your beading pliers and pull your wired yarn loop through the hole at times challenging.  So when I found I’d made a mistake in a beaded row… the project spent some time in the WIP pile to think about what it had done.  I mean really?!

On the plus side when I did go back to restart my project I had apparently forgotten that before I put it in time out, I’d apparently pulled back the bad row and so I didn’t have to do that when I restarted.  YAY!

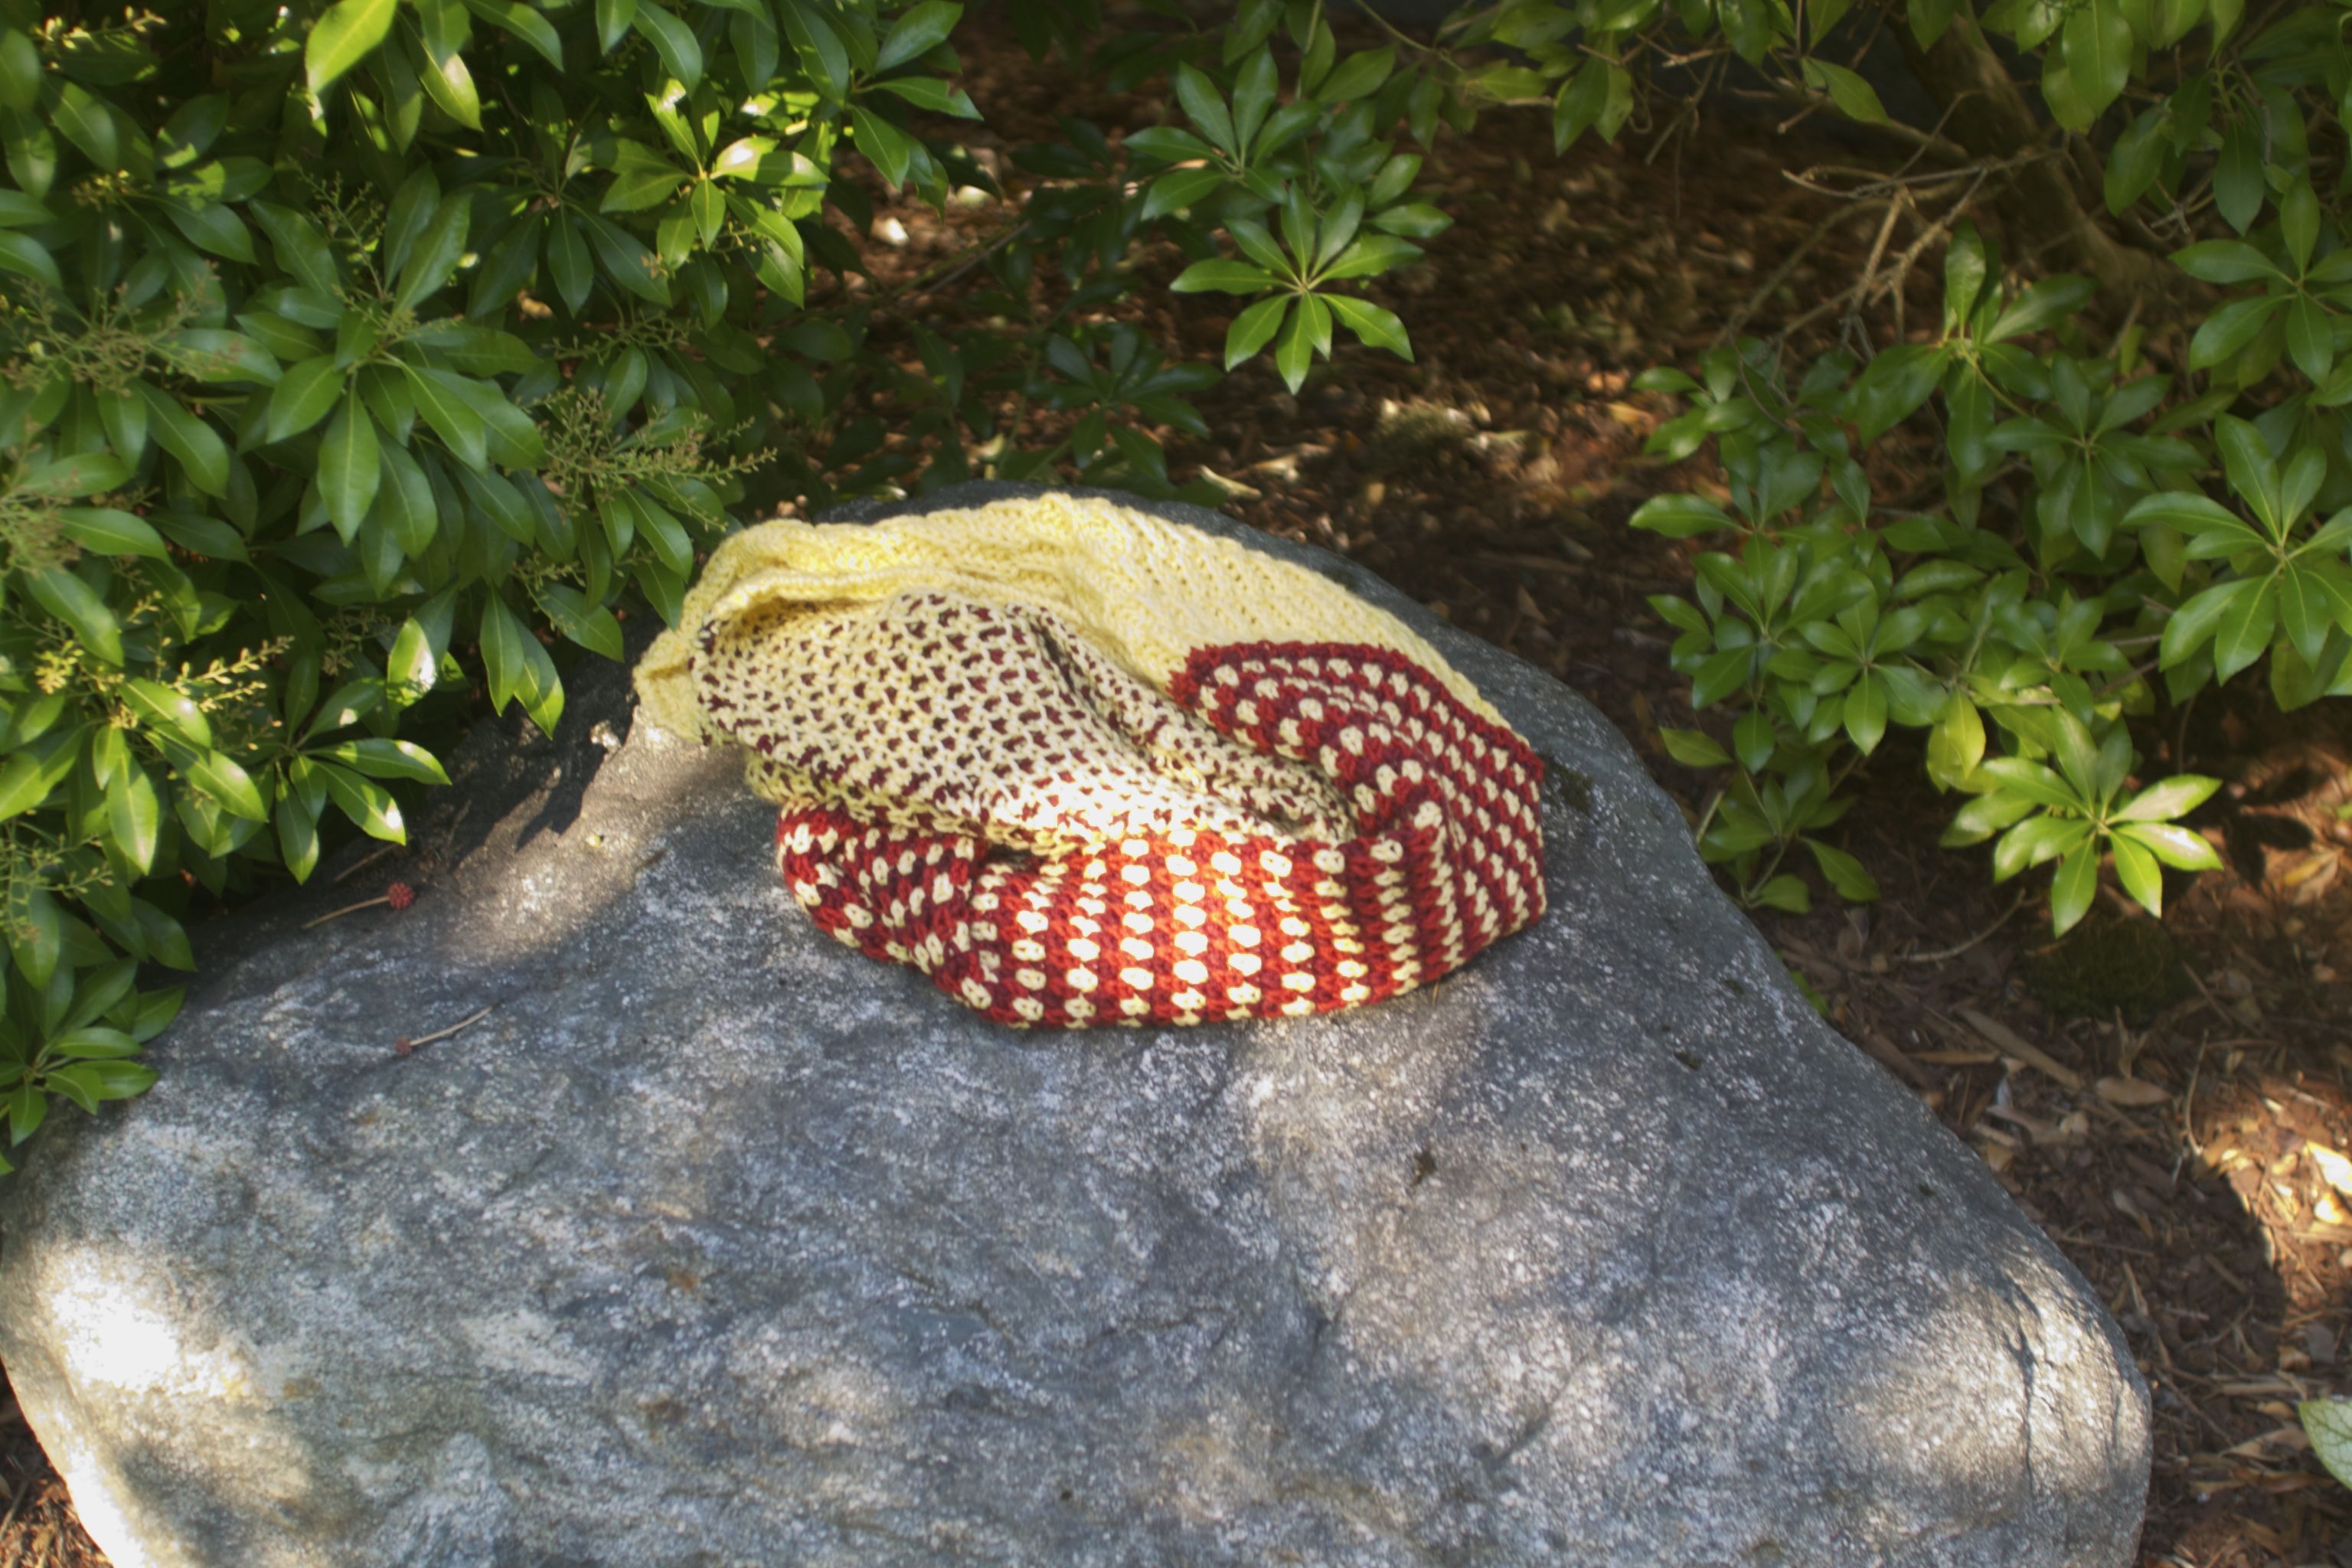
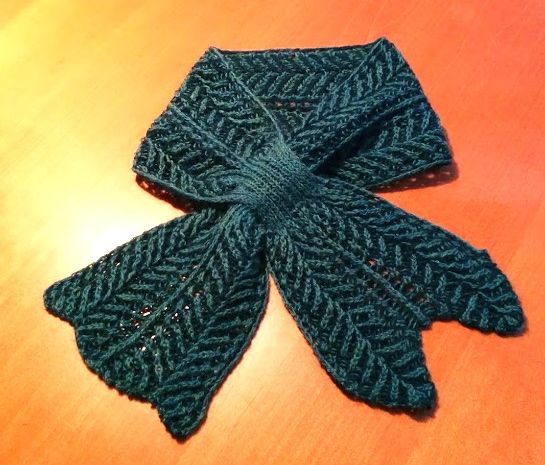
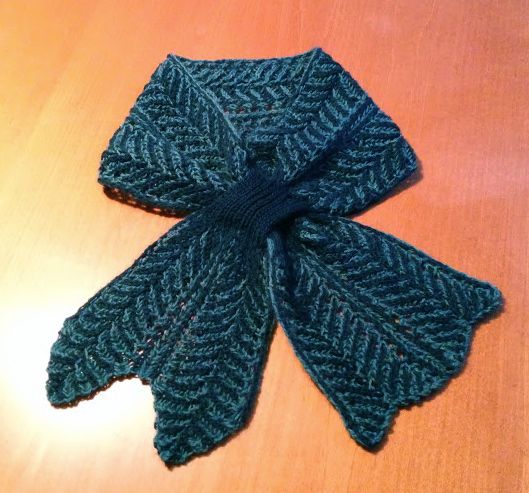
But wait!  There is more.  Beads are sold by weight and so what I thought was a reasonable quantity based on my prior experience buying glass seed beads turned out to be about 3+ times as many as I actually needed, and so in eyeballing the bind off options… I liked the bubbled version and figured I had enough beads I might as well bead my bubbled bind off.  Of course I forgot all about how long picot style bind offs actually take and so by the end of day one binding off I was rather far more ready to be done than actually done!  So without further ado… here’s some beauty shots of my version of Bubbles and Baubles which based on the color I called Pele’s Bauble.

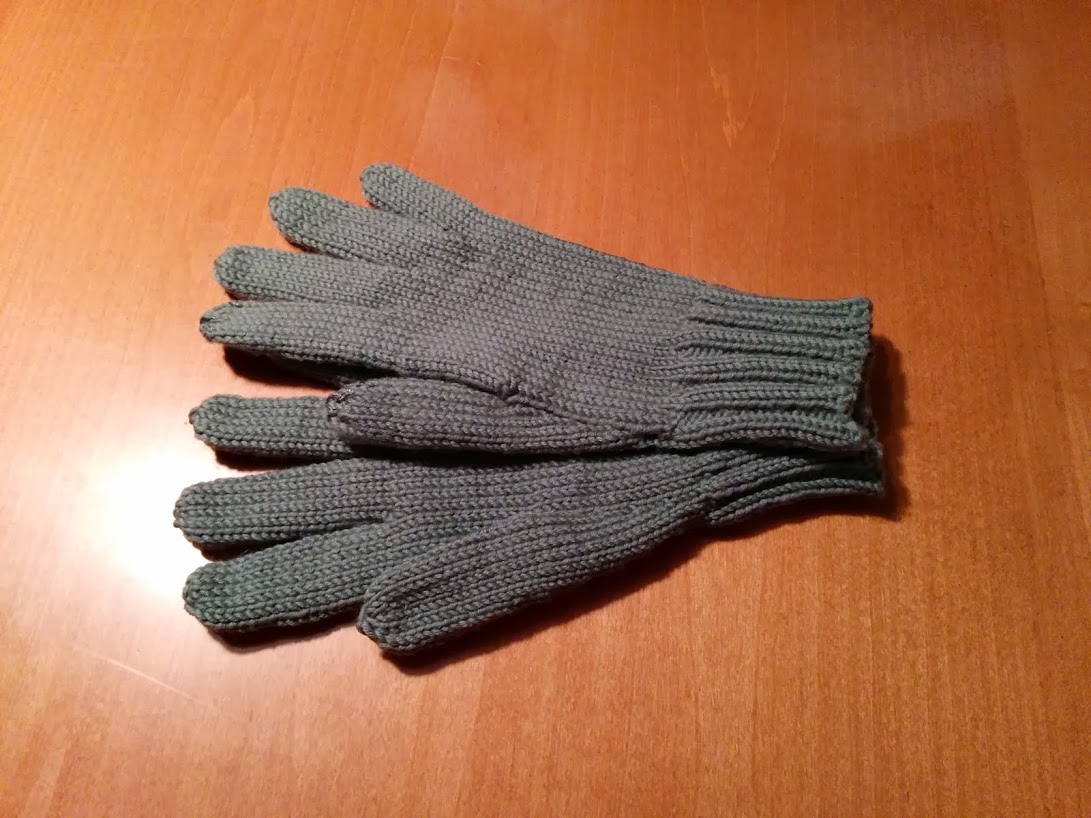
And yes.. I did say there were more socks.  Which is the round three from Sock Madness pair (yes I was out but I finished these before Round Four pattern showed up so its a win in my book) and my between rounds Günter from the Op-Art socks book. I’m now at pair 5 of the 19 patterns completed.

These Goldfishes are so Delicious!

Ok so yes.. I love the Goldfish crackers that inspired the title.  (Its my go-to snack for road trips.)  During the 2014 Shop Hop I picked up some adorable goldfish fabric which I then set out to decide how to use.  I came across this design that used some of the same fabric in combination with some small pieces and appliqué and it all snowballed from there. So today… I’m bringing out my Goldfish Bargello Quilt, fresh out of a run through the wash after I finished binding.

goldfishes front

Front Side

Back Side

Back Side

I’d never tried a Bargello, but a tutorial on the tube method looked simple enough to give it a whirl. I tried to get a wee bit creative with my quilting on this one, and let’s just leave it at… I still need some practice.  But it was a fun experiment all around and I think it turned out pretty darn cute.

Colorworkin’ it! (And some Berries to Dye for)

Ok so the KAL challenge this month was colorwork, and to make it more interesting it was a dueling KAL of a cowl or some fingerless mittens.  I couldn’t decide which project I wanted to commit to, so another member told me I was joining the mitts team.  (Sometimes its rather caring to be bossed around and out of your indecision.)

Well here’s the thing… I was born in a state where you get snow; as in build snow forts and snow men, make snow angels, and generally freeze yourself in the cold, but its all ok because there is cocoa.  The concept of an item of hand wear that doesn’t cover ones fingers just does not fit into my brain on a very logical level.  However, I do have a friend that has expressed an interest in such a silly (to me) item of clothing, AND even in the subject matter upon which the pattern was based (See: Agents of SHIELD, sub catagory: villians – Hydra) and so…

Right in your super-powered keester!

Right in your super-powered keester!

These are made using what is called stranded colorwork.  You carry the non-working color along in loops called floats on the wrong side of your work.

But…. in my fit of indecision and due to the size of the yarn in my stash… I decided to also tackle the cowl, because it had interesting looking stitches. the cowl is knit as one piece with three different stitch patterns, all of which use the knit into the stitch below technique.

Cowling on a rock

Cowling on a rock

There were some amazing color choices from the group, and a few people adapted their cowl stitches to work for hats and scarves.  I went with a color group that I’m hoping will match a pair of mittens I want to knit up for a holiday gift… we shall see.

And now onto the berries portion.  I considered making this a separate post, but I didn’t want to pester anyone who actually is being notified of updates with multiple notifications.

Around these here parts (the Pacific Northwest) we have wild plants called salal (Gaultheria shallon). And about this time of year, they grow dark berries, which I had heard in my quest to first identify the plant were edible.  So this year, surrounded by the myriad of berries, I decided to try them out.

Now, first disclaimer here… Salal berries are not true berries, but is actually from the sepal of the flower, and thus is considered an accessory fruit.  (apples, pears and pineapples are also considered accessory fruit) So what I discovered when I was boiling out the juice was that the berry remains were actually very much still a dark coloration, and still giving off an enormous amount of dark liquid.  So… in the spirit of “this main stain” as a yarn person and not as the laundry lady, I decided to see how it would come out in yarn.

First up, I tried it out on some plain white 100% cotton:

And then because it didn’t turn out like a car wreck… with wool:

So there is my first go at dying something… using the most free ingredients, hand picked from around the yard.  (Is Free Range Dye a thing?).  Not sure it is a vibrant enough dye job to make people jump for joy and throw money at it, but it was something to try and now I do have plans for at least some of this yarn already… so stay tuned!

And one more thing…. my giftee finished her Nyan Cowl, and made some amazing mods to the pattern!

Let the Games Begin!… and then End!

If you are a knitter with Olympic fever you may have heard of the Ravellenic Games.  If not, well then here’s the scoop.  During the Olympics, there is a group over on Ravelry, that encourages you to challenge yourself and knit during the time of the Olympics.  Apparently there may be pixel medals involved.  (You can see all the projects here.)

So in an effort to be a bit more involved in the social nature of crafting, I thought I’d take up the challenge.

I started out with another 2 color brioche project, because I wanted something in between my “epic Brioche project” and the simpleness of the Seattle Brioche Scarf.  I didn’t want a super big project though… so I picked one that took less than 200 yards and finally frogged the cut off tails of my Luscious Sweater.

The pattern is called Rodekool, which is Dutch for Red Cabbage

The pattern is Rodekool, which is Dutch for Red Cabbage

Challenges in this project included, increases and decreases in two color brioche, learning the Italian Cast On method, and maybe, though I can’t quite be certain I got it right.. the Italian bind off.

Based on the yarns original project, I call mine Luscious Cabbages

Based on the yarns origins, I call mine Luscious Cabbages

I actually still have yarn bits left, so I might try to work out a hat to go with this one at some point in the future.  Mostly though its the lighter Tidepool heather color.

The second challenge is right out of my list of ideas for 2014:  Gloves

Right hand thumb and Index  include Conductive thread additions for use with a smart phone or tablet.

Right hand thumb and Index include conductive thread additions for use with a smart phone or tablet.

I went for fairly simple pattern, because I already had some superwash wool in worsted left from my Debora Counterpane.  I didn’t find them too hard, but I know some knitters find the fingers to be rather fiddly bits they don’t enjoy.  Its such a widespread opinion, that out of the 718 entries in the Mittens and Gloves category, there are only 14 that are gloves with fingers!  Everything else is fingerless or mittens.

Part of the reason I took a break from the 2 color brioche was the keyhole scarf  was more challenging than I expected, it was a “2 swears” project.  Which overall is a bit unusual for me.  The whole reason I wanted to learn how to brioche in the first place was for the project I cast on next…..  a two color brioche leafy shawl.

This too, had a different style start, and different increases and decreases.  So I thought I should start with an oversized swatch to see how it went.

Size 10 needles and worsted aught to do it...

Size 10 needles and worsted ought to do it…

Now I wasn’t paying enough attention to how long I had to finish, so I didn’t technically get finished with my shawl in time to “qualify” for the games.  In actual fact, its still on my needles.  So I’m going to save the shawl for another post once its completed.  But I will leave you with a photo of the yarns I picked out.

Colorways are Paradise Valley and La Cantante in Mithril (laceweight) from The Verdant Gryphon.

Colorways are Paradise Valley and La Cantante in Mithril (laceweight) from The Verdant Gryphon.

PS – if you click that link in the last caption and find yourself falling in love with the yarn and want/need a referral code be sure to let me know either in the comments or via the email on my About me page!

Quilt 4: Endless Stairs Fiery Companion

A while back you may remember I bought a bunch of orange fabric and made some friends a Cracker Quilt.

Cracker Blocks arranged in a 4 color woven pattern.

The Cracker Quilt

Well because I am kind of new to the whole thing and worried about things like running out of fabric or butchering my fabric in some fit of miscutting… I overplan in the fabric department.  So for my fourth quilt I didn’t actually have to buy any new fabric at all!  I wanted something that would look like a companion piece to the cracker quilt… so I settled on a pattern called Endless Stairs.

And in the tradition of not spoiling the surprise I bring you… the Endless Fiery Stairs Quilt:

Front... with all the stairs!

Front… with all the stairs!

For the Back… I wanted to do something a bit different.  I have been admiring some of the newer quilt designs where the quilter pulls in the design elements or embellishes the backside in a complementary way.  I went with a framed chevron pattern.

Echoing the front but done with angles instead of rectangles

Echoing the front but done with angles instead of rectangles

I am a believer in trying new things.  They won’t always be a success… but not every failing is a failure.  For the back piece… I pieced my orange and blue middle stripe first and then realized I hadn’t sewn in the blue triangles between the points.   WHOOPS!  I did actually manage to pull off piecing those triangles in there.. but it was a lesson in not getting too focused in and to take your time making sure you’ve seen the whole bigger picture.

Here's an extra detail shot, especially since Ben got the new cards for the nice camera!

Here’s an extra detail shot, especially since Ben got the new cards for the nice camera!

And btw… I still have quite a bit of orange left!

The dark orange is actually a combination of 3 different fabrics.

The dark orange is actually a combination of 3 different fabrics.

Quilt Three: A Fiery Cracker

So awhile back my local quilt shop closed, and it was such a sad day for me.  The owner, Mary, was one of those generous and kind founts of knowledge who seemed to be excited about your project and offered truly helpful tips and ideas to complete it.   So I went to visit her during her closing sale and lament her loss and wish her well.  And while I was there I did purchase a couple things, including a fine selection of orange fabrics, because I have a friend and I just knew she liked Orange.  That was July 16th.

Selected fabrics. The blue was bought separately. And my favorite out of them all was the orange with gold swirls… that’s the one I picked out first.

Now I did ask her what her husband’s favorite color was, and was told that it was blue, so that would work out well for me.. a nice complimentary color even if I didn’t go the same shade as his absolute favorite.  And so a few days later, while we were out seeing The Dark Knight Rises in IMAX on the week it opened (July 21st to be exact) the conversation came up again… and she says to us “Orange isn’t really my favorite color”  O.O!!!

But since she has misled me all this time and she does actually like orange and somewhat collect things with orange, and because I’d already bought the fabric… she’s getting an orange quilt!  And just to give her a bit of a giggle…. I immortalized that very quote on her quilt tag!

So I finally finished that quilt yesterday.  And by finished that means I don’t actually have a 100% done photo, because as I was heading upstairs to get the quilt tag after stitching down the binding while watching X-Files… Ben announced to me that he had invited us and our friends to go out to dinner.  So here’s the closest to done I have from that morning with the binding all pinned down and ready for sewn down:

Cracker Blocks arranged in a 4 color woven pattern.

The design is called a cracker quilt.  I found several people that think that this is the eating cracker related, but from what I’ve read and the design elements I believe its more a Gift Cracker related.  Where the cracker design you see is a combination of the two long colored bars capped by their matching triangles in the first square and continues into the same colored triangles of the next square forming the gift cracker shape.

For my quilting, I did stitch in the ditch outlining the diamond shape of each orange square, and the inner blue rectangles, and then I did a couple variations of echo quilting on my blue squares:

A bit of a detail photo

I learned many new things while making this one… things like when you are making points, you should stitch your seam just behind the prior stitches and not through those stitches to get the best results.  And my two dark oranges… don’t photo and look so disparate as I thought they would.    For those of you that like such things… here’s a link to the gallery of in progress photos.