Getting Ripped

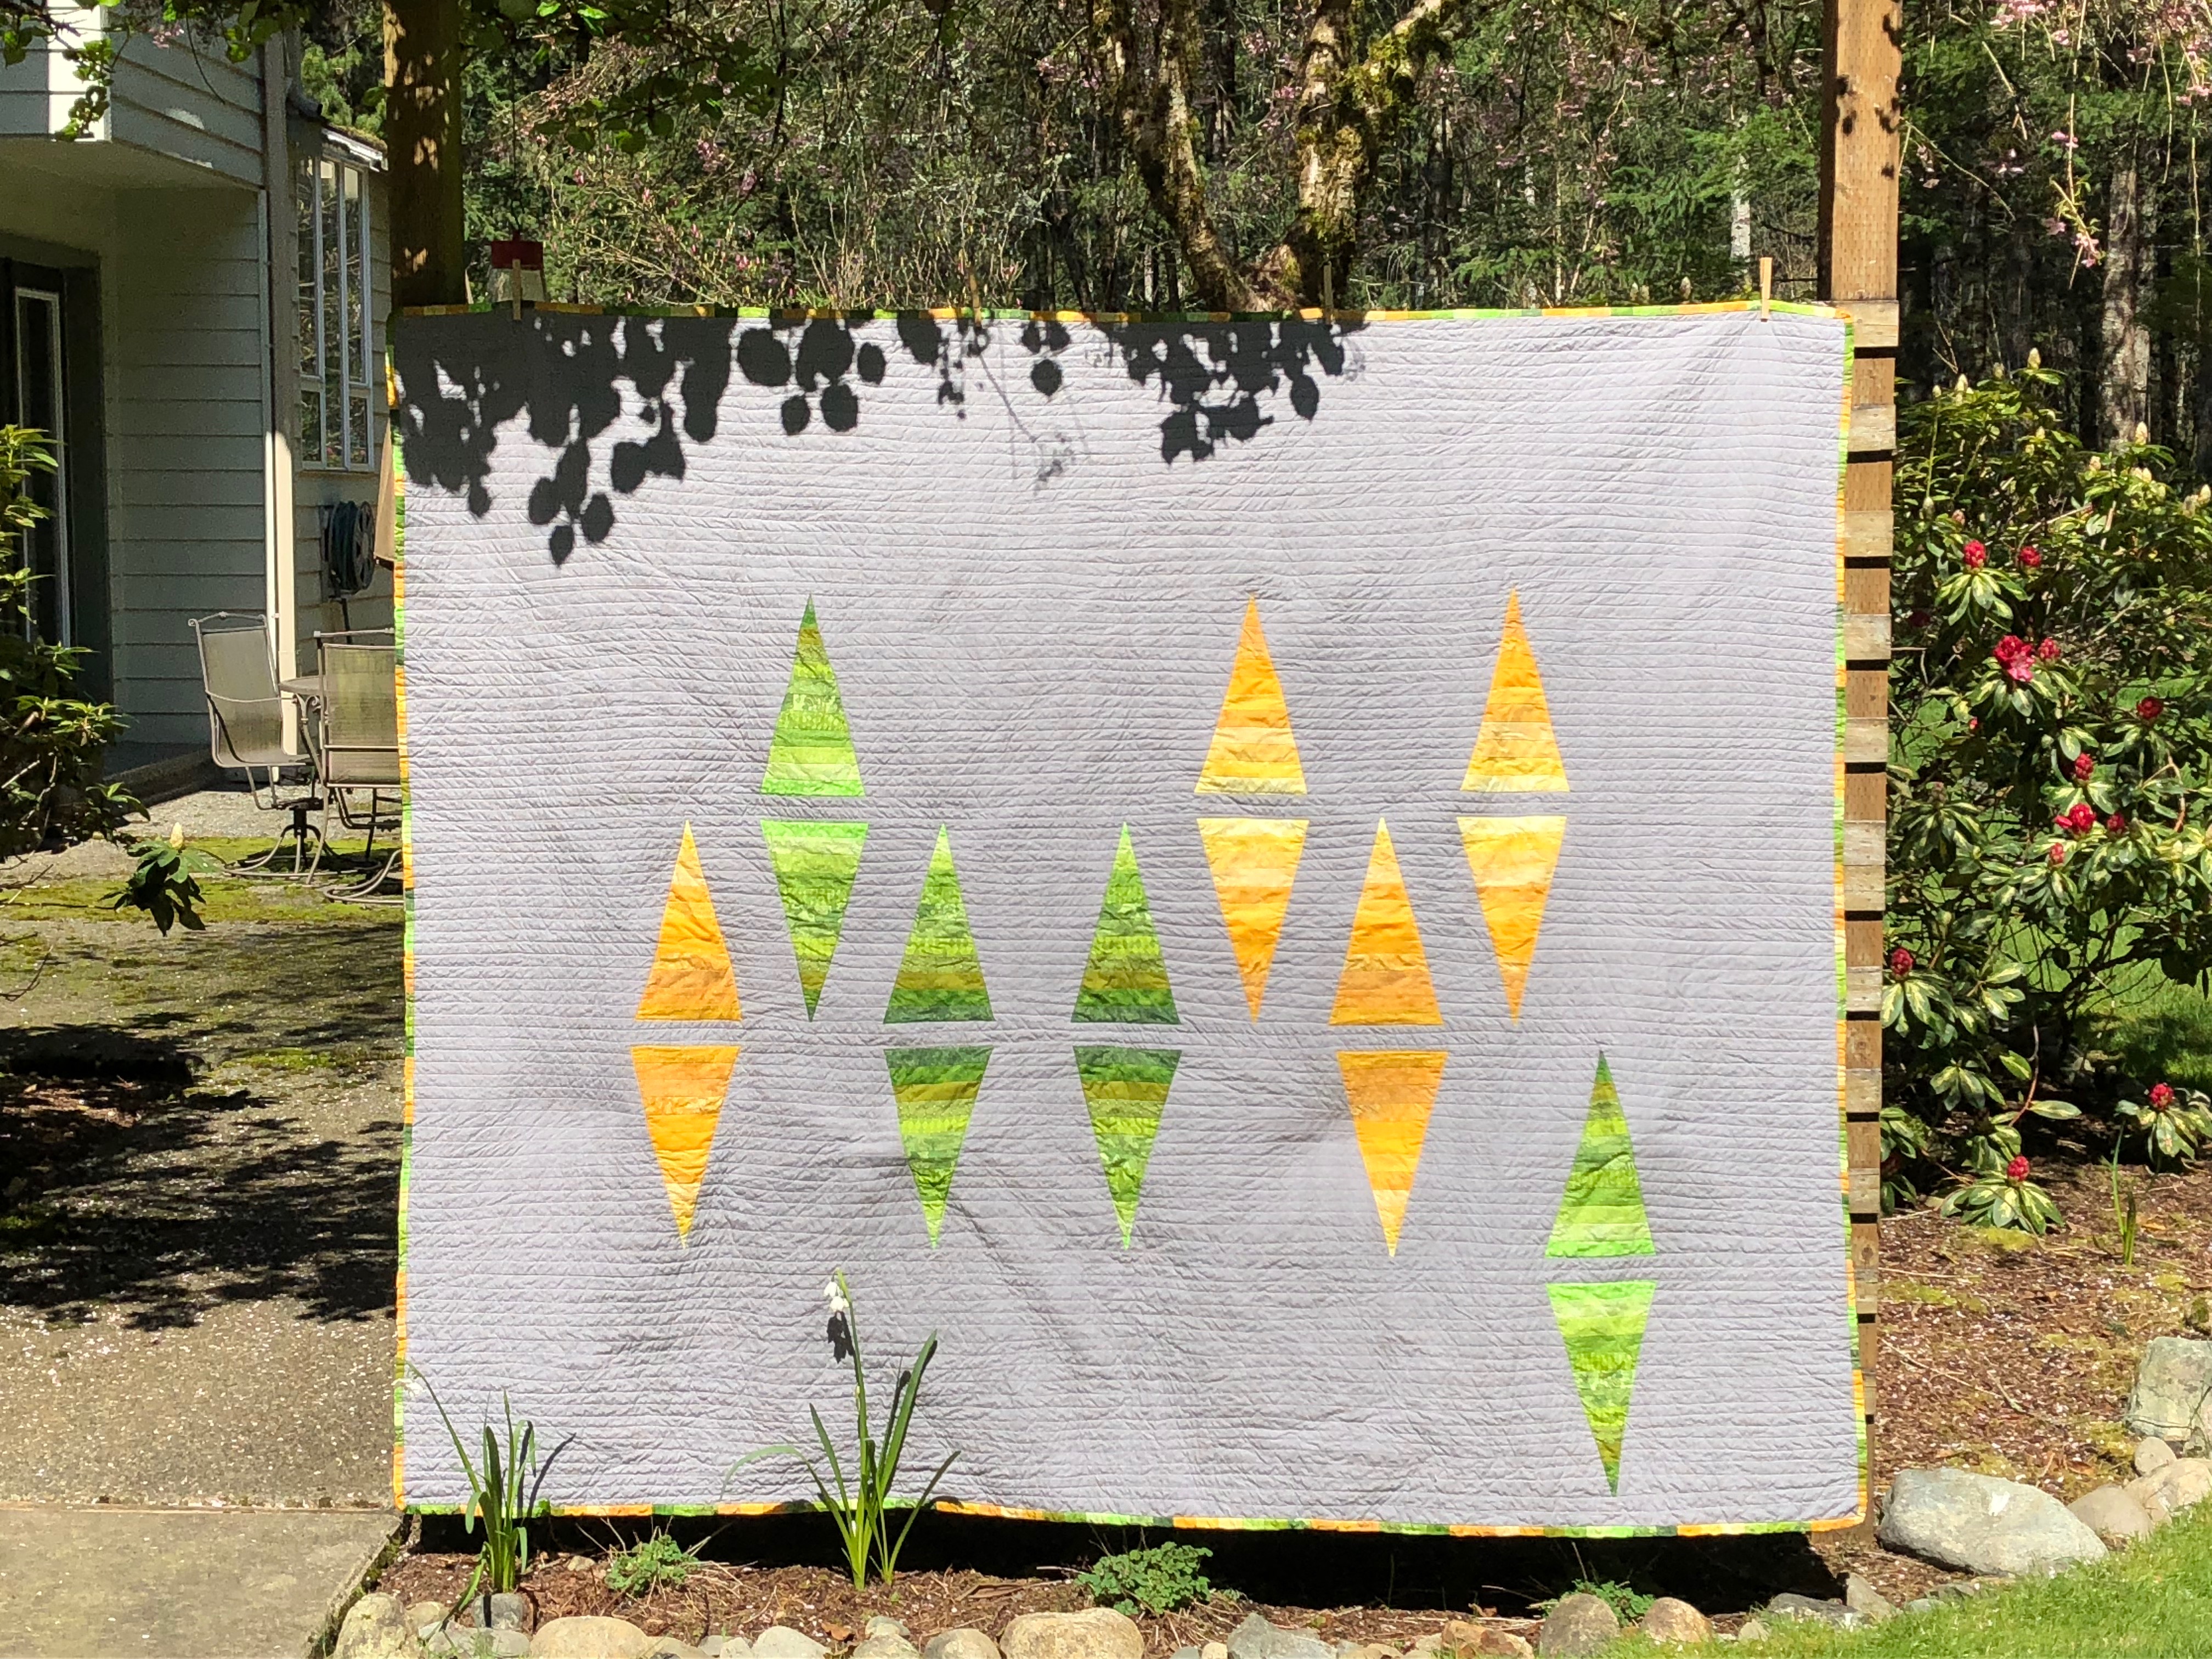
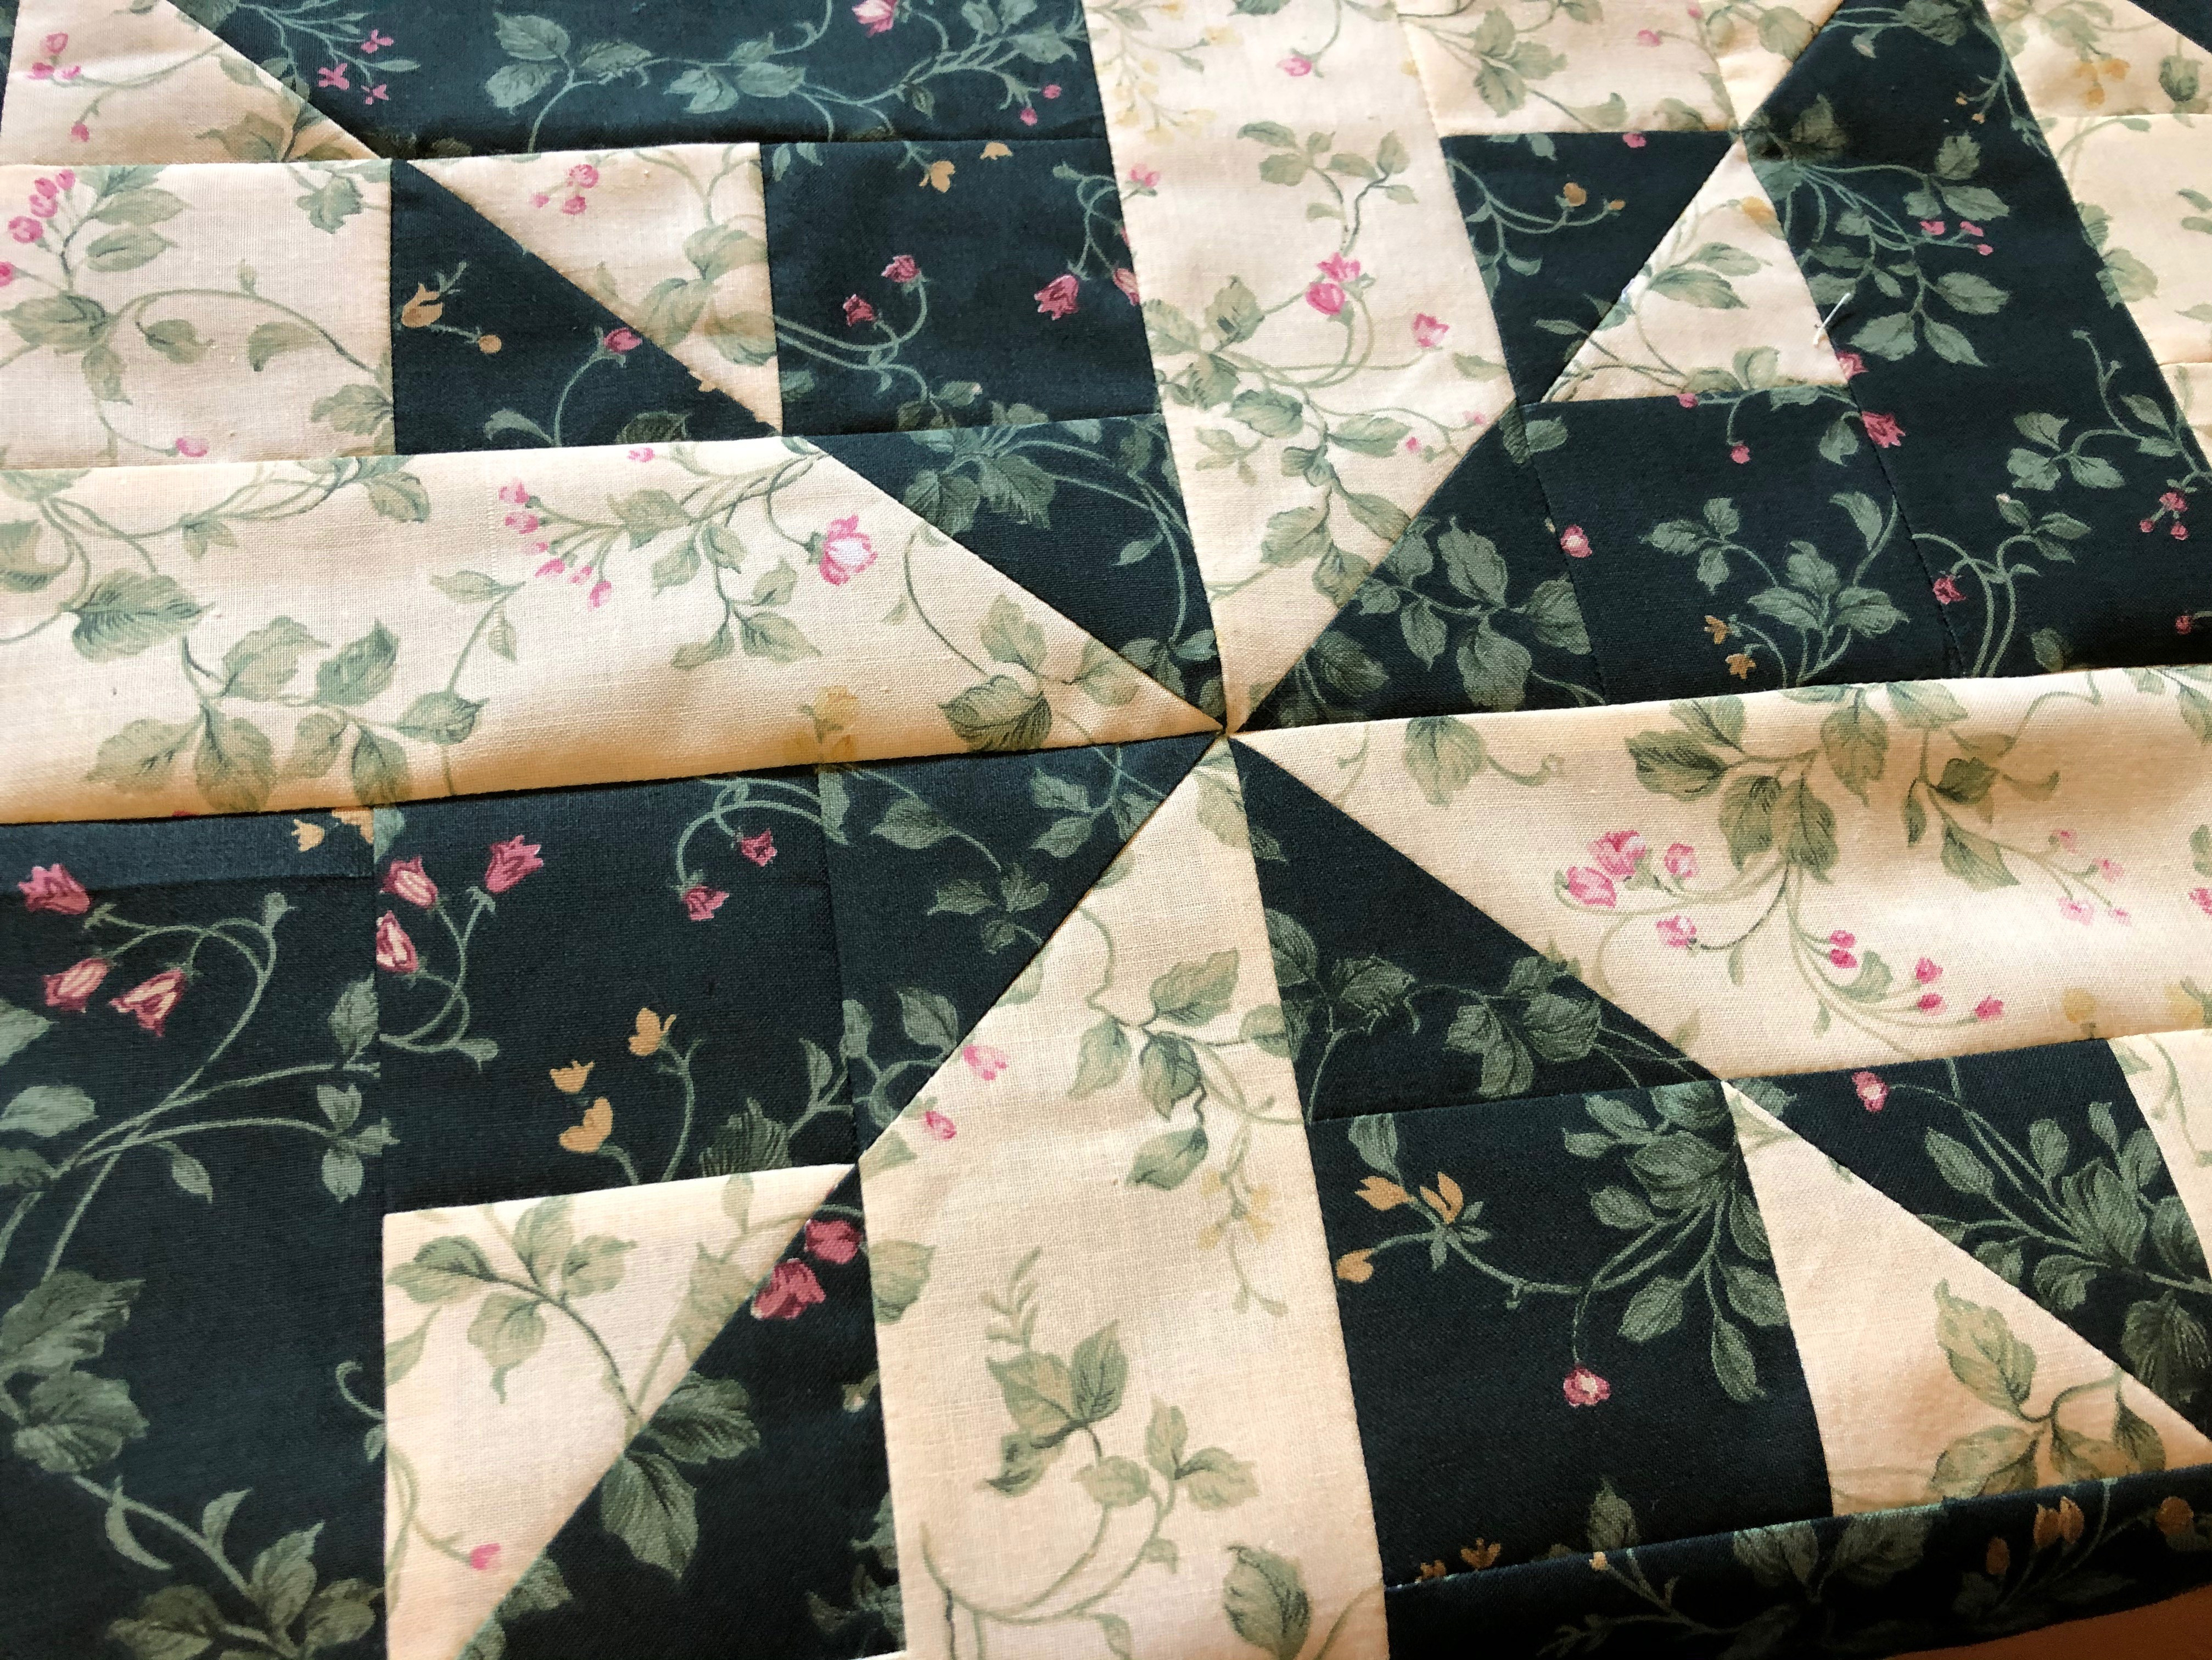
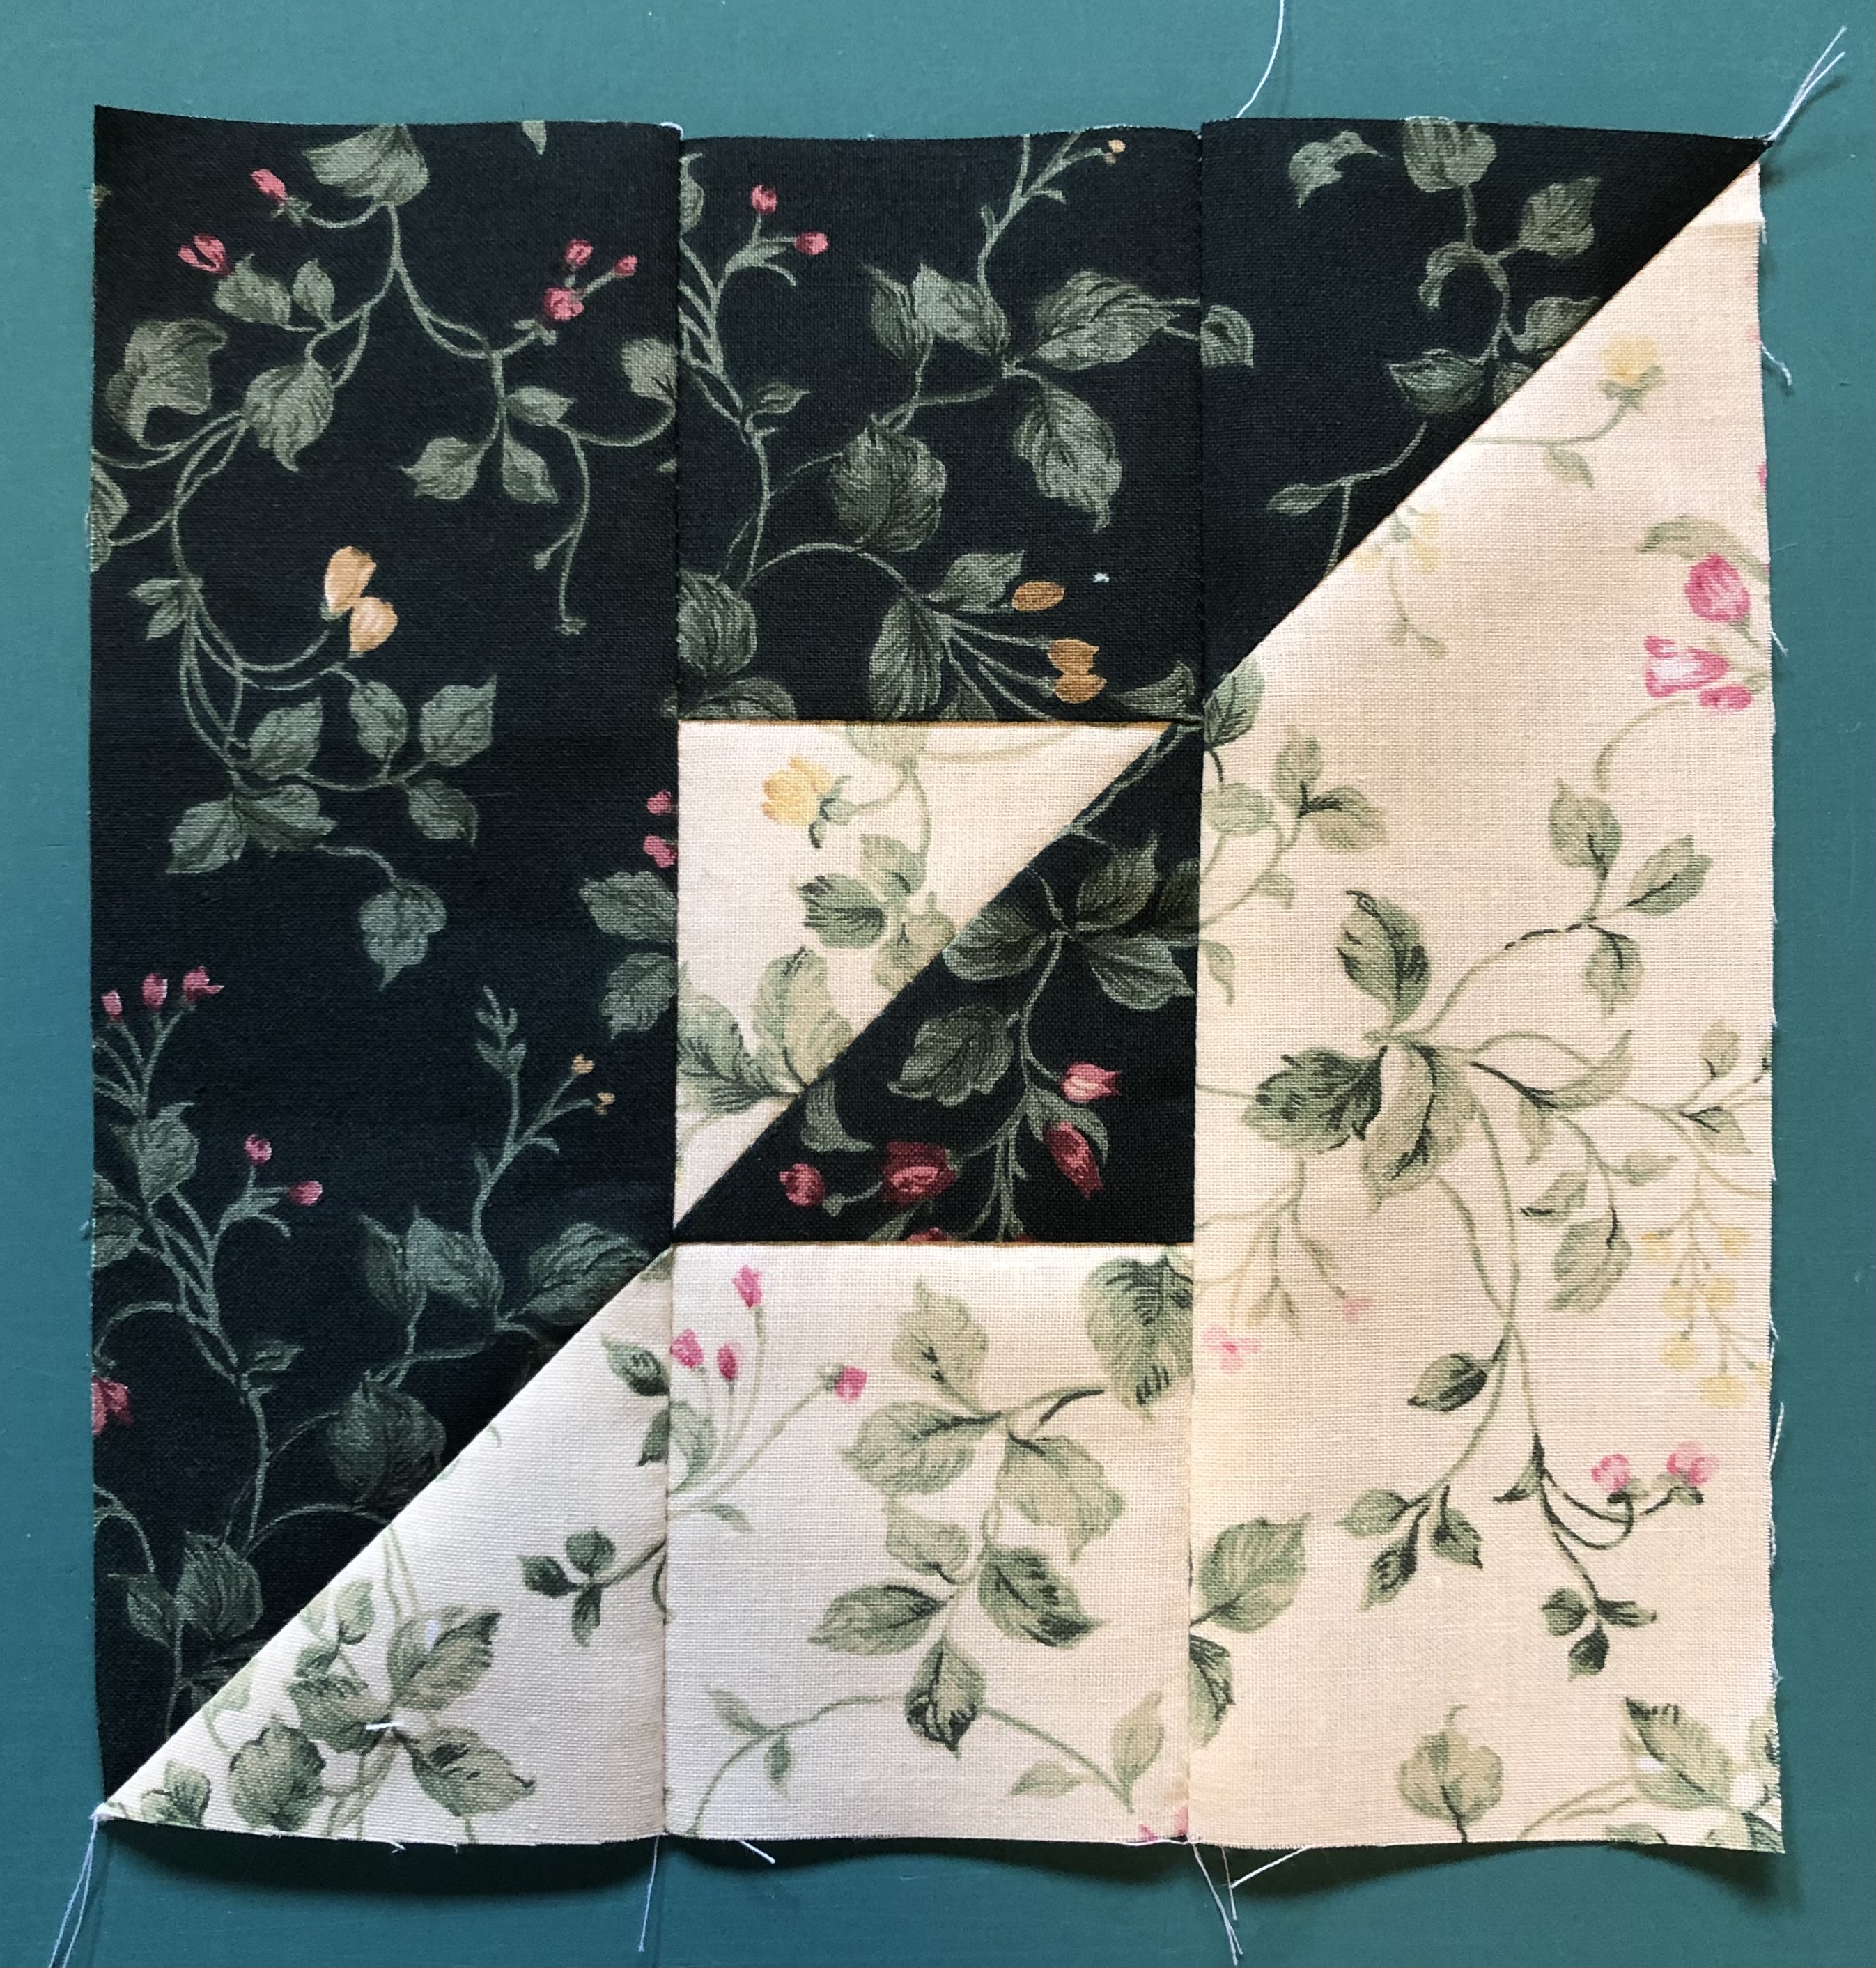
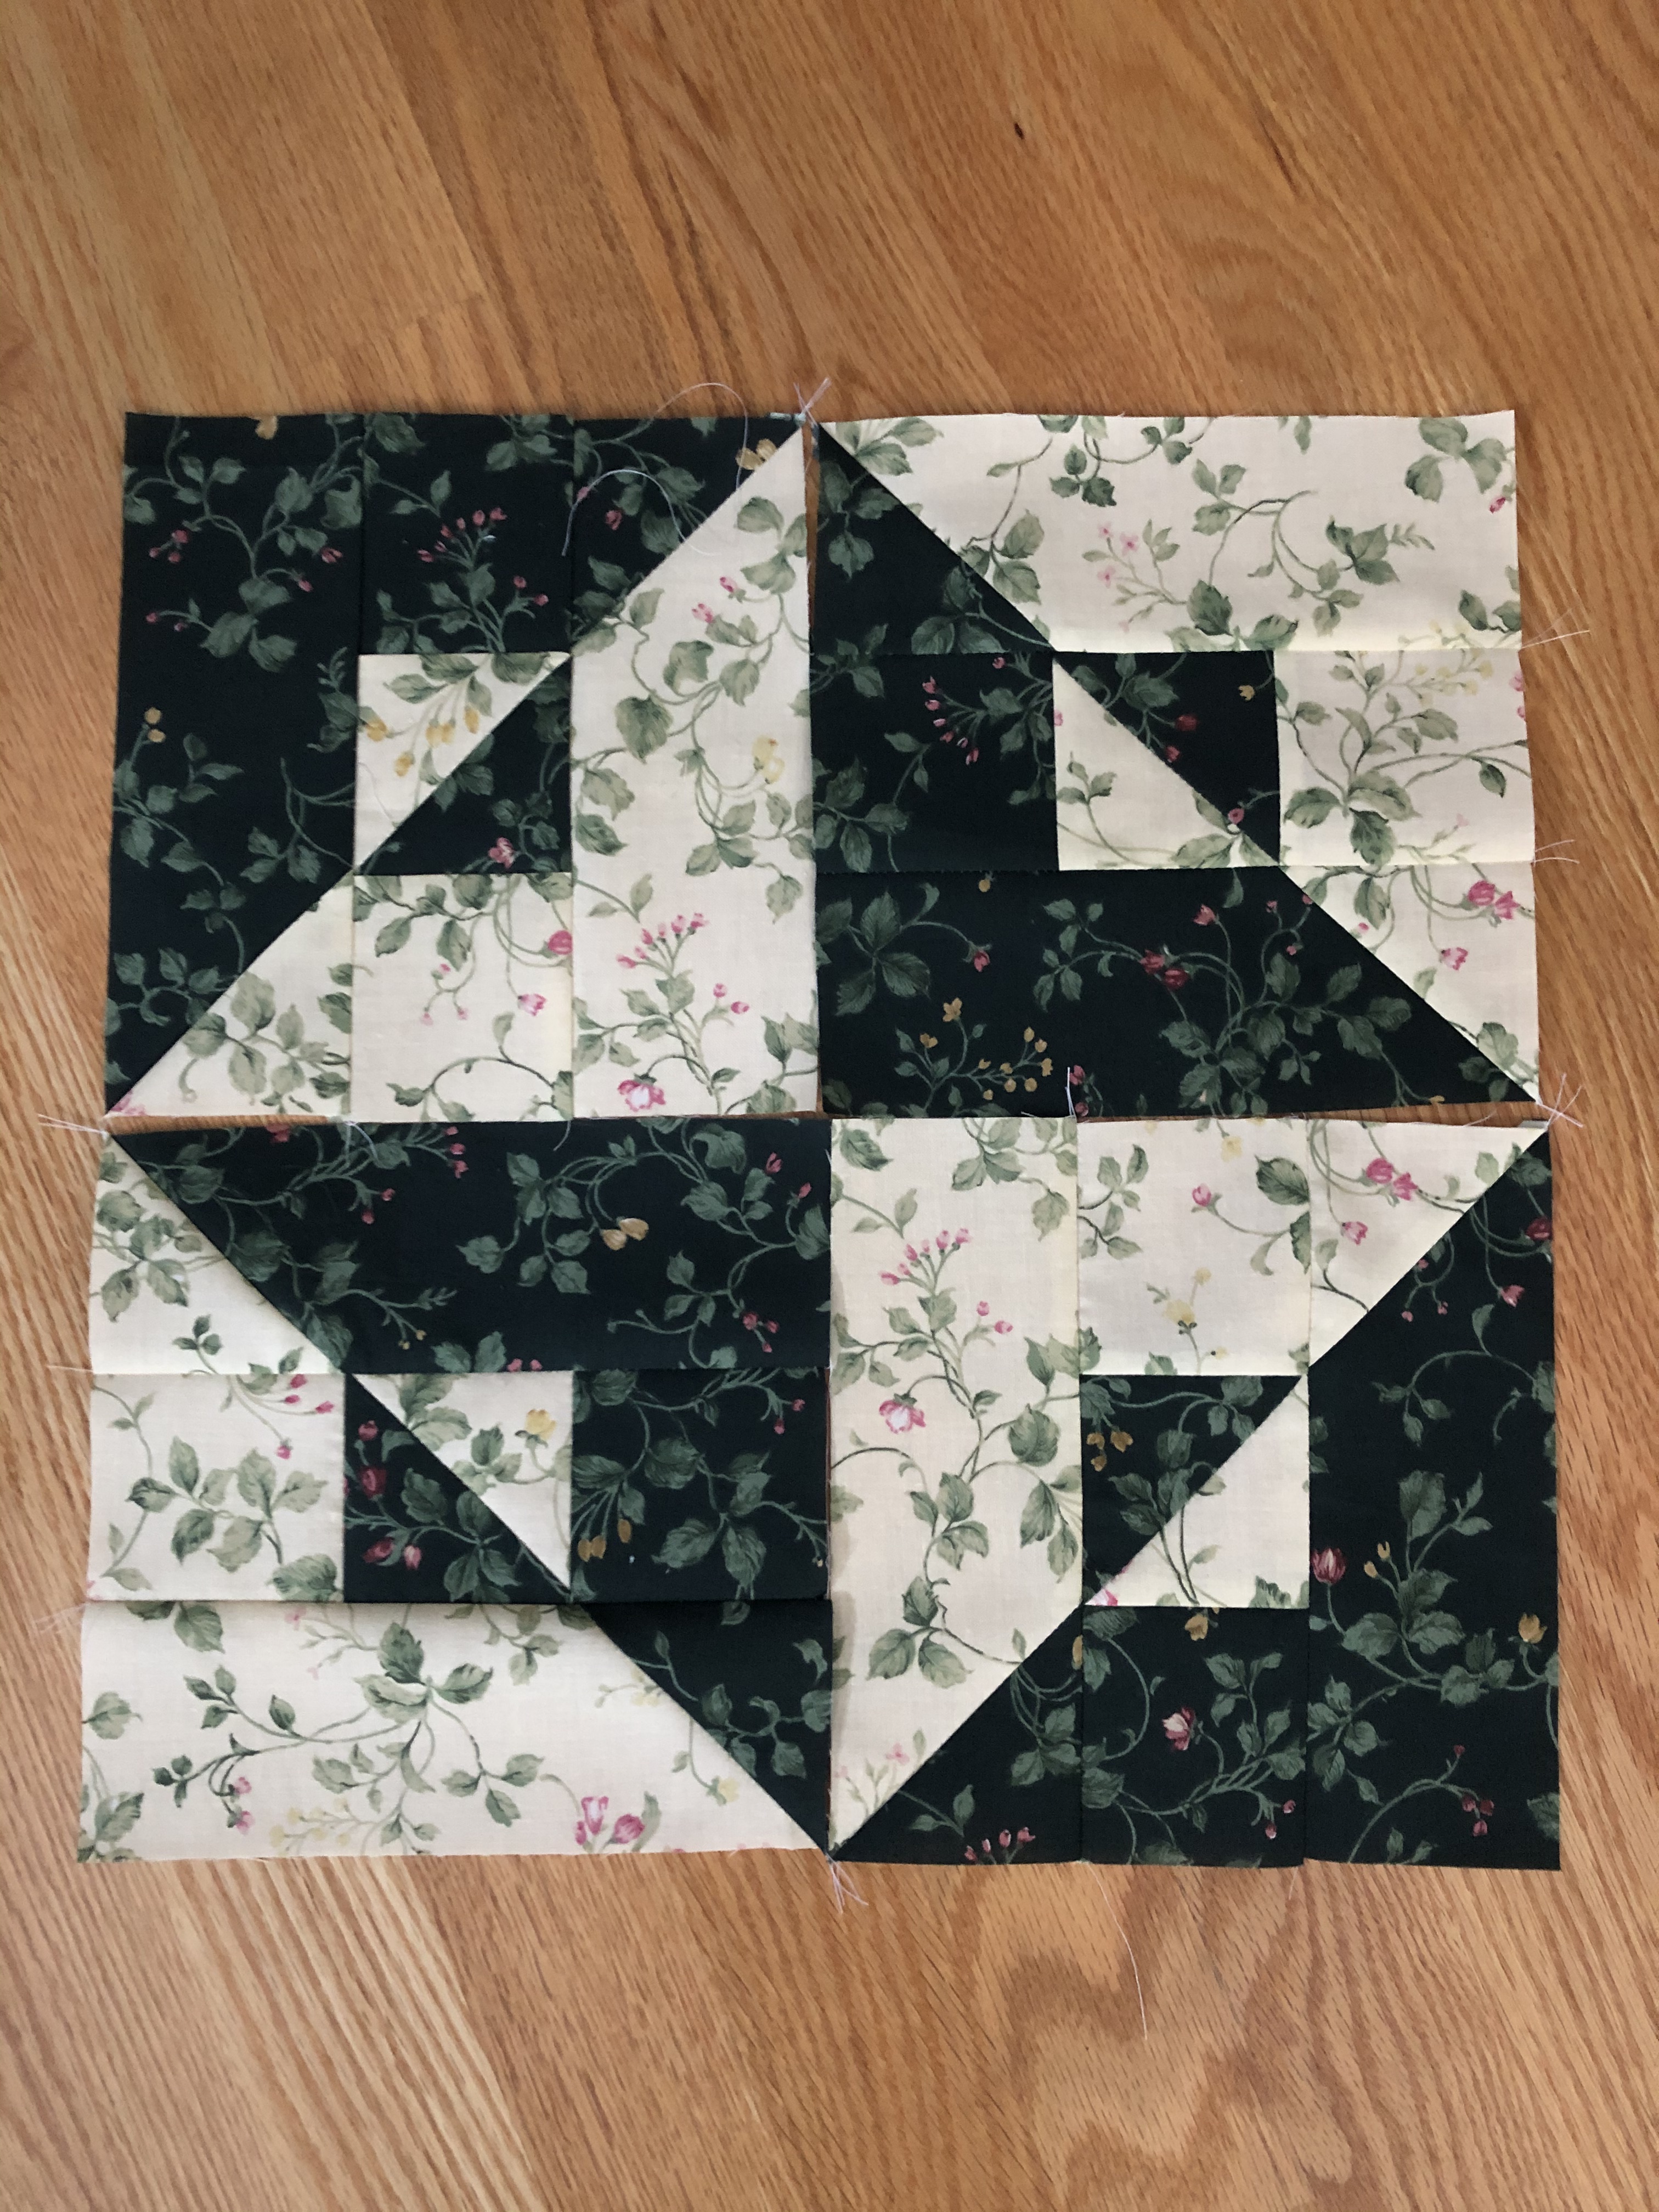
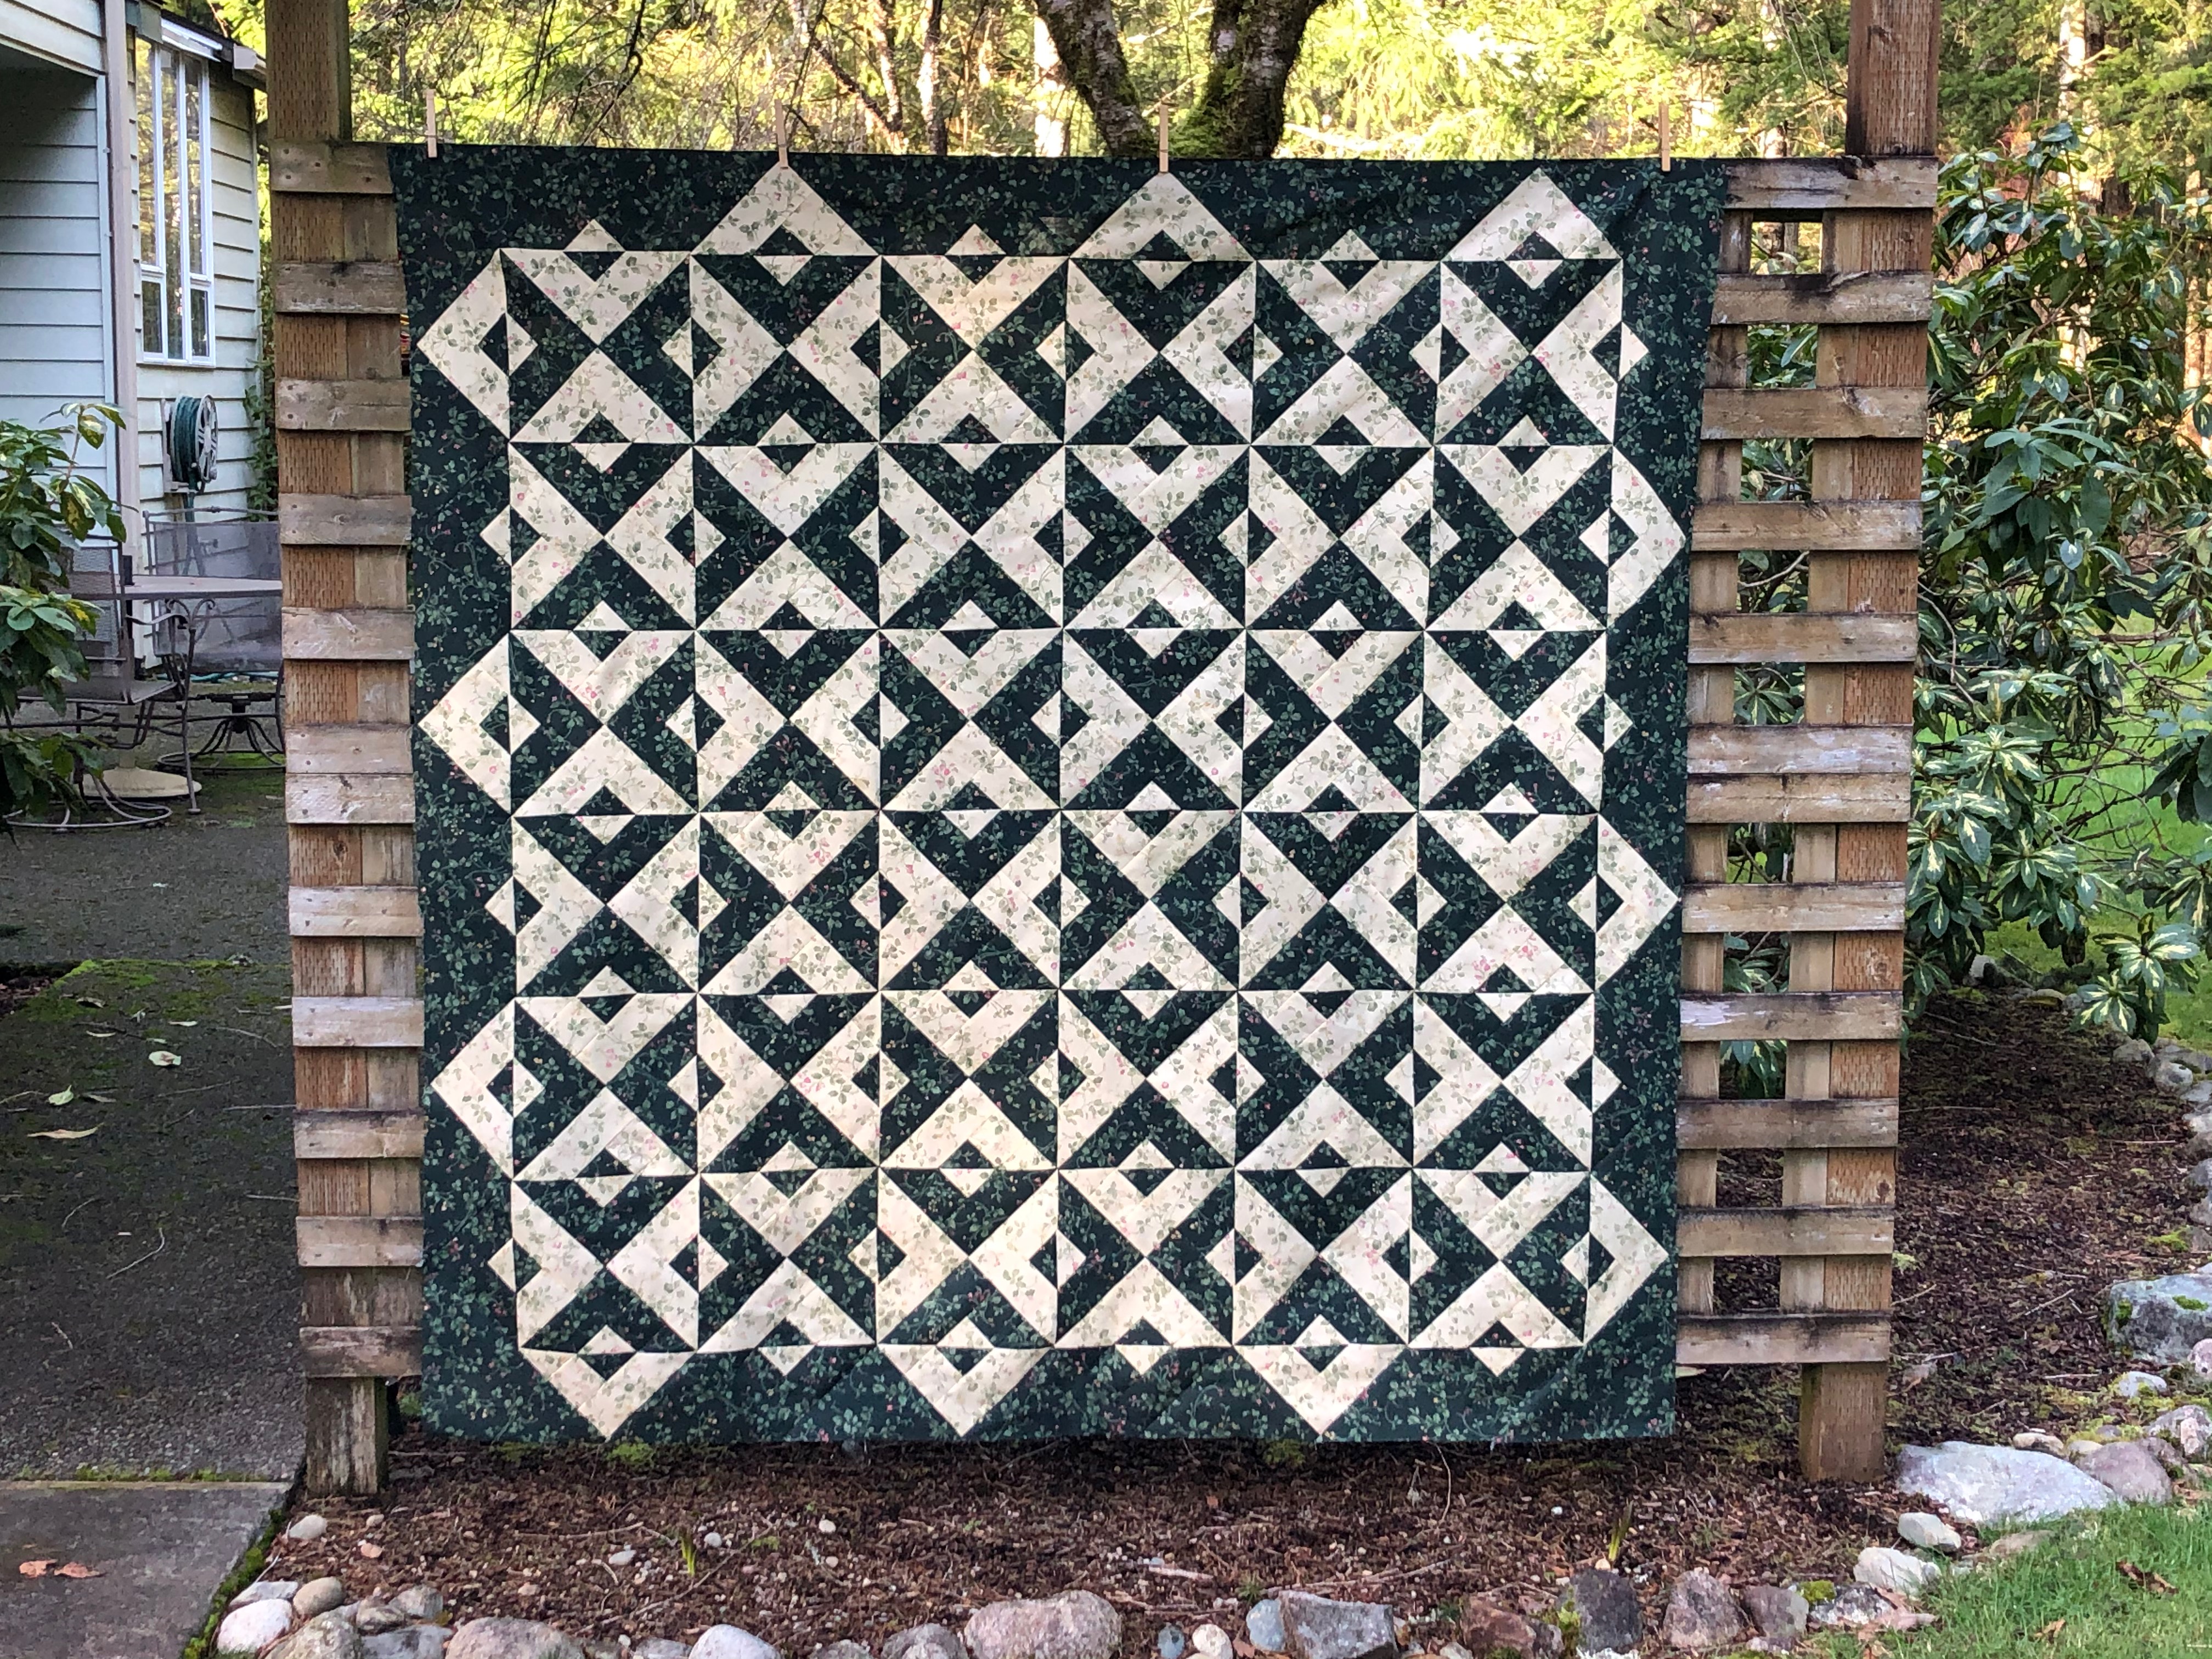
That’s right this post is all about bulking out and… oh no, its about having to fix mistakes, which in sewing involves the seam ripper and I had some ripping adventures on this latest project! You may recall the yellow and green fabric from a post back in January where I finally decided what it was going to become. I picked a pattern called Ruby Reflections in a post holiday sale and while I didn’t have quite enough to do a full pattern, I was able to scale it down one step with what fabric I had (plus a wee bit to supplement the yellow that I was lucky enough to find on ebay) leaving me with what should be enough of the green for the binding so all I need for this one is some backing! But along the way I had one row where I apparently turned the blocks 90 degrees and that one row I seamed together the wrong side so there was plenty of seams to pull apart and redo, but some of the corners seamed together into some practically perfect points.

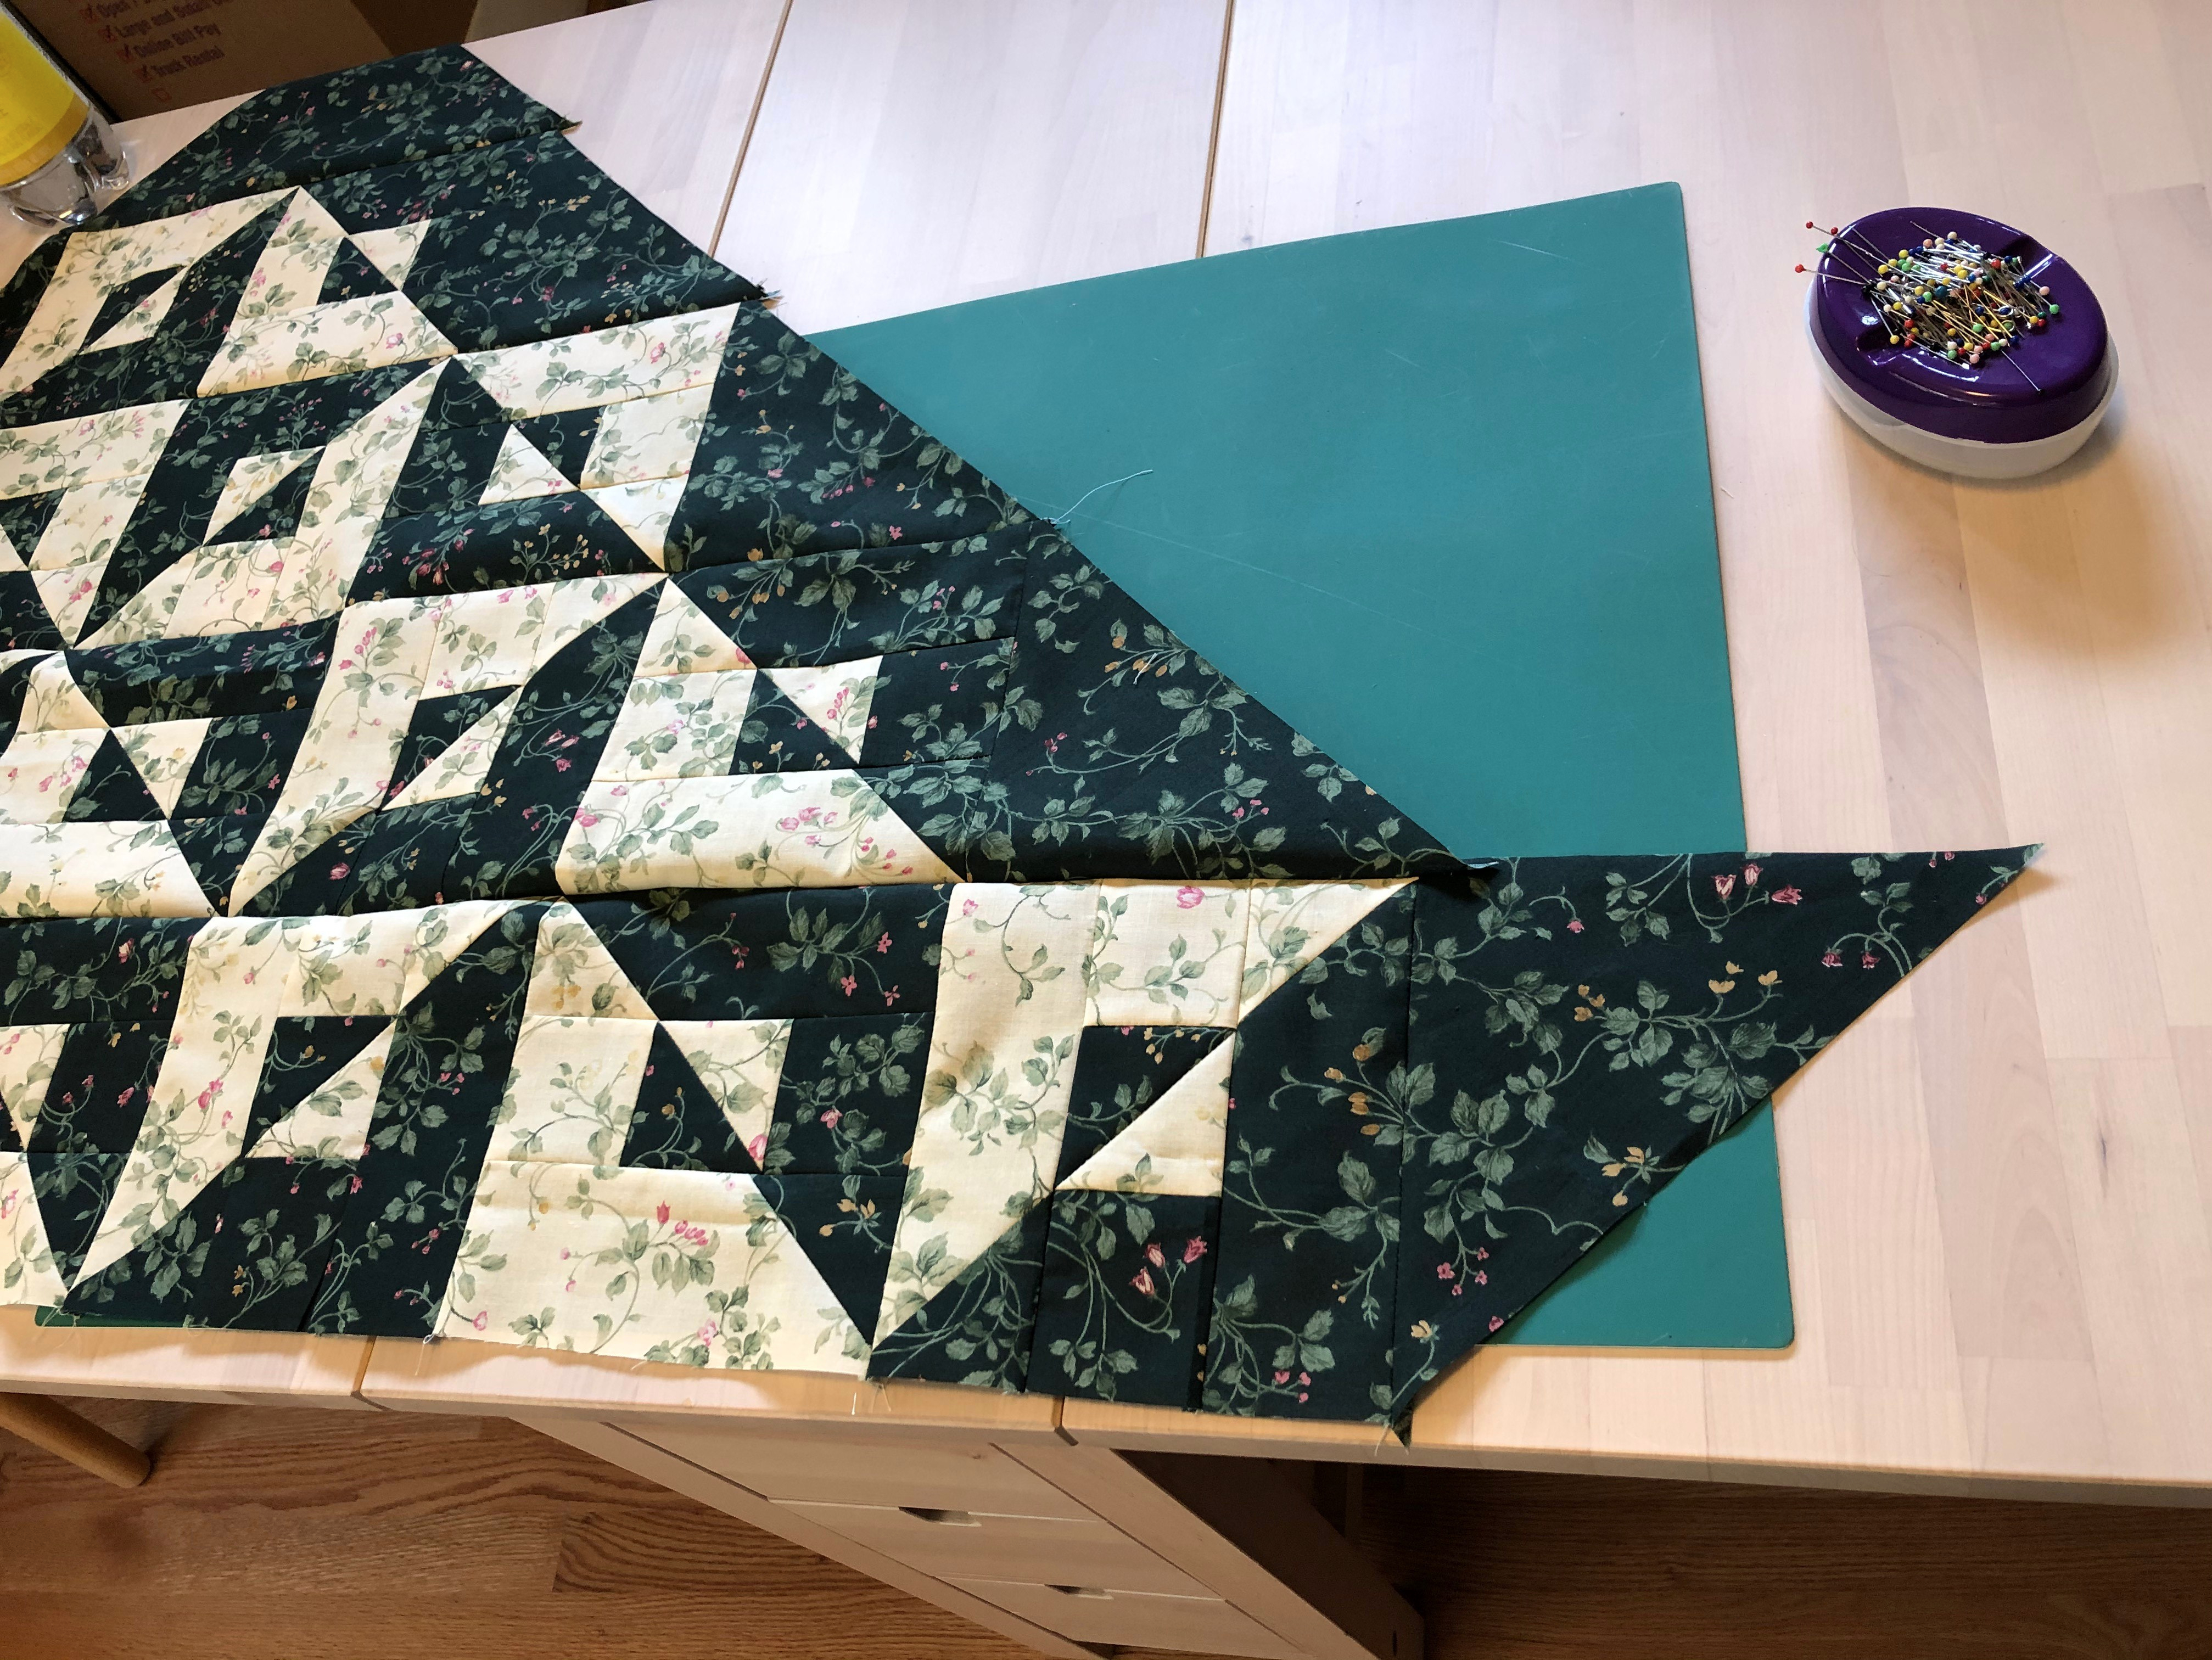
I’ve discovered that just about the time I’m starting to get that confidence and mental motion of “I’m totally nailing this! I am going to finish this up so fast and nicely!” then here comes reality with a humility check roll. But my determination stat is pretty high so… I’ve finished this quilt top! All 84 blocks in one month and coming out at approximately 67 inches square.

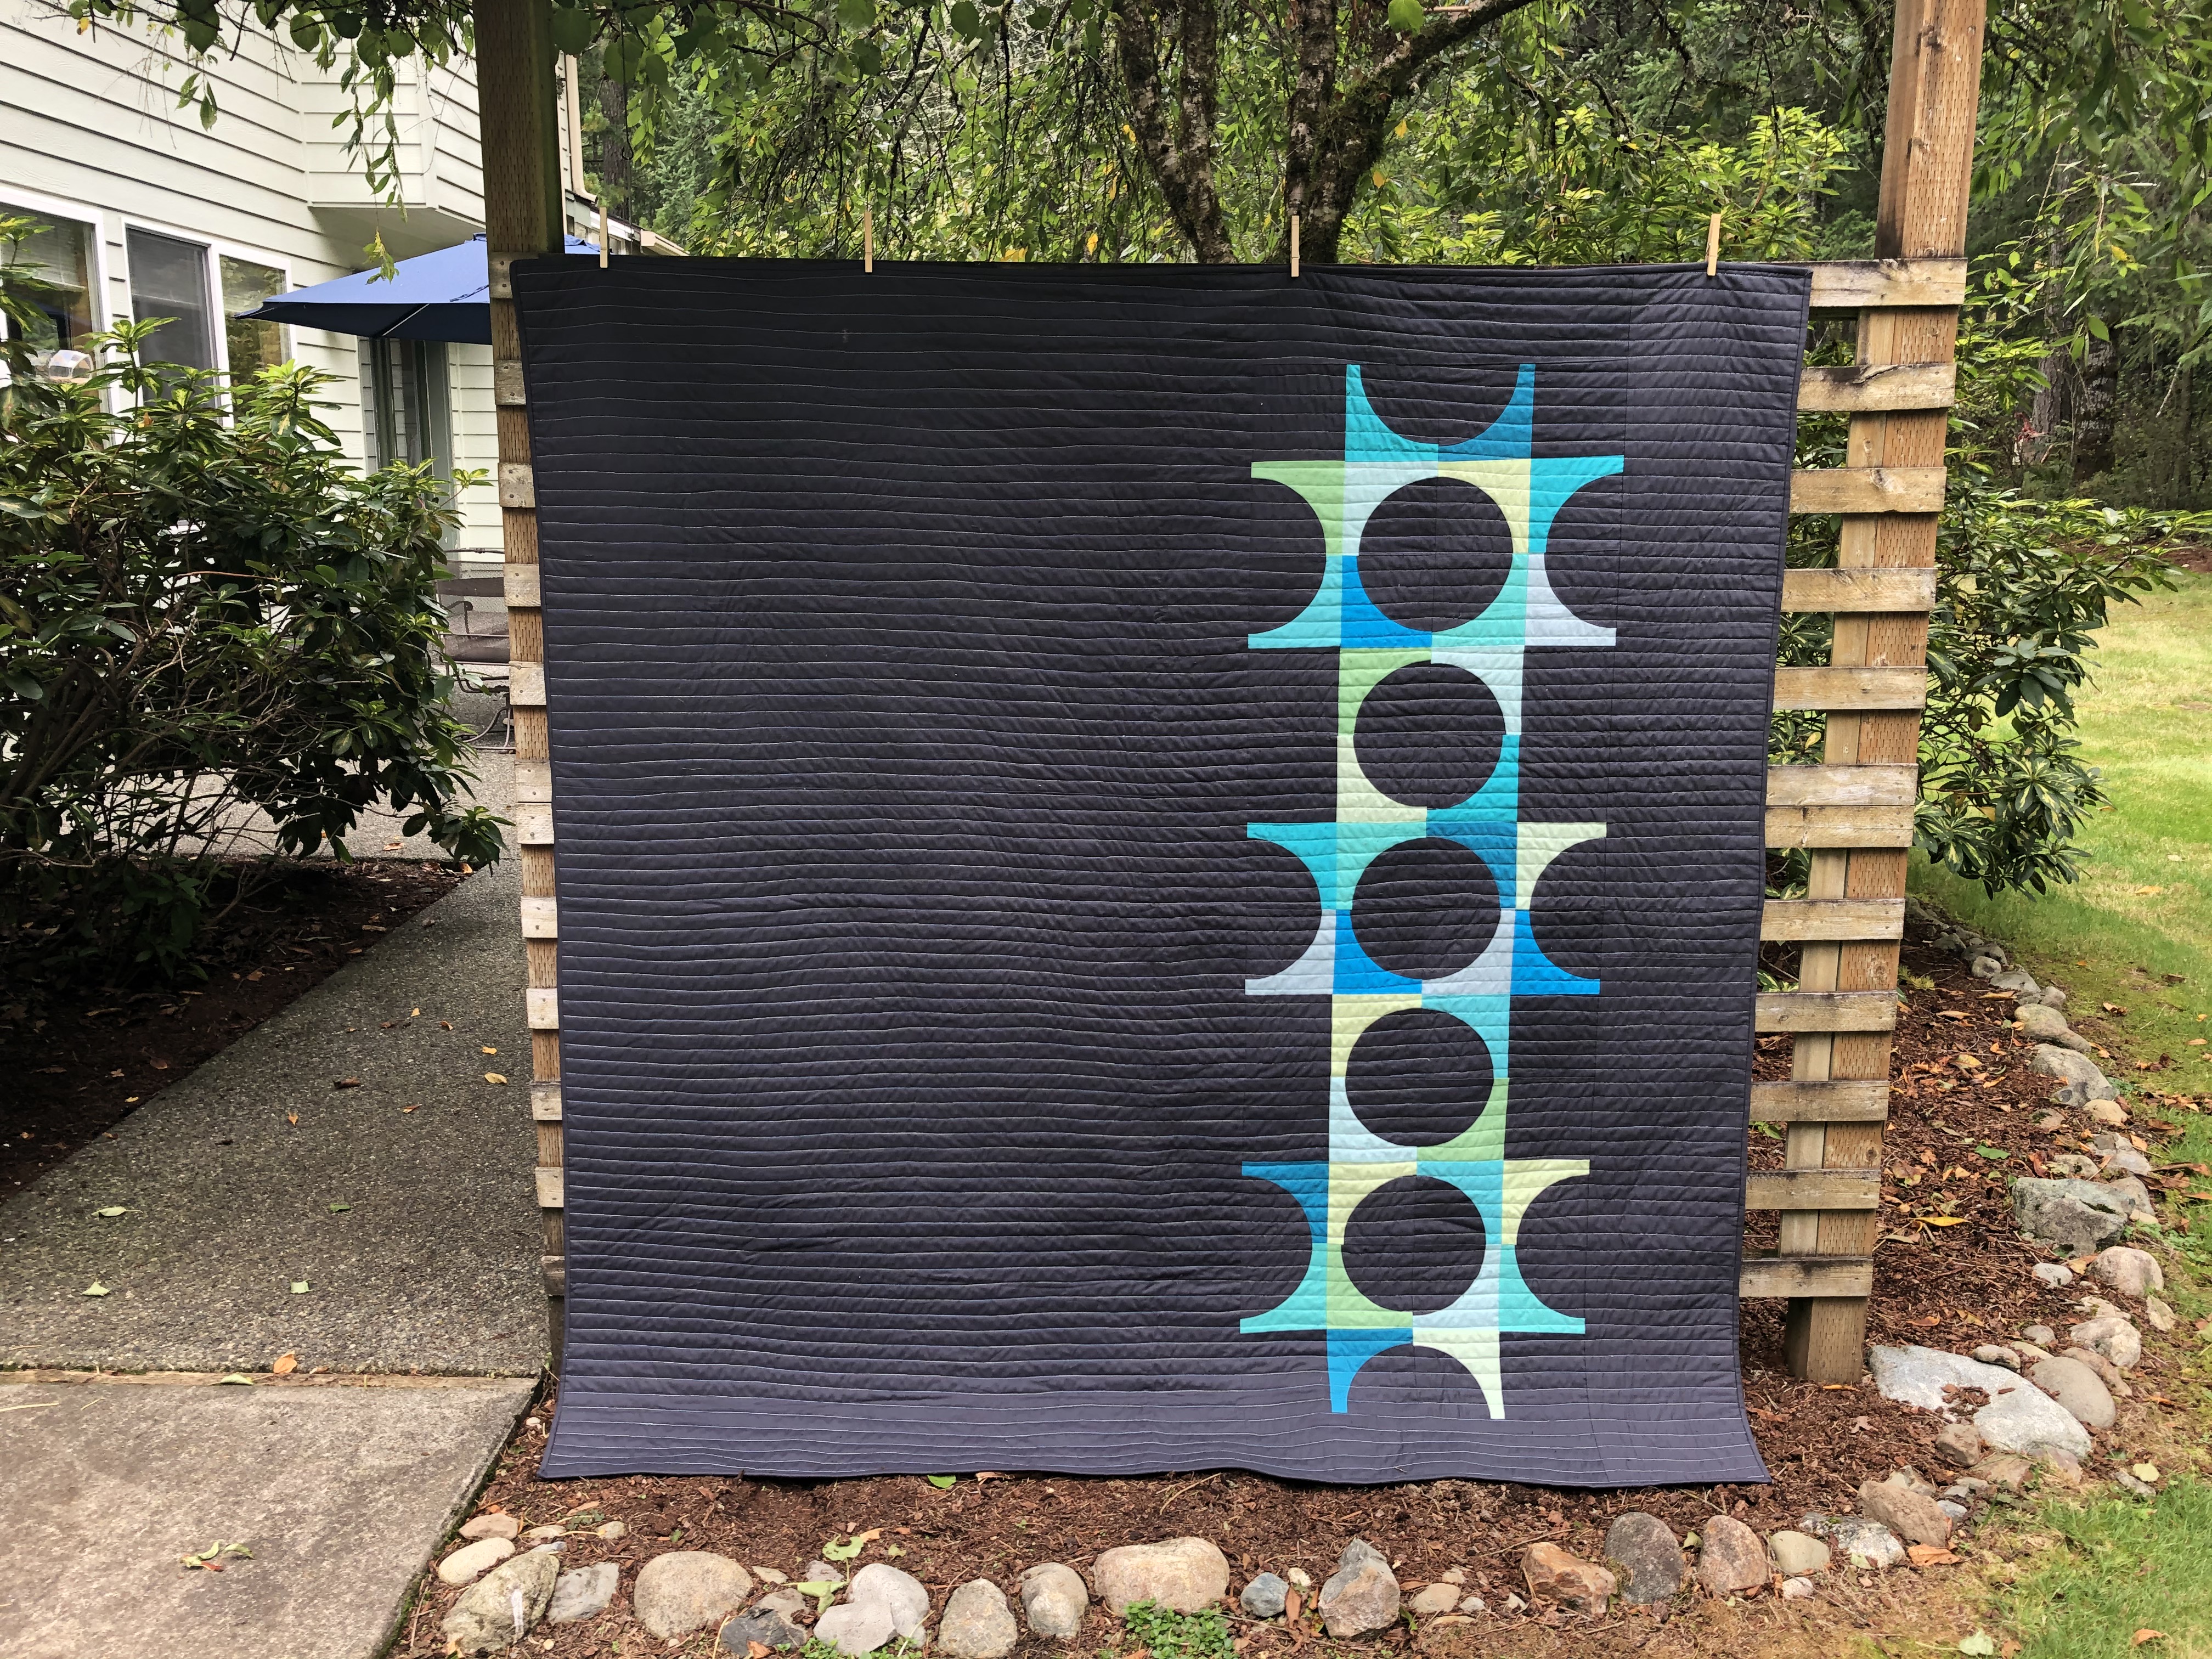
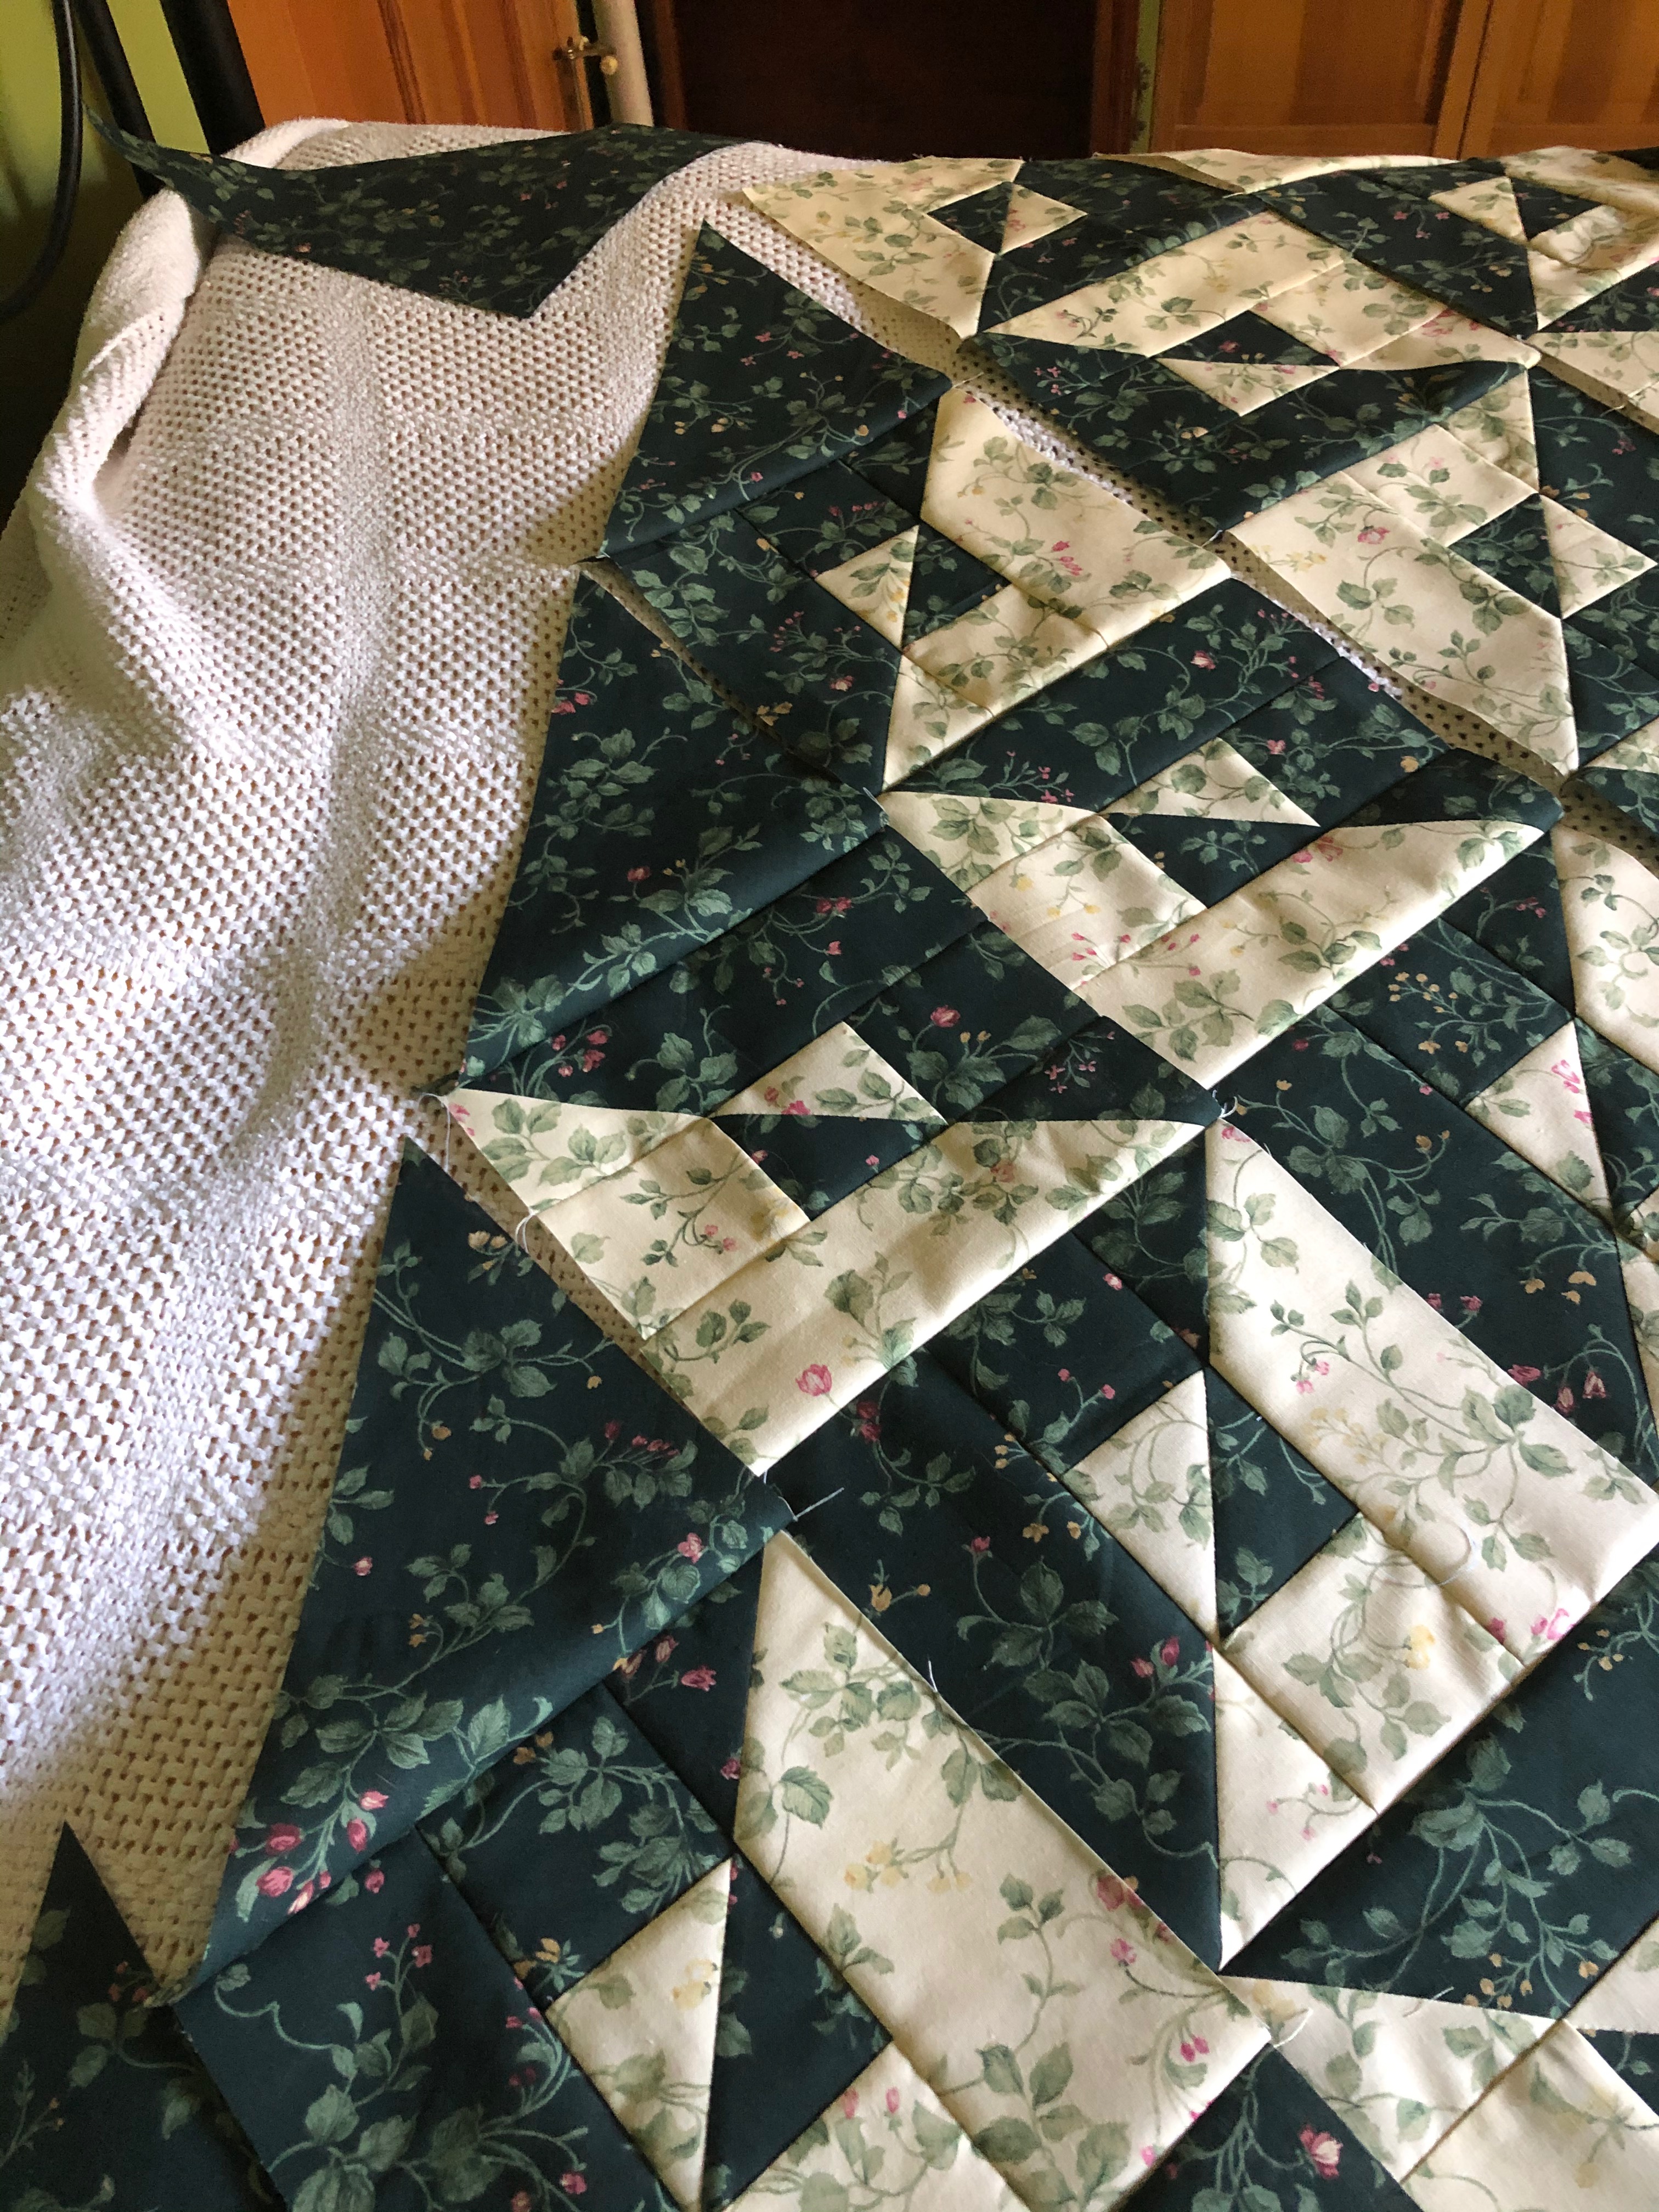
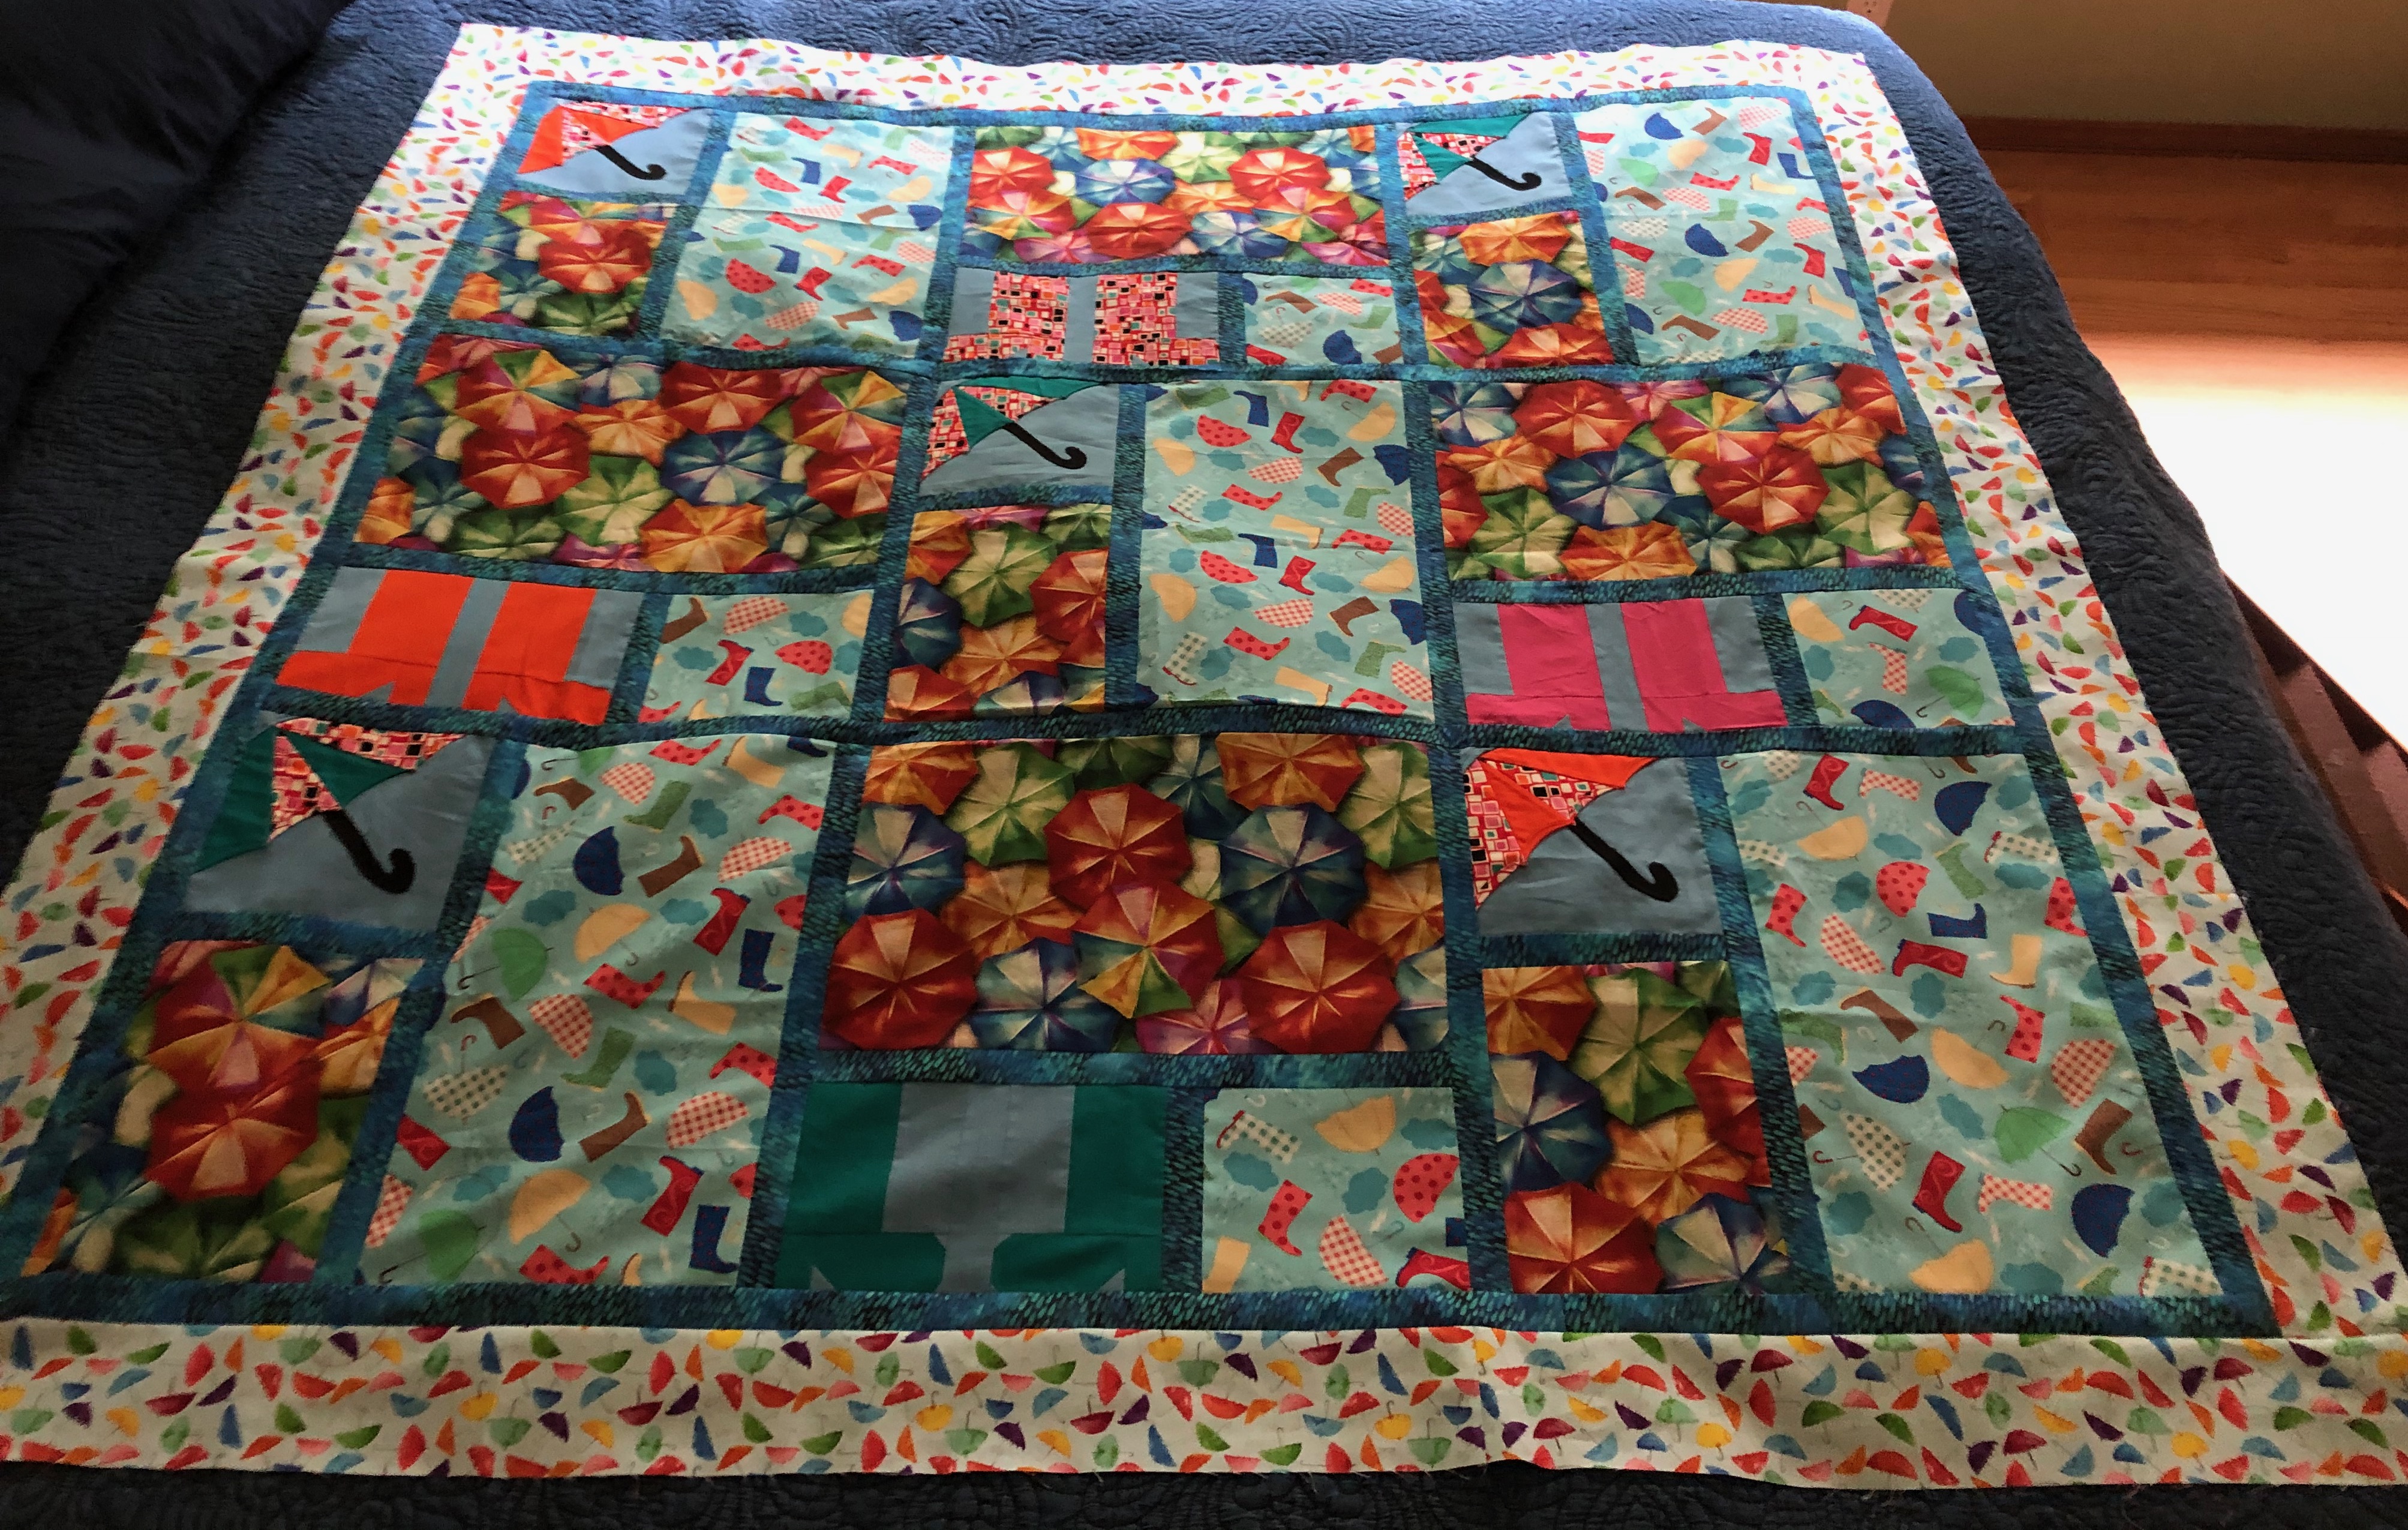
At the end of January I got most of my backing/binding and border fabric for the Rainy Day Quilt, so here’s an updated version of that quilt top. I want to do something a bit fun on the back of this one since its already a bit of a hashed together front.

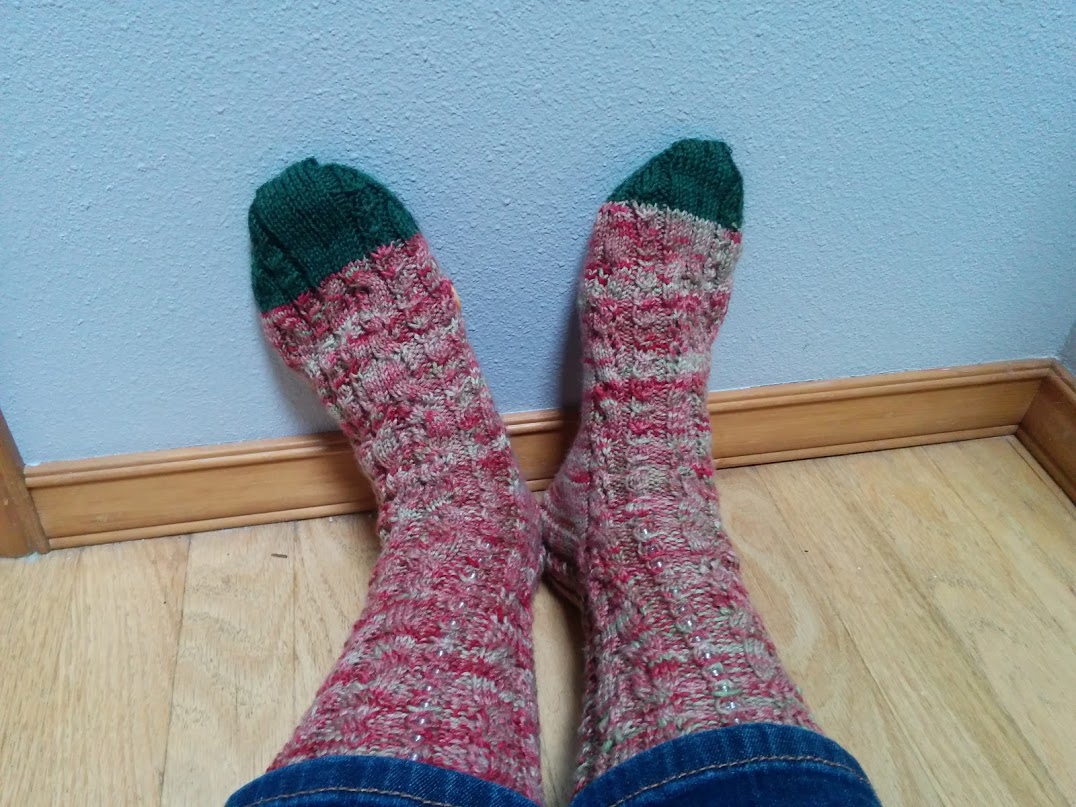
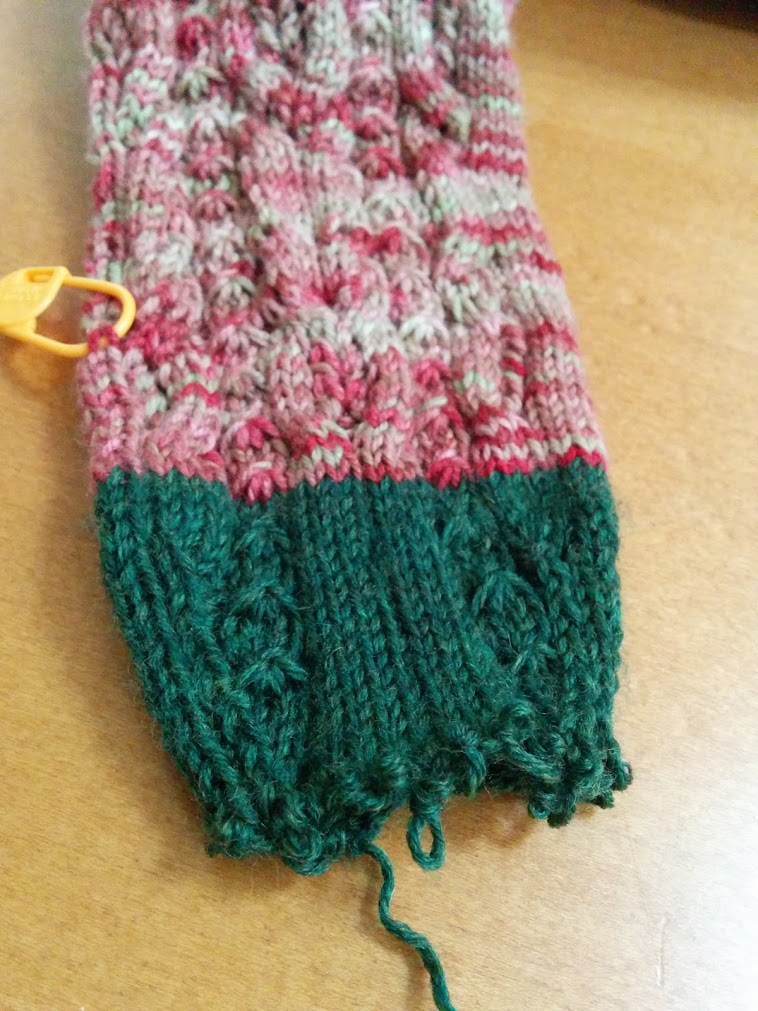
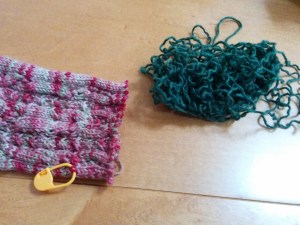
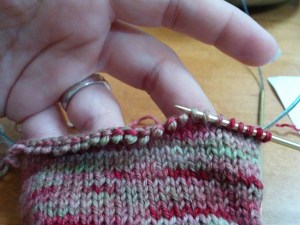
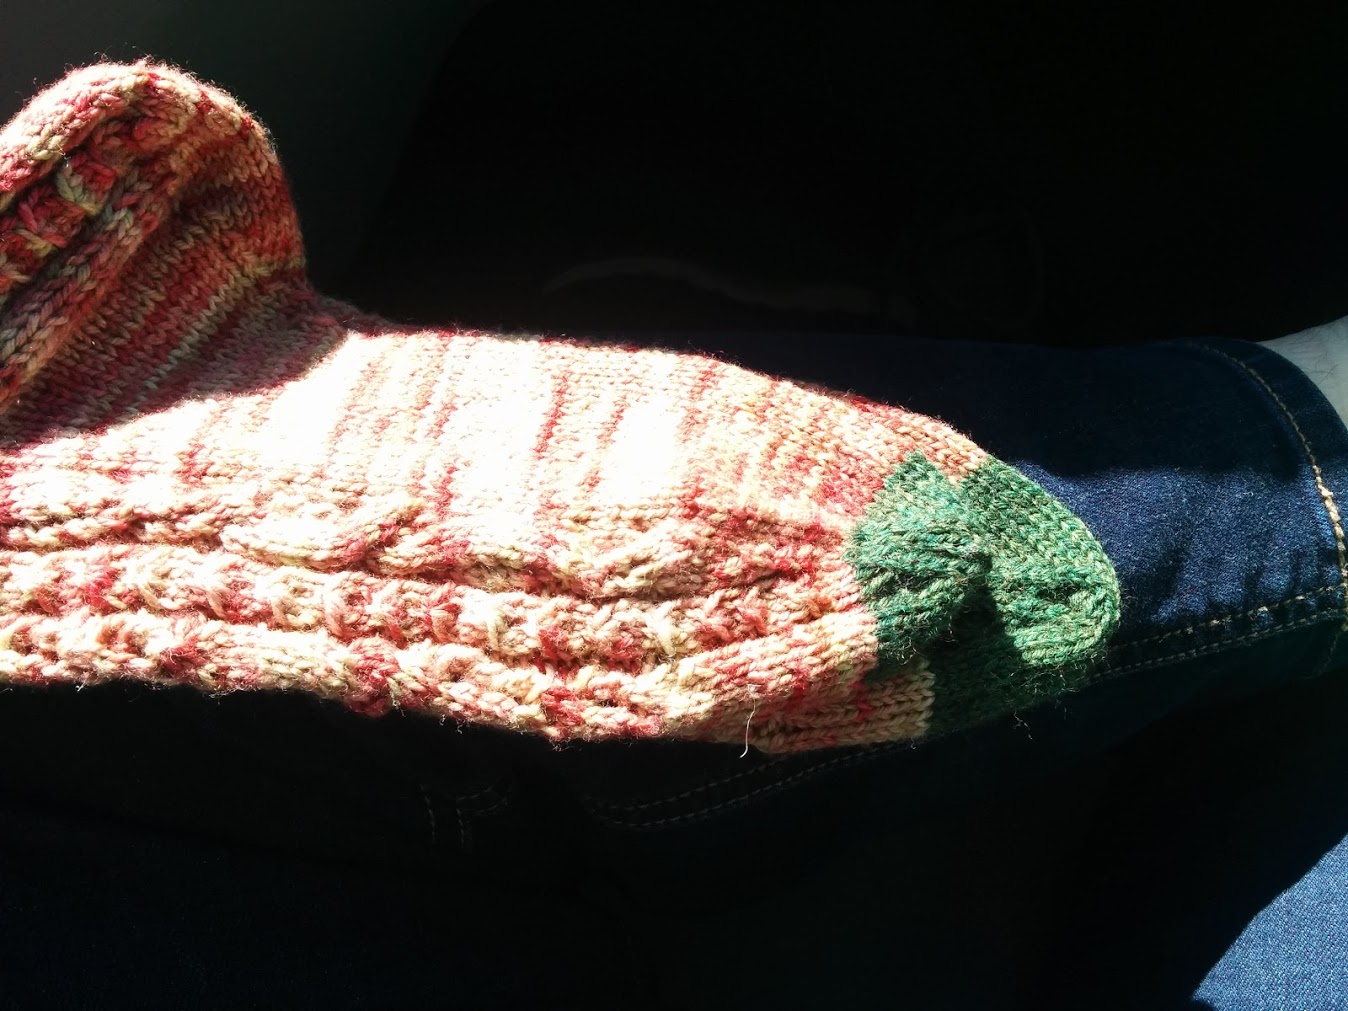
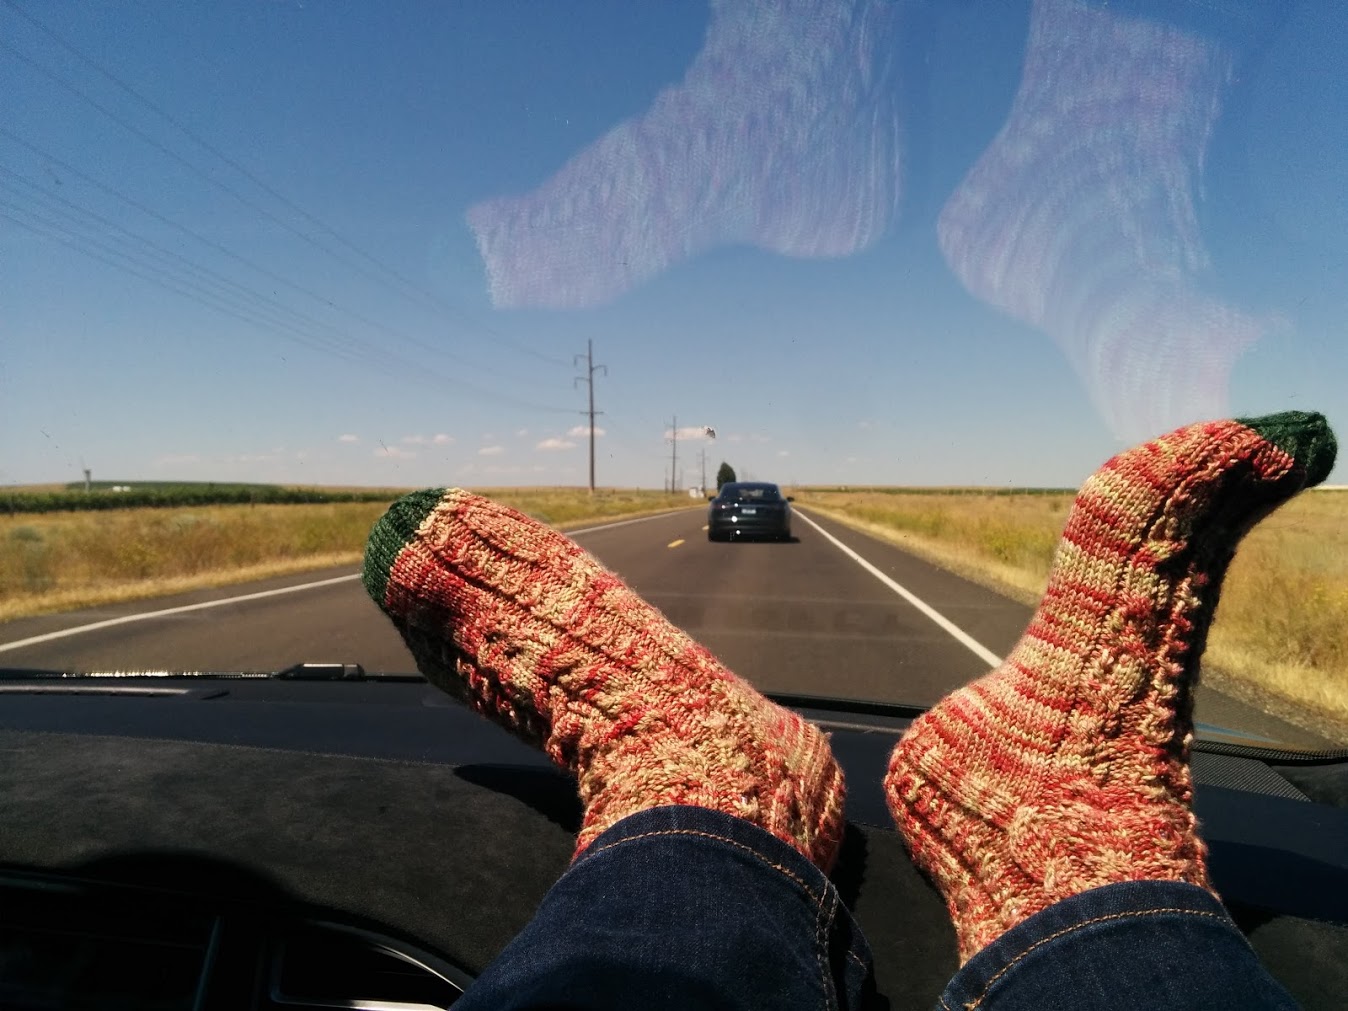
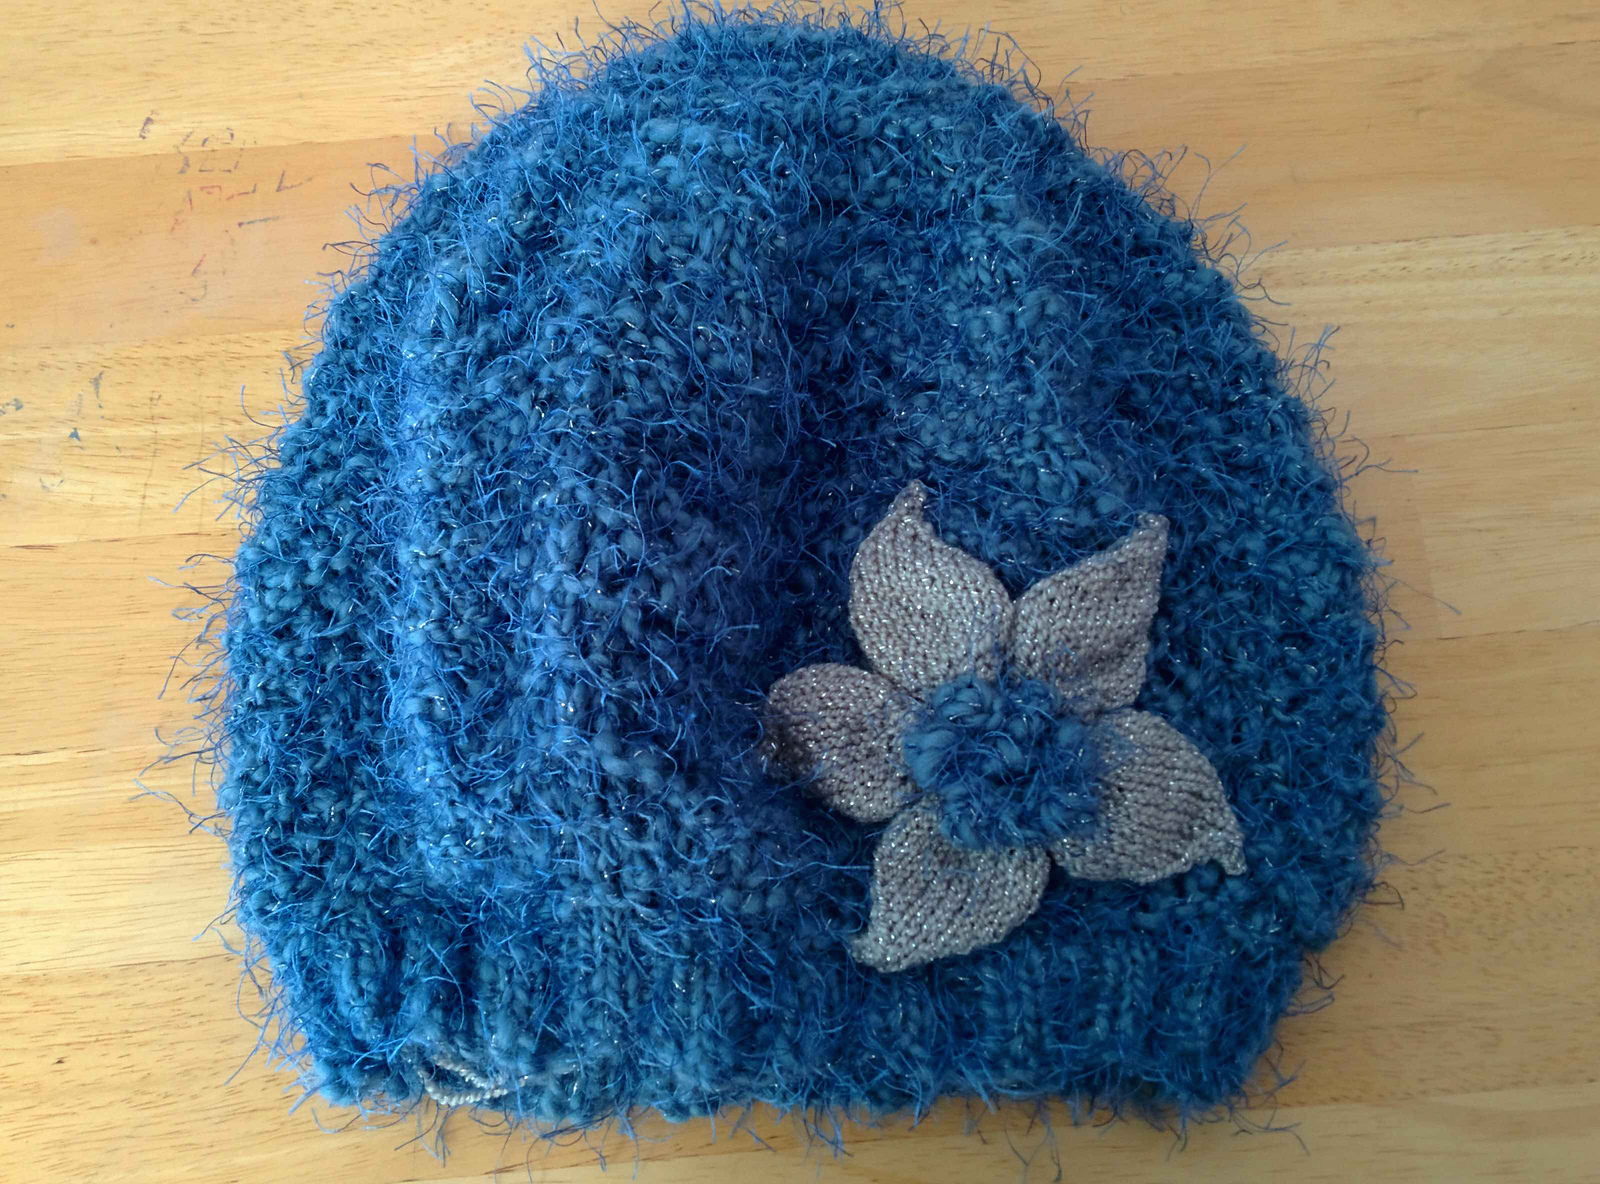
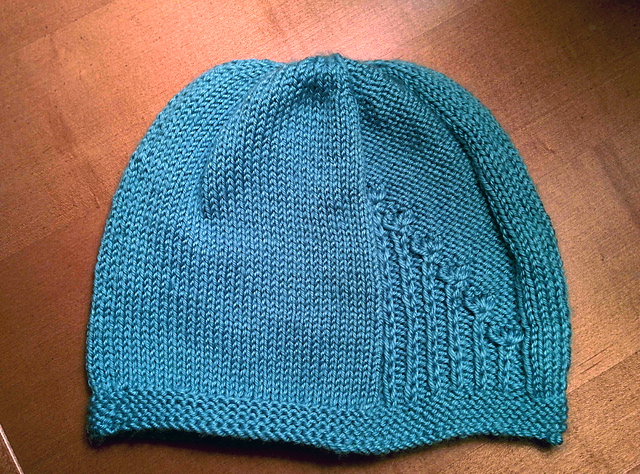
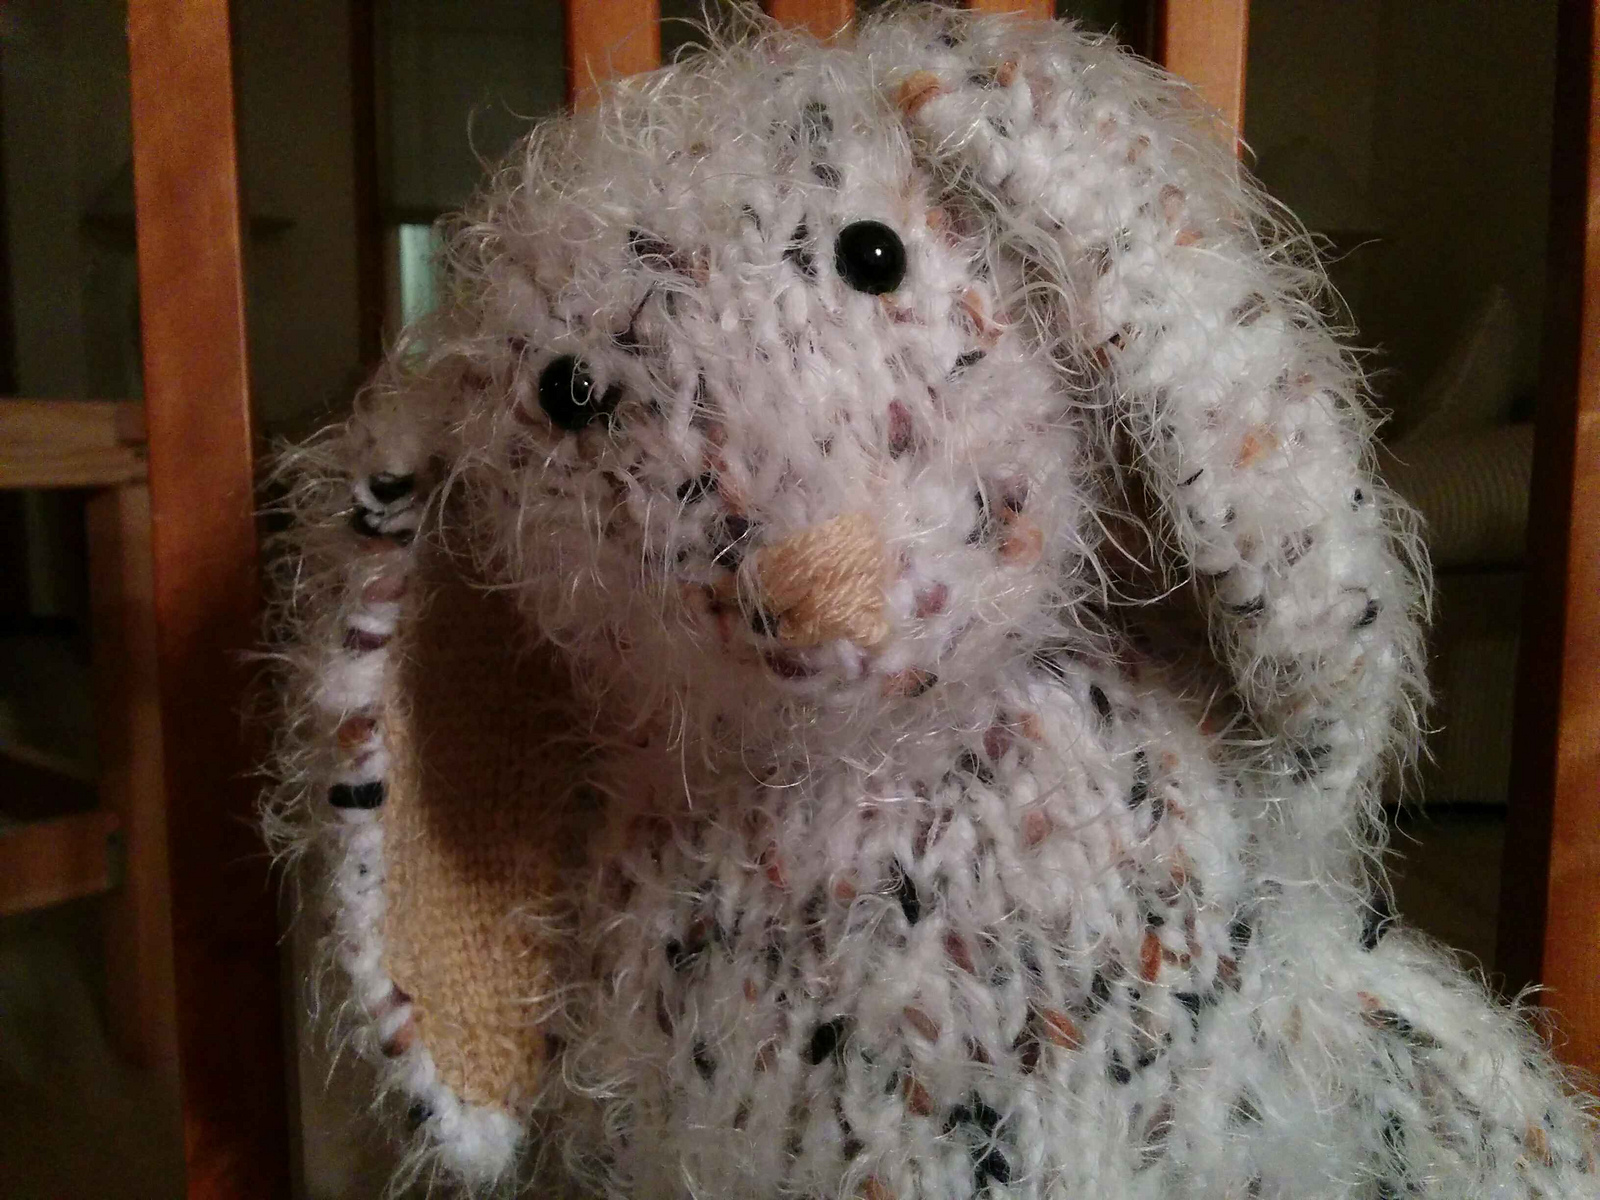
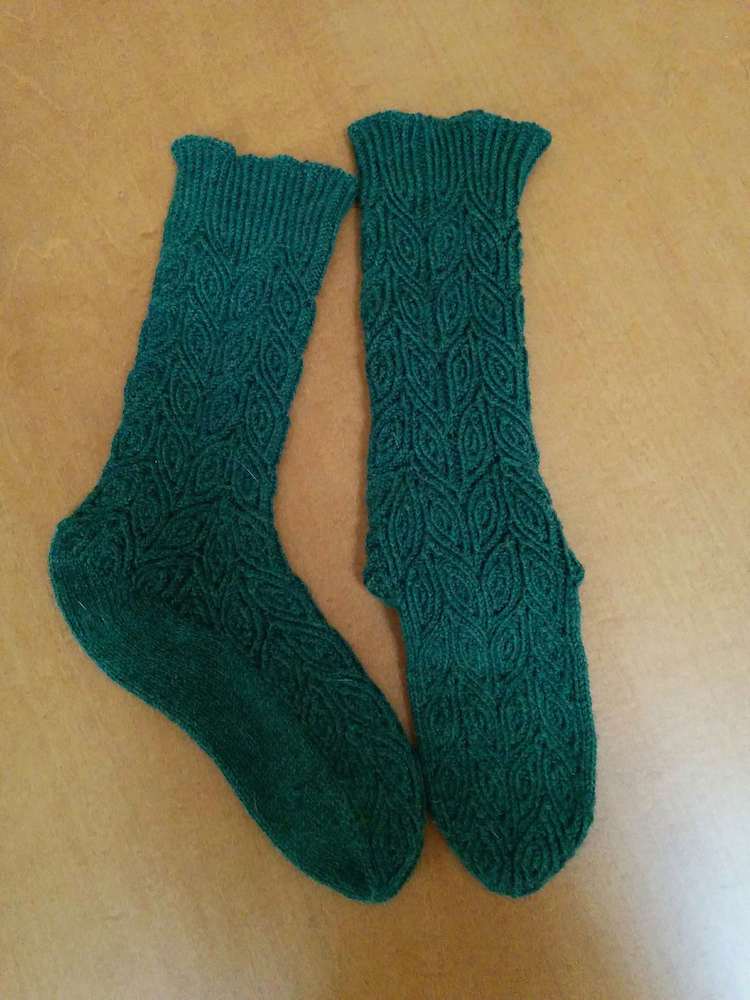
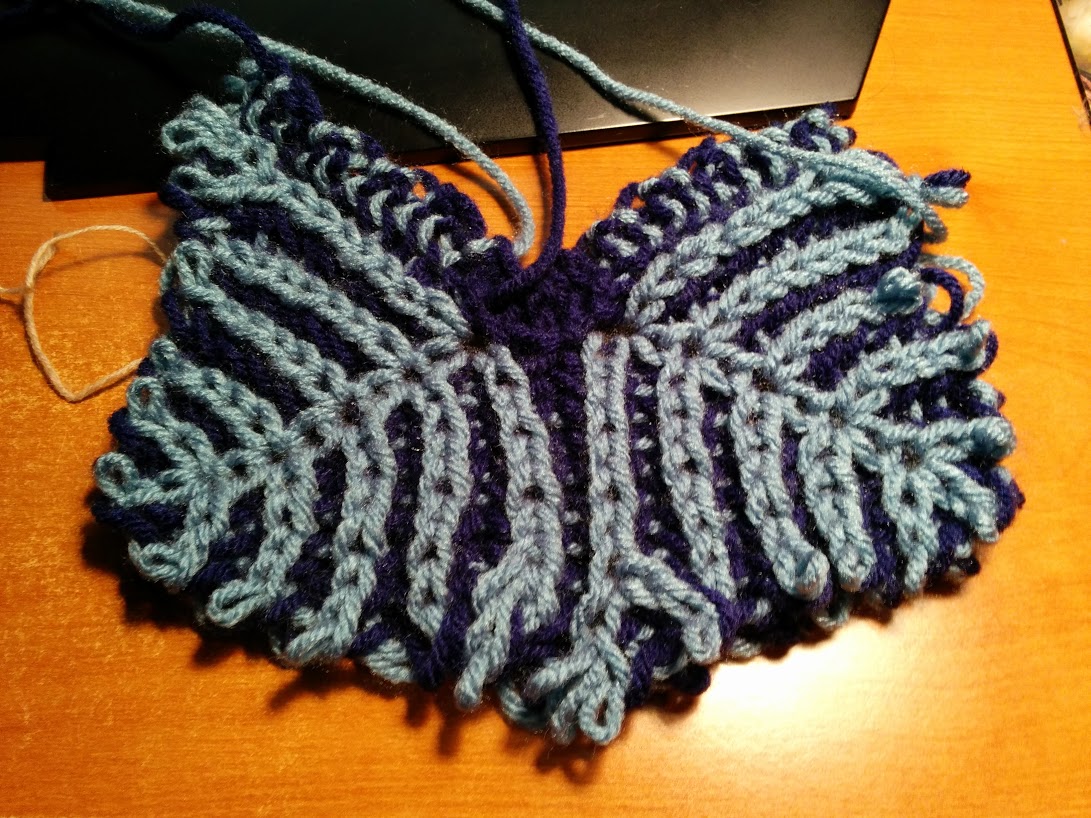
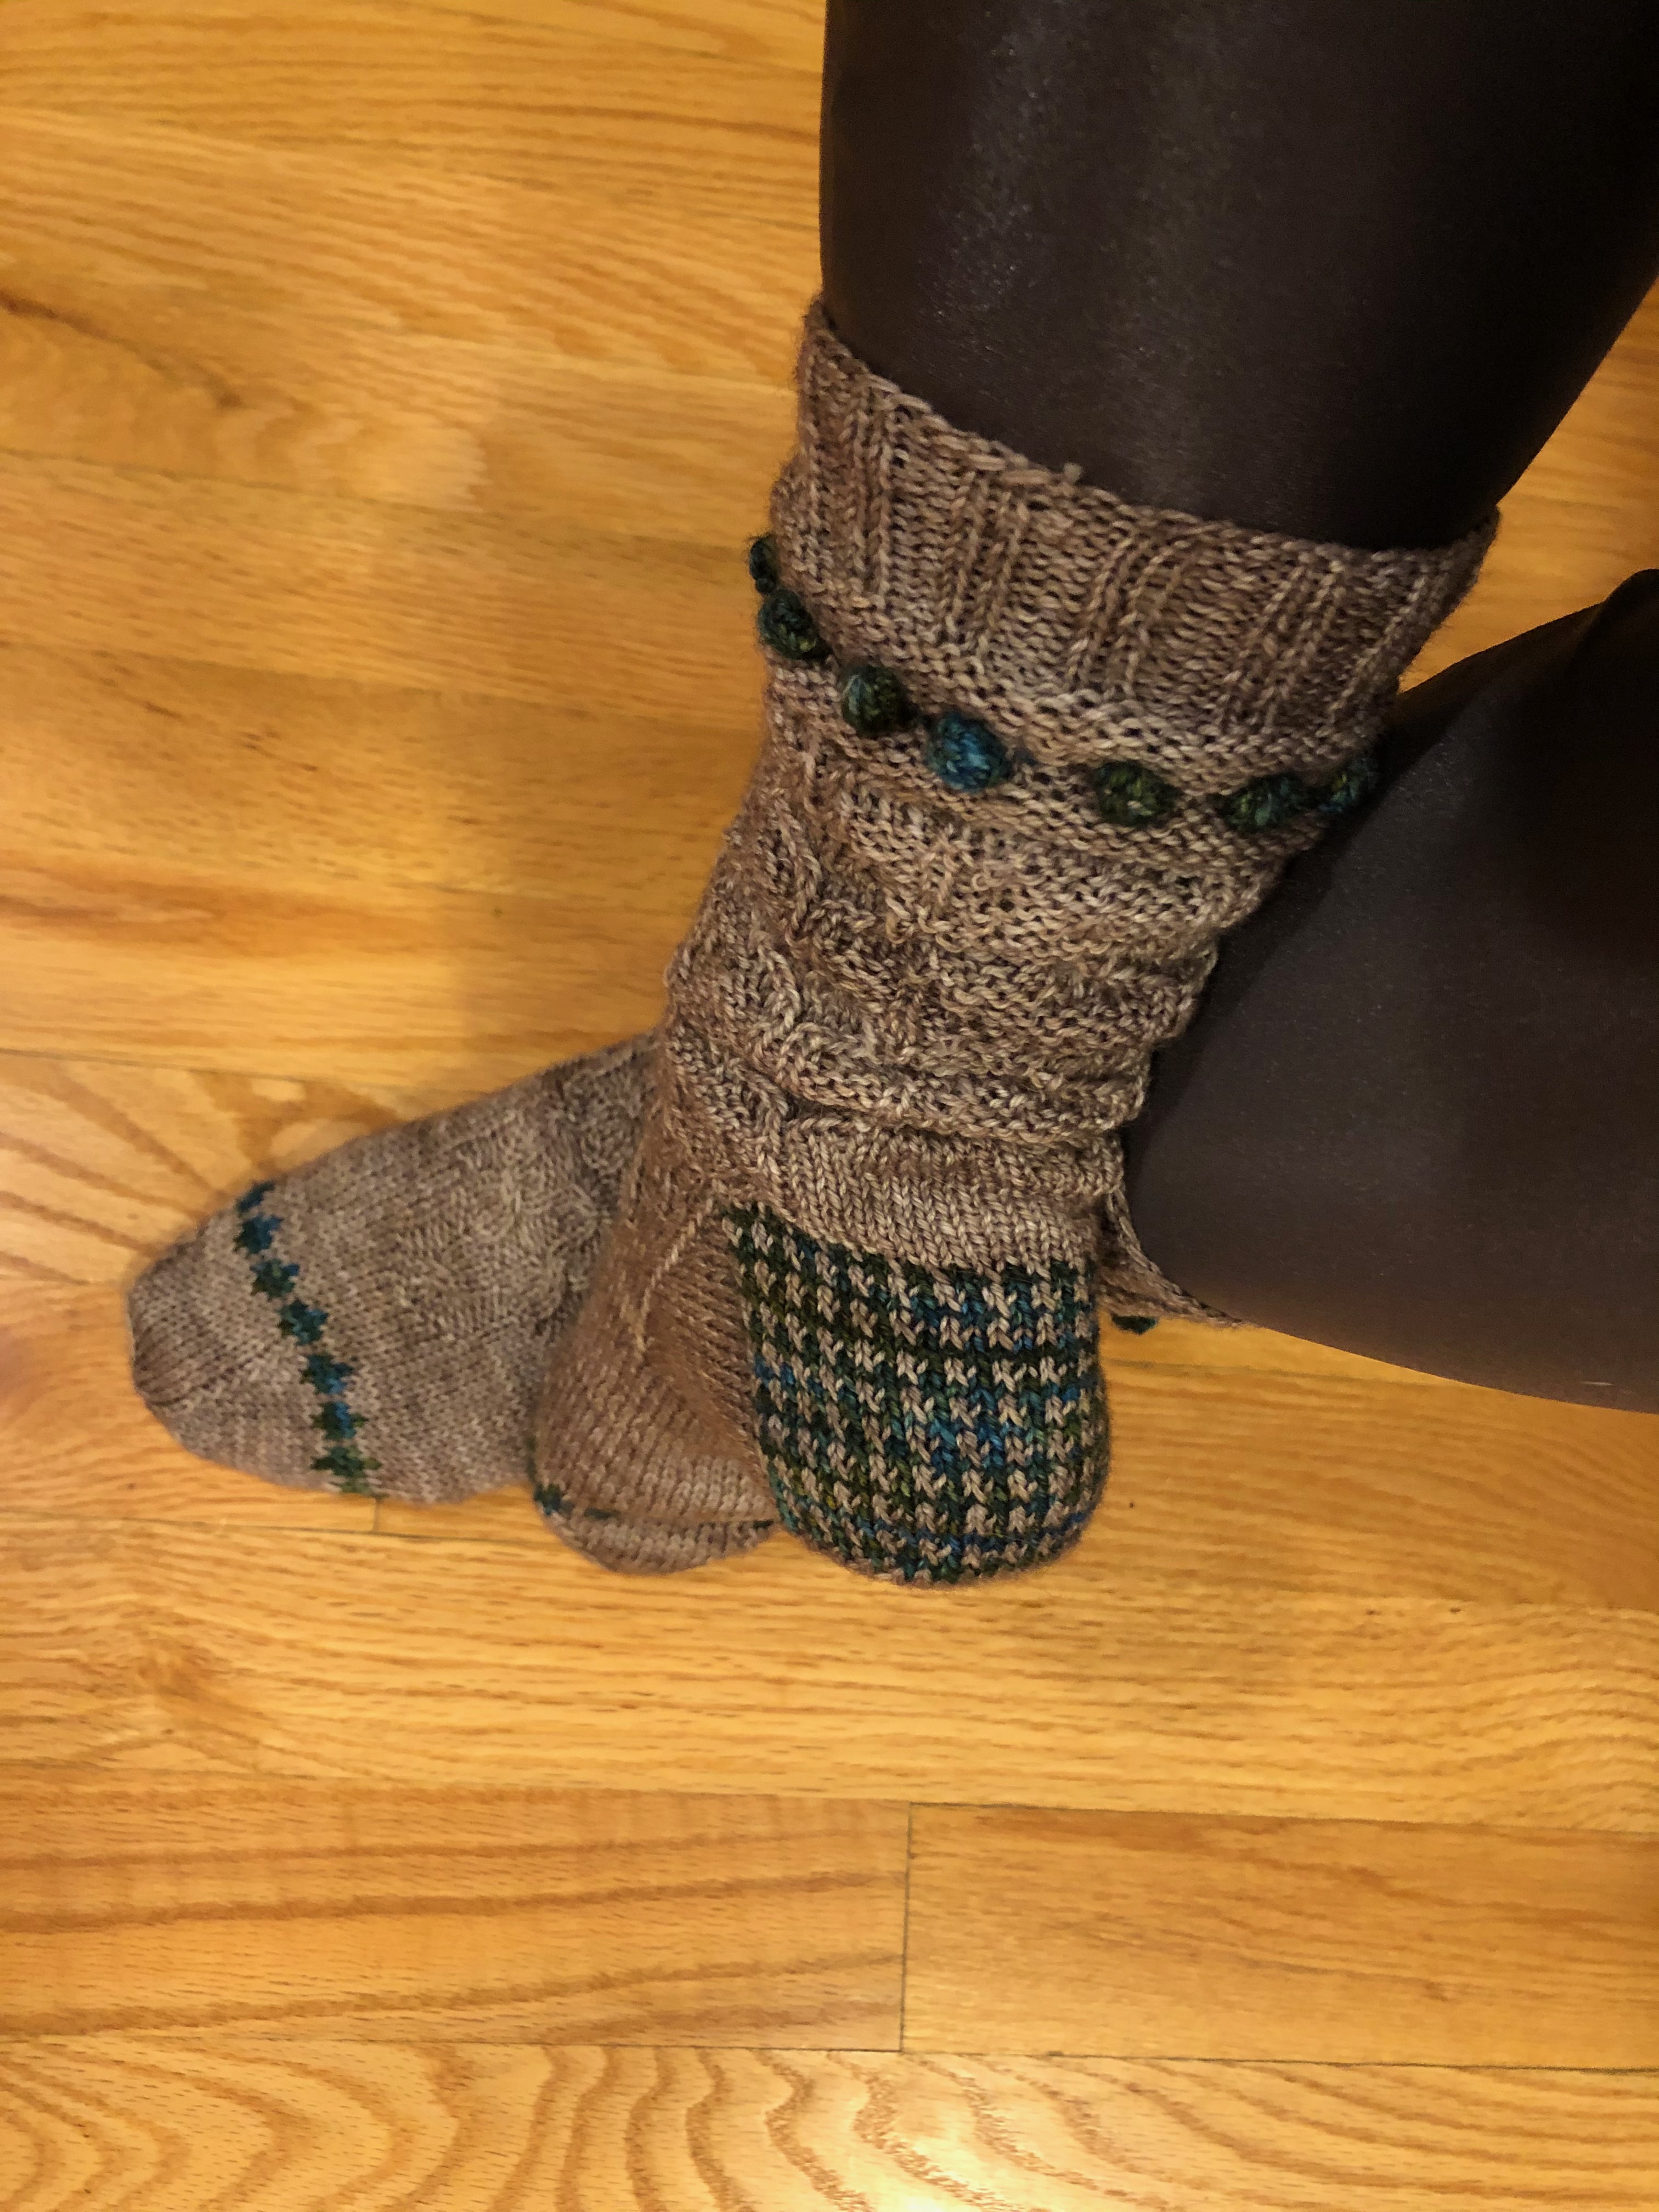
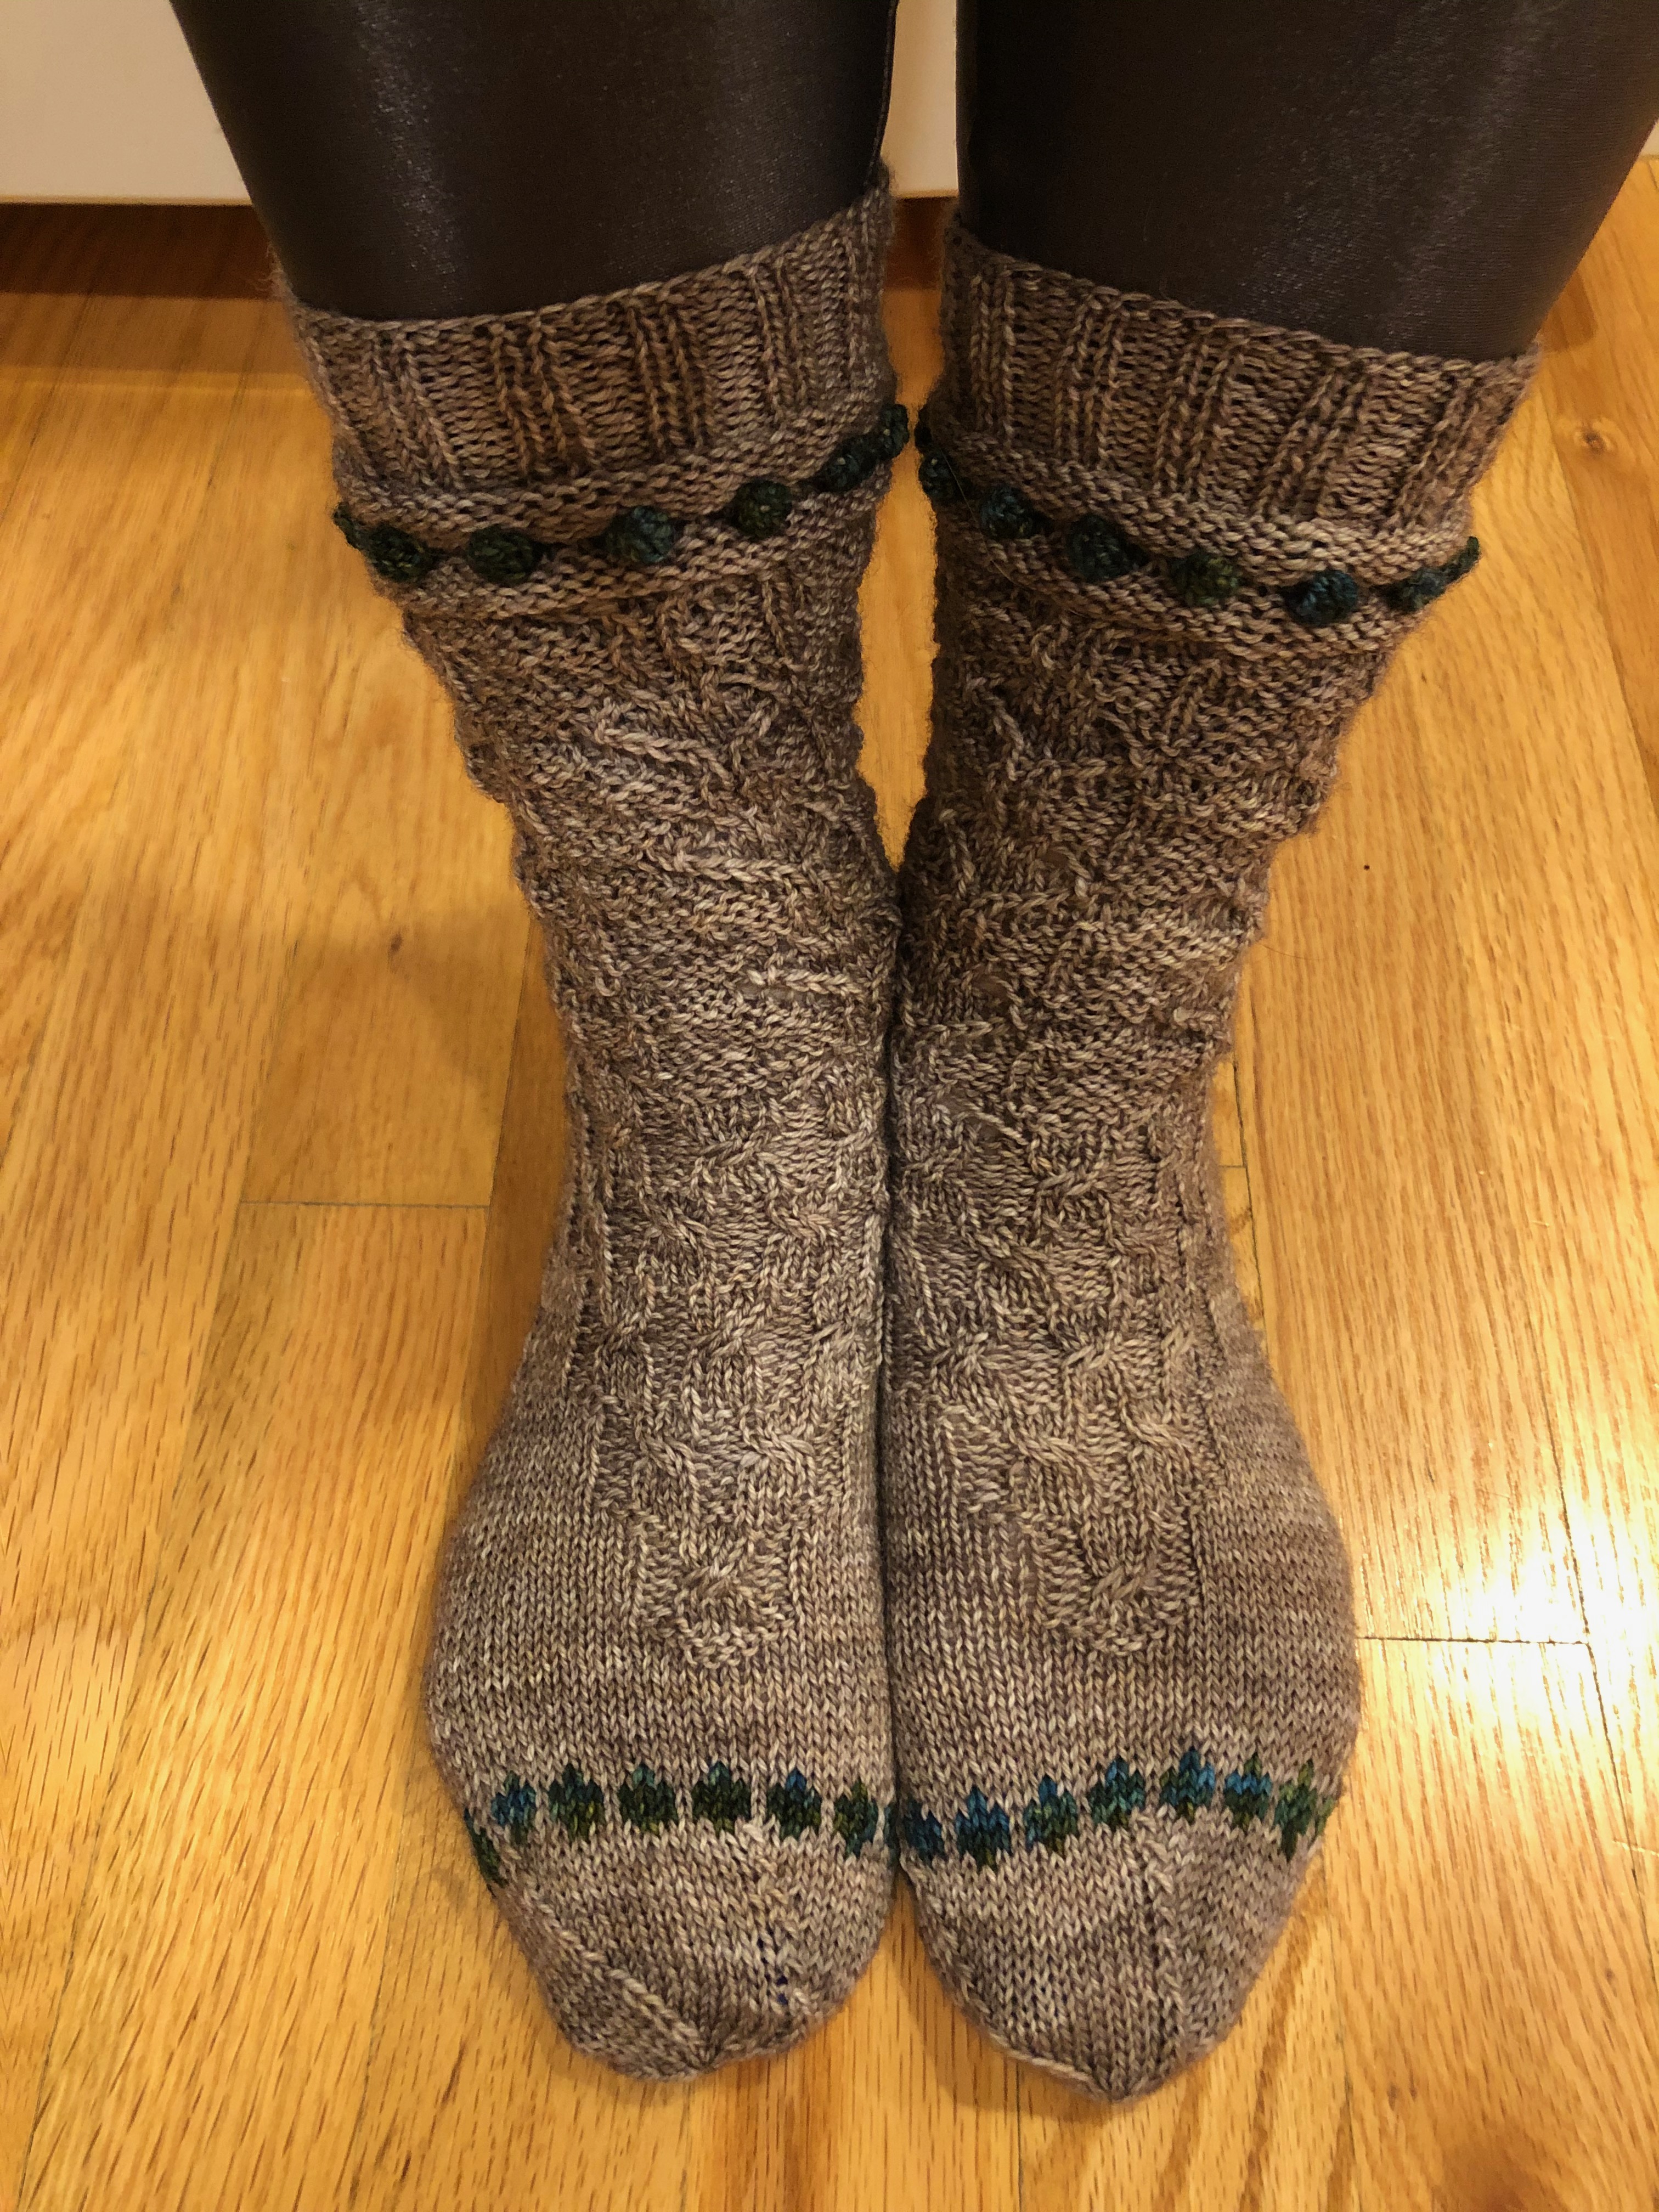
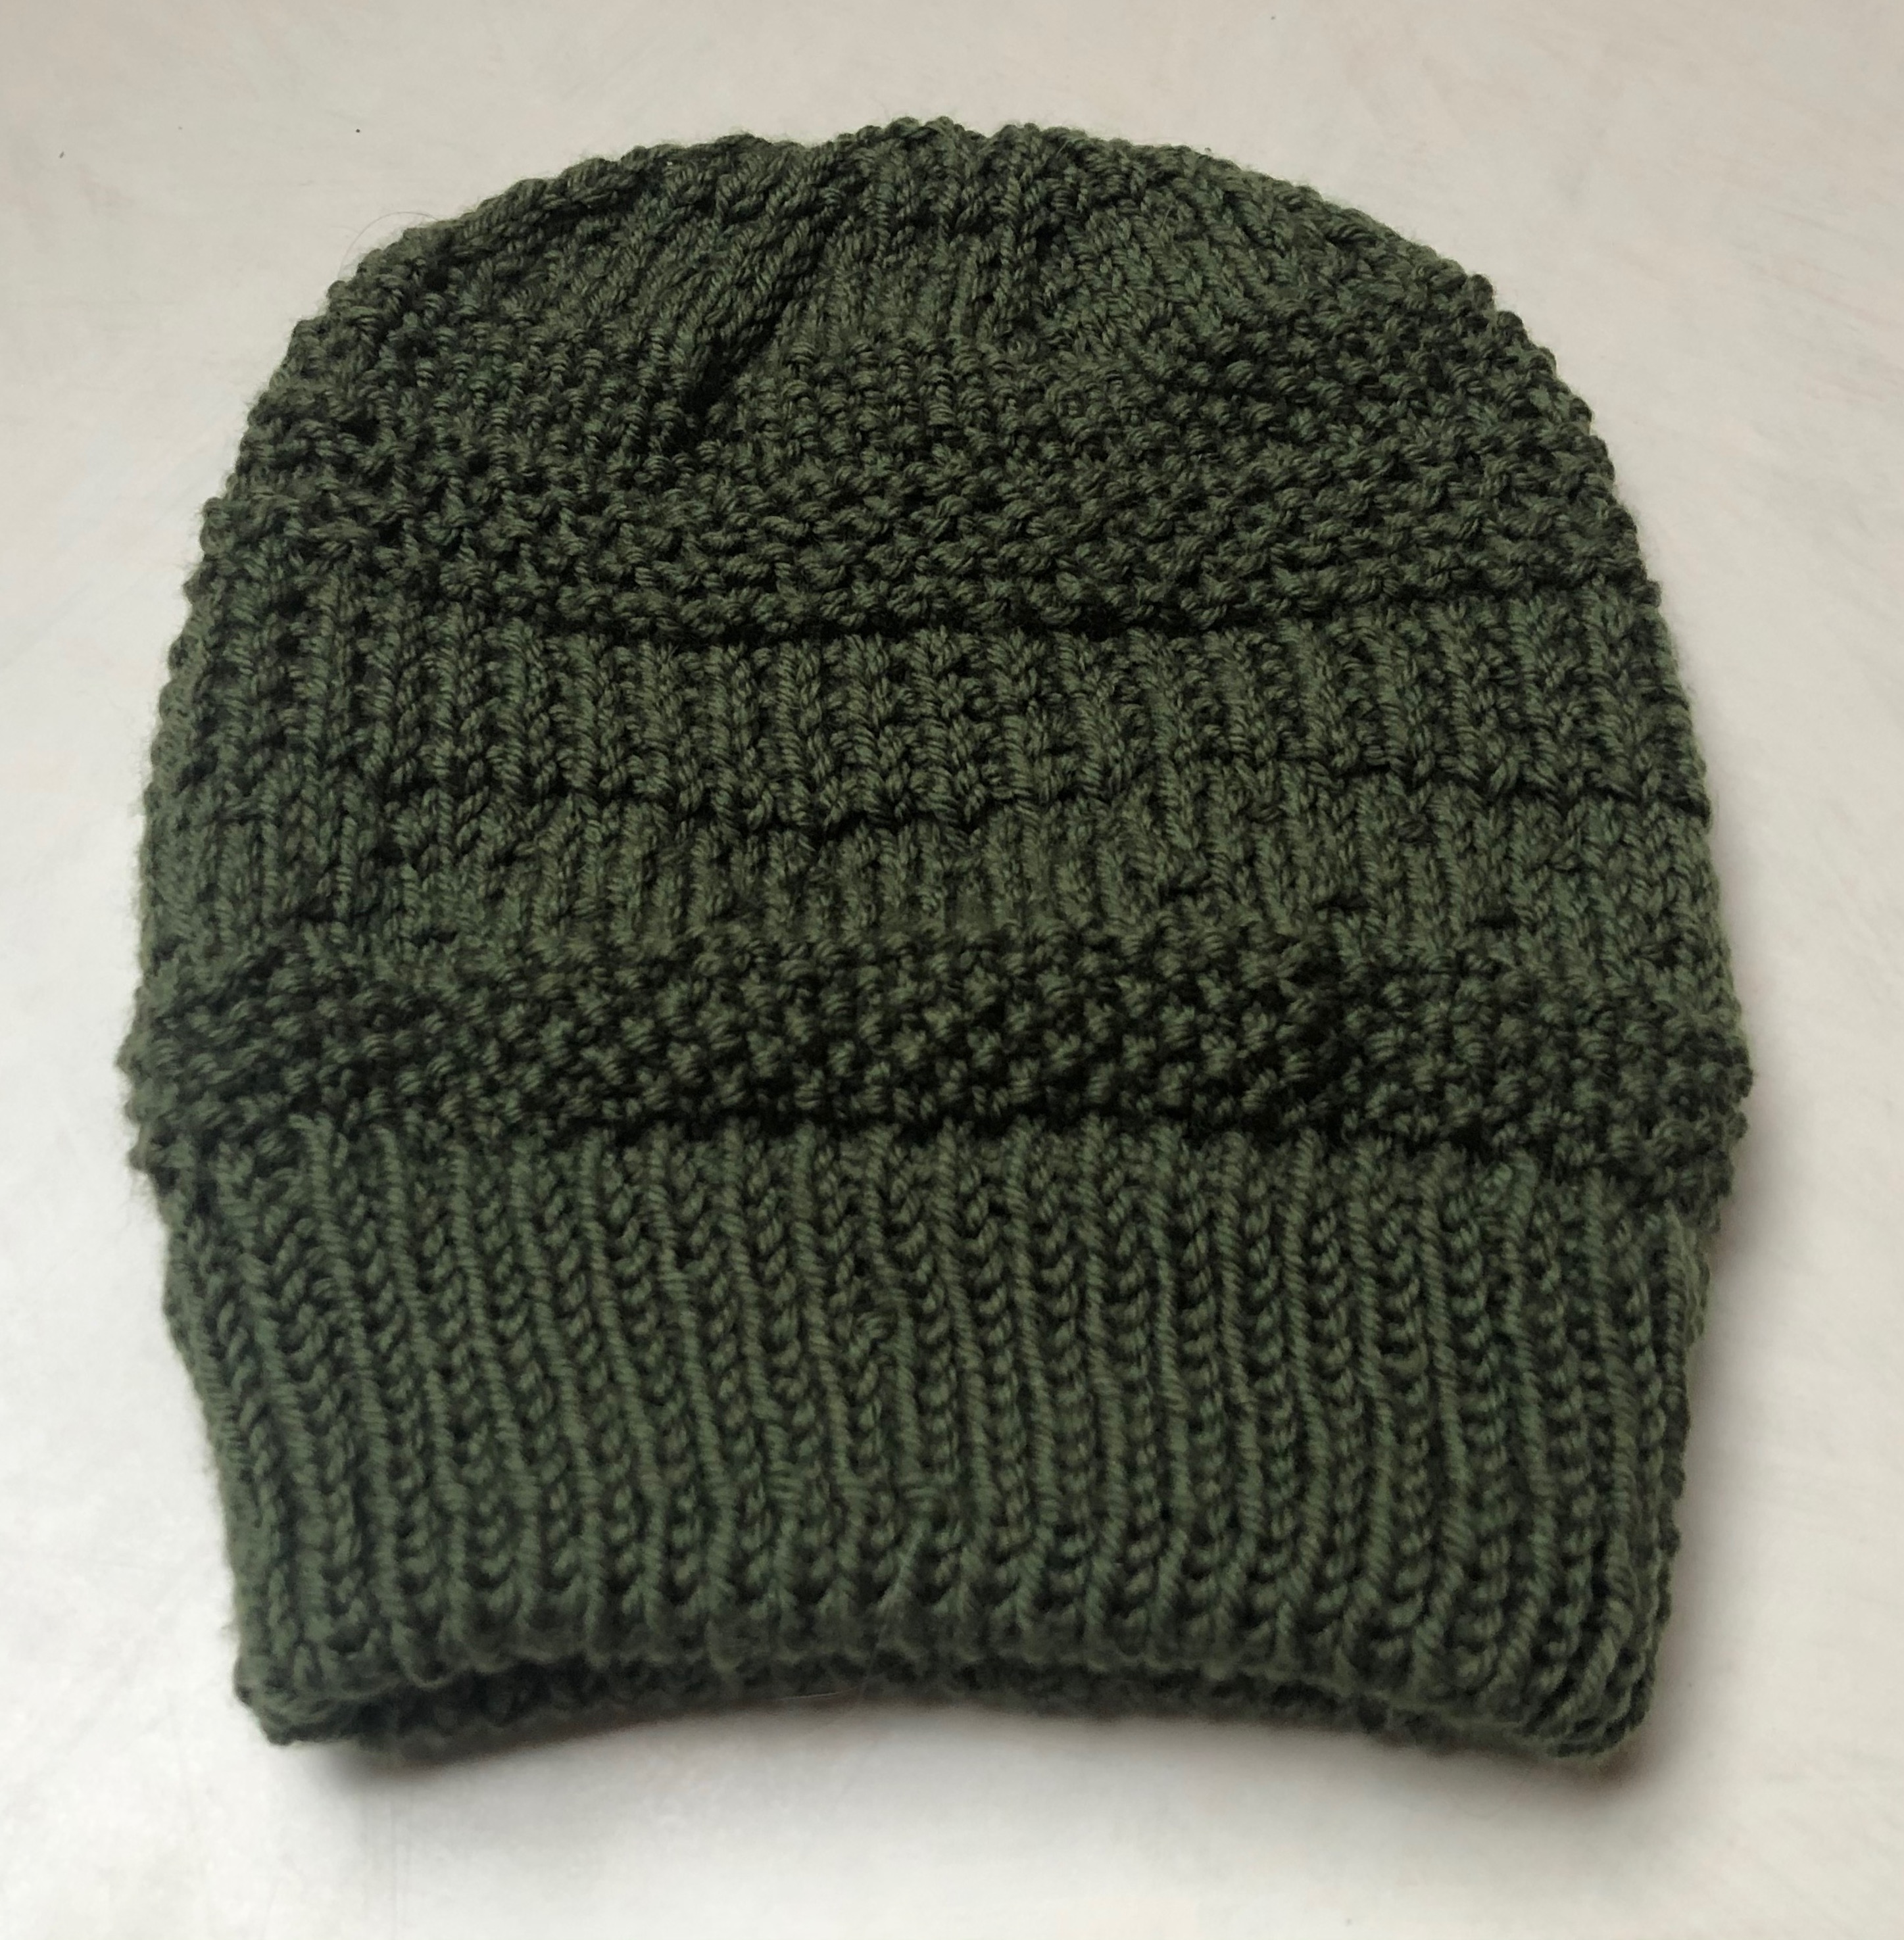
In the knitting department I finished my first socks of 2021, a pair of Fifteens, which is a warm up pattern for Sock Madness and a celebration of their Fifteenth year! And I completed the February Hat. I did quite a bit of a knitted gift as well, but as per my usual, I don’t post gifts until they are given or under special circumstances.

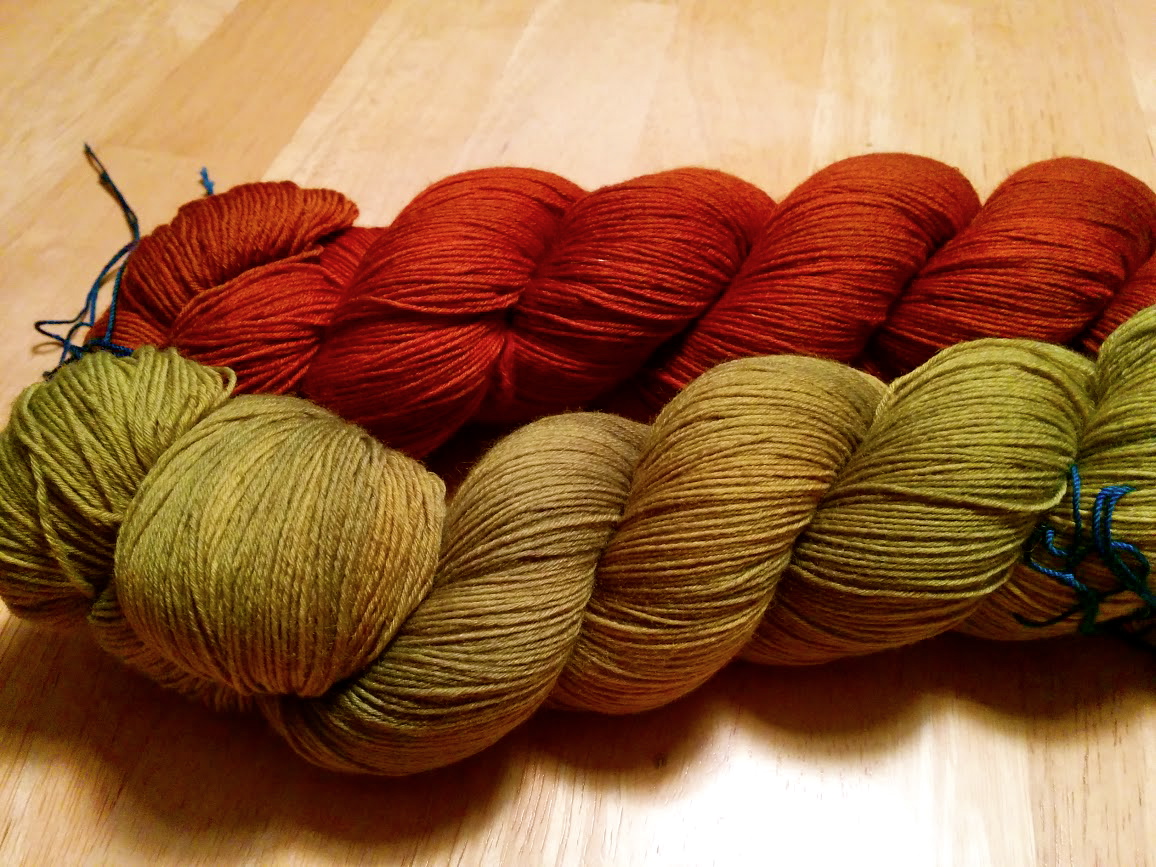
With Sock Madness starting up next month… expect more socks coming soon! (And the March Hat too!)

Rounding the Curve

Well here we are bottom of the 9th of 2019 and I am just now posting my first finish of the four quilts I had planned to finish this year.

Now too be perfectly fair, I finished all four quilt tops and its technically just the quilting portion left, but I’ve discovered that part is not my particular favorite part in all of this quilting business.  I love the designing and assembling the tops and backs and even greatly enjoy the hand stitching down my binding… but most of the quilting is a bit of a snooze.  Though to be perfectly fair, I don’t have a long arm so its quite a bit of quilt wrangling yet.  And this particular quilt called for simple lines which I had just (or at least it felt that way) did on my last quilt.  But at least this time I had a variegated thread for my quilting!

This is an Echoes Quilt kit that I bought to learn how to piece curves.

IMG_2667

I didn’t trim down my curved blocks quite like they did so its more chunky… and I’m not super great at piecing curves I’ve discovered.

For the back I found a wonderfully greens and blues ombre fabric on sale (lucky me).

IMG_2669

This was also my first use of a black batting, which was suggested by my auntie.  I didn’t even know there was such a thing!

So quick 2019 quilt status update: One done, two ready for quilting, and one top completed need to buy and piece the backing.

Finally a Finish!

This post brought to you from the former student of the no-mojo dojo!  This particular quilt has been a bit of a paper jam in my quilting projects because its big, bulky, and boring! I had decided on a very simple narrow horizontal lines as the main quilting. So back and forth and as I don’t work with a quilting frame… draping this queen size sandwich of fabric over my shoulders.  It got to a point where my husband even said something about losing interest in quilting… which at that point it was about half done or more but then had been set aside for a marathon of knitting.

But in finishing it, and especially in the binding of it there was such joy and freedom just moving it into done from “need to work on yet.”  So it took a year but I’m so back I even stopped at the fabric store for a jelly roll for another top already!

IMG_0989

This one is for my guestroom which is a very vibrant green and getting wonderful morning sunshine.  Its also home to my crafting bookshelf with baskets of yarn.

I am particularly pleased with the binding which is pieced from the yellows and greens.  And was so happy to get some sunshine to photograph this one in this weekend too!

I am tempted to send out the Christmas quilt top that is done since I do have that together and then maybe it will be done by Christmas! But I also have a couple kits and ideas for a myriad of other quilts… just as soon as I finish the latest Sock Madness round!

Keep Busy and Keep Going

Sometimes the best you can do is to just keep moving in the general direction of where you want to end up.  Then the next thing you notice you are already well on your way to a pile of stuff that somehow managed to get done.

I attempted to start my latest finished shawl on our holiday road trip.  And while its well written its spread across a few charts and as someone that sometimes has eyes wander in a chart, it was put on hold.  But I’m happy to say my first project with Stellina (aka sparkles) is complete.

The pattern is called Weirwood Tree. I suppose a more dedicated knitter than I would have knit it up in white and then hand dye-painted each leaf that burgundy/magenta of its namesake.

Also on the knitting front, its approaching Sock Madness time, and yet I managed to plan out extra socks to make, and even finished a pair for Ben, who has since decided he actually likes hand knit socks.  And I churned out a brioche cowl for a KAL this month too.

And last but not least I said I wanted to make 5 quilts this year… so I managed to put together another quilt top (I have the backing and binding fabric for this already)

Yes, it is a Christmas Throw Quilt.  No, I don’t have plans for it other than to make it. The design is called a Four Patch Lattice and goes together rather quickly.

Next Up: Expect a bunch more socks, Maybe a sweater, and I should probably get around to quilting one of these quilts…..

And to top it off…

Its not even the official middle of January and I’ve already got my first top together!  Believe it or not, the majority of the fabric was purchased back in June of 2015 specifically for this quilt idea and then it only took about a week to actually assemble.

Guest Quilt Top

The idea was hatched from a quilt someone posted from I believe Quiltcon 2014, but the bookmarked link I had is now defunct and I can’t seem to find it again.   So if you think it was you and would like the credit you deserve (or just to tell me how unoriginal I am) then drop me a line!

On the knitting front I’ve put together a couple new variations on my market bags, one with a seamless handle design and one a mosaic style to use up some partial cotton balls from the stash.

And then I frogged and restarted a new lace shawl based on the Weirwood Tree pattern. I first started this on the holiday road trip but its a less simplistic lace design which needs a bit more attention.  After getting home with a proper knit companion, its been progressing along. I’m throwing in a few photos I took from the trip (I wasn’t driving at the time) too.

Hope your new year is also producing some good progress too!

Hollywood Socks: Fixing it in Post Production

Ok, so you may recall that I made a nice set of beaded socks for Sock Madness that were a bit too long in the foot for me. Well during Sock Madness there are specific rules per pattern to help ensure that at least everyone knits a standard requirement.  For me, that meant my sock feet were too big. So technically they were finished, but then I needed to re-finish to make them wearable.

Mad About the Gals original finish

Mad About the Gals original finish

I did realize that my socks were going to be too long so I did put a stitch marker at more appropriate measured row for starting my toes and did not weave in my yarn tails, just tucked the toe yarn inside the sock.  So the first step was to un-kitchener the toe.

Here you can see my marker for the earlier toe transition point and I've unworked the kitchener stitches.

Here you can see my marker for the earlier toe transition point and I’ve unworked the kitchener stitches.

Since I have quite a bit to frog back, I decided to just pull back like one would frog the entire item, but by keeping a handle on how fast and far I was pulling, be able to re-pick up my live stitches at or around the row I’d marked.

Once you have your stitches picked up again, you just use your directions to re-knit them to the correct length.  Here’s a photo of the first sock re-completed stacked on top of the other sock in the original finish so you can see the foot length difference.

Sorry about the lighting... I was working on these while taking a drive to Oregon.

Sorry about the lighting… I was working on these while taking a drive to Oregon.

After you have finished the first, then you work the second just the same.

It was a beautiful day for a drive.  I still have some green toes, but not as much and the socks fit.. which was the most important part.

It was a beautiful day for a drive. I still have some green toes, but not as much and the socks fit.. which was the most important part.

In semi-related news.  I also finished my second Woodruff Sock, which is my first colorwork sock.  They are a bit roomy, but not too big I think if I were to knit them all over again I’d probably go down a needle size, but we shall see after the first real wear and block.  Here’s some beauty shots.

Don’t Panic! (Its supposed to look that way)

So I decided to refresh the site a bit as I head into year five.  (Can’t believe I’ve been at this for so long.)  So I hope everyone likes the blue, and if not then you can look forward to the next update in say… 4.75 years or so.

Nearly finished photo.

Nearly finished photo.

In other news, when I visited my Grandmother this year she tried to explain how its hard to find a cute winter hat, perhaps one with flowers.  So as a knitter…. I got right to work.  The first one is a slouchy hat with a flower on the side, and I thought being kind of festive I’d use up some more blingy fluff and sparkle style yarn from my stash.

While I did take a actual finished photo, with the skies getting pretty dark by 4PM the lighting on this one is a bit better.  Unfortunately at this point I decided it probably wasn’t really my grandmother’s style.   Thankfully, a friend was visiting about the time this photo was taken and proclaimed she really liked it, so guess who got a totally not a surprise, but I wrapped it anyway gift?  [HINT:  This amazing person right here!]

Fresh off the needles, one hat with flowers

Fresh off the needles, one hat with flowers

So back to square one on the hat front, but I am one of these people that seems to collect patterns around an idea, so naturally I didn’t have just ONE hat with flower(s) to choose from.  So I picked another and some yarn and forged ahead.  This pattern was super fast to knit and simple, yet a nice design.

Hopefully its the hat with flowers type that she will enjoy and wear.

In other knitted gifts, I made a colorwork shawl for another friend.  The pattern is called Unalakleet.

The actual drape is a bit of a capelet, and it is a real test of tension work as its done as stranded knit and purl.  Which makes the backside appear to somewhat mirror the front, but is all done with loops of yarn carried across.

There is just one more gift on my list I’m finishing up, but you and that giftee will just have to wait and see!

Experienced Level, Beads and Knitting with Novelty

Apparently September was just one of those months where you are doing just so many things that finding time to photograph your knitting and update your blog just wasn’t going to happen.  If you really must know.. there was spaghetti sauce being made, and rooms being painted, and the buying and selling of cars happening… and yes, through it all there was knitting.

So first up… let’s chat about novelty yarn.  Its one of those things that seems to change over time and finds itself marketed to a new knitter or learning to knit knitter, and then as you learn and grow your skill you don’t need fur and ruffles to hide your stitches and suddenly its the bane of your yarn stash.  So in my latest round of stash assessment, I was a bit taken aback by the quantity of fur and other bits that “seemed like a good idea at the time” and went on a quest to find something to make with it.  And I’m happy to report that the Suzy the Cuddlebunny pattern, is a pretty quick  and simple knit that turns out rather well.

Looking for somebunny to snuggle.

Looking for somebunny to snuggle.

I made mine with a flecked fur and an acrylic held double for all the body parts, and just a plain acrylic for the inner ear. The body was deemed “so soft and snuggly” but the test snuggler, so I think, FuzzyWuzzy here will find a good home this holiday season.

Which brings me to the experienced portion of this post.  At some point in the learning of a skill you may find yourself confronted with determining your skill level.  Are you still a beginner?  Comfortable calling yourself Intermediate? What do you feel about “experienced”?  Its kind of intimidating, but here’s the deal with knitting… if you can’t figure it out, or you screw it up beyond all hope… you can just frog it back to your source material.

For me, this bit of bravery involved a pair of socks labeled as experienced level.  Someone else had posted their finished pair and they were marvelous…. so even though it was only my third pair of feet wearable socks… let’s go for it!

Socks of Grand Experience

Socks of Grand Experience

This pattern relies on twisted stitches, where you knit into the back loops of the stitches instead of the front of the loop at points. The bottom of the feet is flat stockinette, but the pattern then picks up from the base of the foot and wraps around the heel and up the leg.

Second Sock Syndrome.... it was hard but I managed to overcome it!

Second Sock Syndrome…. it was hard but I managed to overcome it!

So… what’s an “experienced” knitter to do, but finally tackle using beads.  So here’s a vary patriotic themed Fabergé shawl for one of my aunts.

Thankfully the autumn rains gave me a photo op break.

Thankfully the autumn rains gave me a photo op break.

I really like how the eyelet section is worked to make the stitches look mirrored from the center spine.

I especially like how the top eyelet section is worked to make the stitches look mirrored from the center spine.  Beading is surprisingly less complicated then you would think.


So there you have it… the month of September.    Now onto all the holiday knitting… which should include a new pattern revolving around gifting canned goods, some mittens both as gifts and as my first mystery knit-a-long. (yep, I’m finally giving up the “but what if I don’t like it?!” worry on this one.) And more quilting… because I’m falling way behind on my Super Mario QAL project.

 PS – I am totally wearing those socks right now!

How to Invoke the Fairies, and my Beautiful Brioche Shawl

First of all…. I need to tell you I finished my  Brioche 2 color shawl that I posted the yarn for earlier…. and its so nice I’m going to give it a proper size photo.

Just like my climbing Hydrangea... its wearing the colors of both Spring and Fall leaves.

Just like my climbing Hydrangea… its wearing the colors of both Spring and Fall.

This is a pattern I fell completely in love with when I first saw it called Under Dutch Skies.  I decided that I would need to learn to brioche, just so I could make one of my own.   I started it towards the end of the Ravellnic Games with the hopes I might complete it.  But as the deadline got closer and closer I started to push myself and made more mistakes… primarily with my leaf spine counts.

As you can see here, in rows prior I did my increase in the wrong spine  instead of the center.

As you can see here, in rows prior I did my increase in the wrong right side stitch instead of the center stitch.

Once you’ve made that mistake well… its not one I was able to tick back and then work up correctly so thank goodness for lifelines, but it still meant frogging several rows.  I wasn’t going to make it to seven leaf repeats in time to finish… so it was finally time to take a real break and get the shawl out of my head for awhile.  This also freed me to make an additional leaf repeat.  I was so excited when I got to the binding off.

I realized as I was laying it out to block, that I’d made a mistake earlier on, and I’d just never found it.  Now here’s the thing about knitting mistakes.  They are kind of like looking at yourself.  When you look at yourself and your own knitting you find all the things you wish were better.  Maybe we wish we were thinner, or maybe we wish our hair looked better or that there is less of it in some places and more of it in others, and we can get focused in on all the things that aren’t just right. (My stitches are uneven, I twisted that one stitch wrong, etc) But when you take a step back and you look at the whole picture like someone else does…. both you and your knitting are so much better than you think.

So I’ve given you hints now go right ahead… find my mistake.

Not so obvious until you find it....

Not so obvious until you find it….  Feel free to click on the photo until you get it in a larger size too!

Now the reason for that whole exercise is that sometimes when we gift or sell our handcrafted items we feel this compulsion to point out those mistakes.  There is no need.  Its a gorgeous thing worth of praise WITH its minor imperfections.

Now perhaps you have some eagle eye friends and family or over time they find its special unique “feature” and feel compelled to point them out to you.   You can respond to this in a few ways, but here’s my favorite two.

  1. This is an identification feature.  It proves that this item is unique and should it be lost or stolen you could correctly identify yours, even if someone else made the same item with the same yarn.
  2. Invoke the fairies.


That’s right… invoke the fairies by looking that person straight in the eye and letting them know that you had to leave a mistake in the item.  Fairies like to steal and take things that are perfect, and after all this friend/family member was already so incredible you felt that if you gave them an absolutely perfect knit item, the fairies might feel compelled to take them away.  (Thus making your imperfection into a very high compliment!) 

Let the Games Begin!… and then End!

If you are a knitter with Olympic fever you may have heard of the Ravellenic Games.  If not, well then here’s the scoop.  During the Olympics, there is a group over on Ravelry, that encourages you to challenge yourself and knit during the time of the Olympics.  Apparently there may be pixel medals involved.  (You can see all the projects here.)

So in an effort to be a bit more involved in the social nature of crafting, I thought I’d take up the challenge.

I started out with another 2 color brioche project, because I wanted something in between my “epic Brioche project” and the simpleness of the Seattle Brioche Scarf.  I didn’t want a super big project though… so I picked one that took less than 200 yards and finally frogged the cut off tails of my Luscious Sweater.

The pattern is called Rodekool, which is Dutch for Red Cabbage

The pattern is Rodekool, which is Dutch for Red Cabbage

Challenges in this project included, increases and decreases in two color brioche, learning the Italian Cast On method, and maybe, though I can’t quite be certain I got it right.. the Italian bind off.

Based on the yarns original project, I call mine Luscious Cabbages

Based on the yarns origins, I call mine Luscious Cabbages

I actually still have yarn bits left, so I might try to work out a hat to go with this one at some point in the future.  Mostly though its the lighter Tidepool heather color.

The second challenge is right out of my list of ideas for 2014:  Gloves

Right hand thumb and Index  include Conductive thread additions for use with a smart phone or tablet.

Right hand thumb and Index include conductive thread additions for use with a smart phone or tablet.

I went for fairly simple pattern, because I already had some superwash wool in worsted left from my Debora Counterpane.  I didn’t find them too hard, but I know some knitters find the fingers to be rather fiddly bits they don’t enjoy.  Its such a widespread opinion, that out of the 718 entries in the Mittens and Gloves category, there are only 14 that are gloves with fingers!  Everything else is fingerless or mittens.

Part of the reason I took a break from the 2 color brioche was the keyhole scarf  was more challenging than I expected, it was a “2 swears” project.  Which overall is a bit unusual for me.  The whole reason I wanted to learn how to brioche in the first place was for the project I cast on next…..  a two color brioche leafy shawl.

This too, had a different style start, and different increases and decreases.  So I thought I should start with an oversized swatch to see how it went.

Size 10 needles and worsted aught to do it...

Size 10 needles and worsted ought to do it…

Now I wasn’t paying enough attention to how long I had to finish, so I didn’t technically get finished with my shawl in time to “qualify” for the games.  In actual fact, its still on my needles.  So I’m going to save the shawl for another post once its completed.  But I will leave you with a photo of the yarns I picked out.

Colorways are Paradise Valley and La Cantante in Mithril (laceweight) from The Verdant Gryphon.

Colorways are Paradise Valley and La Cantante in Mithril (laceweight) from The Verdant Gryphon.

PS – if you click that link in the last caption and find yourself falling in love with the yarn and want/need a referral code be sure to let me know either in the comments or via the email on my About me page!