If A Bird in the Hand is worth 2 in the Bush, How much for 14 birds in the hand?

So last Christmas when I wrapped up Debora, I tied on my tiny version of the Bird in a Tree bird.  I’d made up one per the directions and he was very cute… but in the spirit of wondering if one could knit something up in size 5 embroidery floss I knit up the small version.

Full size and original tiny red bird for comparison.

Full size and original tiny red bird for comparison.

Tiny red was very cute, and the seed beads worked pretty nicely for eyes, which spared me the french knots… which is one of my least favorite embroidery stitches.  Red bird was a bit of a success… and so I accepted the challenge of knitting over a dozen more… which leads us back to… 14 birds in the hand:

The rough equivalent of 28 bush birds.... which isn't even the record for Pine Siskins at my feeder this past spring.

The rough equivalent of 28 in the bush birds…. which isn’t even the record for Pine Siskins at my feeder this past spring.

All of these birds were knit up on some of my smallest double pointed needles from a multipack of what I thought I might need at some point doing lacy socks or something.  Which I believe is the size 00 needles.  All I know is the whole time I was knitting I was worried I would end up bending them into new and unusual shapes. (Which only happened that one time!)  The floss was ok, but didn’t have much give, so if you dropped a stitch or messed up, it was pretty much a frog and redo process.

Now… in case you were wondering how small these guys REALLY are…

That's a US nickel for size comparison

That’s a US nickel for size comparison

Egg Cartons - aka Bird Organizers

Egg Cartons – aka Bird Organizers


What to expect in 2013

Well last year I set myself the goal of one Christmas stocking a month from January to October and it went pretty well.  I sold a few of the stockings, and hopefully someone will take advantage of this coupon code “InWithTheNew” and save themselves 25% on those I have left in the etsy shop!

So this year  I thought it might be good to set myself some of those crafty goals again… so here’s what I know I want to do in 2013:

I’ve accepted a commission on 18 itty bitty red birds for one of my aunts Christmas Trees.  The pattern is available on ravelry, my only difference is that instead of yarn I used size 5 DMC floss on what I think are my size 00 knitting needles (I swear I thought I was going to bend those things as I was going along!)

This tree soon to be populated with a flock of red birds

This tree soon to be populated with a flock of red birds

I’d also like to tackle my first sweaters.  I want to make one for myself and one for Ben.  For him, I’ve picked out my pattern… and its aptly named… Ben!

I'm gonna make a Ben for my Ben so he can Ben in his Ben!

I’m gonna make a Ben for my Ben so he can be Ben in his Ben!

On the Quilting front, I’ve picked fabric and cut for my first square on the grand King sized Quilt I want to make for our bed:

I picked up a couple of these Jelly Rolls at the Labor Day Sale and then did the math on downscaling some star blocks to fit the roll cuts

I picked up a couple of these Jelly Rolls at the Labor Day Sale and then did the math on downscaling some star blocks to fit the roll cuts

This is my first Block cut and just starting to piece.

This is my first Block cut and just starting to piece.

Because its going to be so big, my plan is to piece it and then take a class and quilt it on a long arm machine at one of the local(ish) quilt shops!   If you want to follow along, just as in prior cases… there is an album started for this one.

And lastly, but certainly not least… I want to start making gloves and mittens in a similar style to last years stockings.   Which means lots of fiddling until I find what works best in that arena.

So… Wish me luck!

Meet Debora; My First Pattern

So a bit ago I made a shawl, and each section started as partial cast on and partial picked up stitches.

I started out so afraid of cutting up my yarn....

I started out so afraid of cutting up my yarn….

Then I migrated to the 3 leaf counterpane, where every pane was a separate piece that had to later be joined together.  Its also one on which I fiddled with the pattern slightly, and only had enough yarn to make a 9 pane piece.

Conquering my fear of joining pieces together!

Conquering my fear of joining pieces together!

And today… I’m finally presenting my very first counterpane pattern, which I am naming after a very important person in my life, my aunt Debora.

The Debora Counterpane

The Debora Counterpane

This was an interesting experience as I pulled out and restarted the original pane several times until I found something that combined the elements I wanted.  On the second pane, I documented each rows stitches as I attempted to recreate my work.  Then for panes 3 through 16 it was stitching from the pattern and adjusting the notes so that they made sense to someone other than myself!  For this 16 pane blanket, which was gifted to my aunt Debora, it took roughly 10 skeins of Cascade Superwash DK weight.

A Closer view of the pane joined at the leaf points.

A Closer view of the pane joined at the leaf points.

And a view of the panes joined at the lace points

And a view of the panes joined at the lace points

If you would like this pattern, you can get it from the patterns page (linked above) or here: DeboraCounterpane (PDF file)

This pattern is freely available, but if you enjoy it and feel so compelled, my aunt Debora and I would be pleased if you would give a donation to the American Cancer Society.


I won a prize!

So a bit ago I mentioned I entered my Stargate Cat beds into some Instructables Contests, namely the ThinkGeek Sci-fi contest, but also… I took a chance and entered them in the Sew Warm Instructable Contest as well.   The ThinkGeek contest is still ongoing, so there is still time for people to vote or enter in that one.  But it is my honor to say, I won a second place prize in the Sew Warm Contest!  Which means I  won one of these:

Singer Adjustable Dress Form

Singer Adjustable Dress Form

How awesome is that?!


Christmas Kitchen Gifts to Give

Giving homemade gifts is one of those things that you either pull off with amazing confidence or immense trepidation.  For me its usually trepidation.  I’m very aware of the gold macaroni effect that some homemade gifts carry with them.  So braving all that and casting into the ether of “well if they don’t like it they can use it as oil rags!” I present some Christmasy Kitchen gifts  (I’ve already gifted these, so its safe to share!):

One set was 2 quilted Hot Pads, A knit dishtowel, dishcloth and scrubby

One set consisted of  2 quilted Hot Pads, A knit dishtowel, dishcloth and scrubby

Every item was different, and the knit items are simple knits done in Christmas colored cotton yarn.  I used King Charles Brocade , Double Seed StitchBasketweave Stitch, Grandmother’s Favorite Dishcloth, and just a pure garter stitch for patterns.   To make the scrubbies, cut a roughly 1 inch strip of tulle (and just eyeball it…. you won’t notice any imperfections.  My strips always turn out looking like they were cut by a 5 year old hopped up on espresso.) and knit as a second strand with your regular knit pattern.

My hot pads were all test quilt blocks, a 6 inch block and an 8 inch block.  In the photo above the smaller is a traditional 9 patch and a disappearing 4 patch block, both of these I just used stitch in the ditch method.

An Old Maids Rambler and a more traditional Four Patch Set

An Old Maids Rambler and a more traditional Four Patch Set.  The Rambler is just stitch in the ditch, the Four Patch has echo quilting on the larger bird solids, and diagonal on the smaller four patches.

IMAG0860

A9 patch with just 2 fabric colors, and a Variable Star.  I used echo quilting on the interior of the star, and quilted through the diagonals of the lighter fabric on the smaller square.

Each of my sets were joined by identical fabric choices for the backs.  I used two layers of batting and bound them by folding the larger backing material twice over to the front.  To get the mitered style corners, fold the corner in at a 90 degree angle before you fold in the sides.

Now I also included several batches of cookies, and tied my gift bags with some ornament seed cakes.  I got the seedcake recipe from this instructable that was designed for making a seed wreath.

My seed cake ornaments with their hanging loops.

My seed cake ornaments with their hanging loops.

What I did differently is that I used my cookie cutters, covered on one end with tinfoil as my molds.  I actually had a few more than these, specifically some snowflakes, but they were a bit fragile and didn’t make it, either from the removal from the cutters or from my attempts to add hanging holes.  So I’d suggest either pre-stringing your cakes, OR use a heavy nail as a hole making form within your seedcakes when you are forming them.   They are safe for feeding the birds, or you can use them on your tree!

The things I get talked into….

So… yesterday Ben points out to me the very cute Chewbacca that Wil Wheaton was reposting.  And I mentioned that I had seen it and it was actually a contest entry in the ThinkGeek /Instructables Sci Fi Contest. (Yes that is 3 links, but the last one there is the one you want for looking at entries)

So naturally… I let myself be talked into entering the Stargate Cat Bed.  (OK it didn’t take a LOT of convincing… just some encouragement)

Still maintaining wormhole stability!

So if you are also a bit of a fan of such things…hop on over to look at the entries, and put in a vote for your favorite, whichever one that may be… because there are some amazing things over there!

Christmas Stockings are now on Sale!

Well here we are at the part two of my New Years Resolution…. I have all my stockings crafted… now time to sell them off (I sincerely hope!)

They are all for sale at my etsy shop here:  http://www.etsy.com/shop/MissCarlotta  minus one already claimed Zelda stocking.

Feel Free give me any feedback on my pricing/photography skills/etc!  And for those that refuse to click links here’s a gallery of all my stockings I knit this year that are up in the shop.

This slideshow requires JavaScript.

You can also find links to both my shops on the right.  Now that you are wondering why I have two shops… well its because of readership.  WePay doesn’t charge me to list items only for sales, but the traffic is much smaller.  Etsy does charge me to list items, but there are slightly greater odds that someone will see the shop that maybe hasn’t been to my website.

Did I give you this hat? (& first mittens)

Today I took a break from house work and finished up a Christmas gift and finished the second of my first pair of mittens.  I’ve known since I found the pattern just what yarn I wanted to use to try out making mittens.  It was this sage and white that would be kind on me, and was a nice soft wear.  I’d had the ball saved up for awhile… from when I made this hat and was learning about cabling and decreases:

A Beanie or Tuque… depending on where you live.

Now I know I gave someone I know this hat… but for the life of me I can’t remember whom specifically, it was either Calvin, or Al, or Mary or Dad.  So if any of you are reading this…. I have some mittens!

Kittenless Mittens

Now, to start with I didn’t find dpns in size 4 at the local hardware shop… (yes I live in a town of the size and age where you can purchase knitting needles from the hardware store) so I did pick up some size 3, which is slightly smaller and knit the smallest size.  Turns out… These mittens seem a bit bigger in a few places so my next pair will need a different pattern… ah well! But they do have the advantage of being ambidextrous.

At some point some enterprising homemaker devised the one fool proof method for ensuring that a kid wouldn’t ever lose their mittens.   No it wasn’t the elastic with clips on both ends, that turn frigid cold and packed with snow at the most inconvenient of times.  It was the long rope cord connecting mitten A to mitten B.

Almost as old as that, is the pattern I used to make my first mittens.  Apparently this is a pattern from Eleanor Roosevelt’s knitting patterns, and you can find it at knitty.com. 

Anyway… if I did give you that hat and you’d like the mittens, let me know.  And if you want a cord linking your mittens together… I have just a little bit more of that yarn!

Quilt Three: A Fiery Cracker

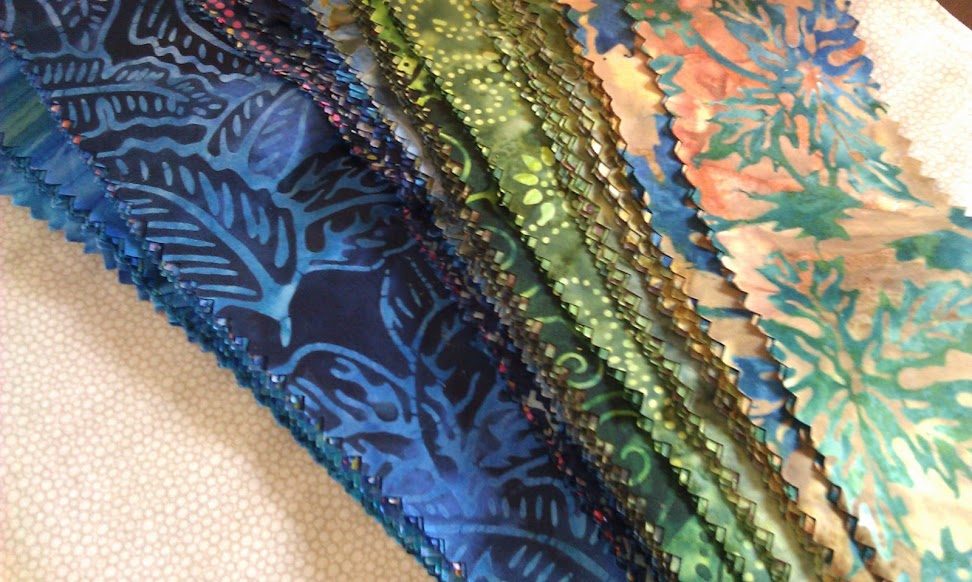
So awhile back my local quilt shop closed, and it was such a sad day for me.  The owner, Mary, was one of those generous and kind founts of knowledge who seemed to be excited about your project and offered truly helpful tips and ideas to complete it.   So I went to visit her during her closing sale and lament her loss and wish her well.  And while I was there I did purchase a couple things, including a fine selection of orange fabrics, because I have a friend and I just knew she liked Orange.  That was July 16th.

Selected fabrics. The blue was bought separately. And my favorite out of them all was the orange with gold swirls… that’s the one I picked out first.

Now I did ask her what her husband’s favorite color was, and was told that it was blue, so that would work out well for me.. a nice complimentary color even if I didn’t go the same shade as his absolute favorite.  And so a few days later, while we were out seeing The Dark Knight Rises in IMAX on the week it opened (July 21st to be exact) the conversation came up again… and she says to us “Orange isn’t really my favorite color”  O.O!!!

But since she has misled me all this time and she does actually like orange and somewhat collect things with orange, and because I’d already bought the fabric… she’s getting an orange quilt!  And just to give her a bit of a giggle…. I immortalized that very quote on her quilt tag!

So I finally finished that quilt yesterday.  And by finished that means I don’t actually have a 100% done photo, because as I was heading upstairs to get the quilt tag after stitching down the binding while watching X-Files… Ben announced to me that he had invited us and our friends to go out to dinner.  So here’s the closest to done I have from that morning with the binding all pinned down and ready for sewn down:

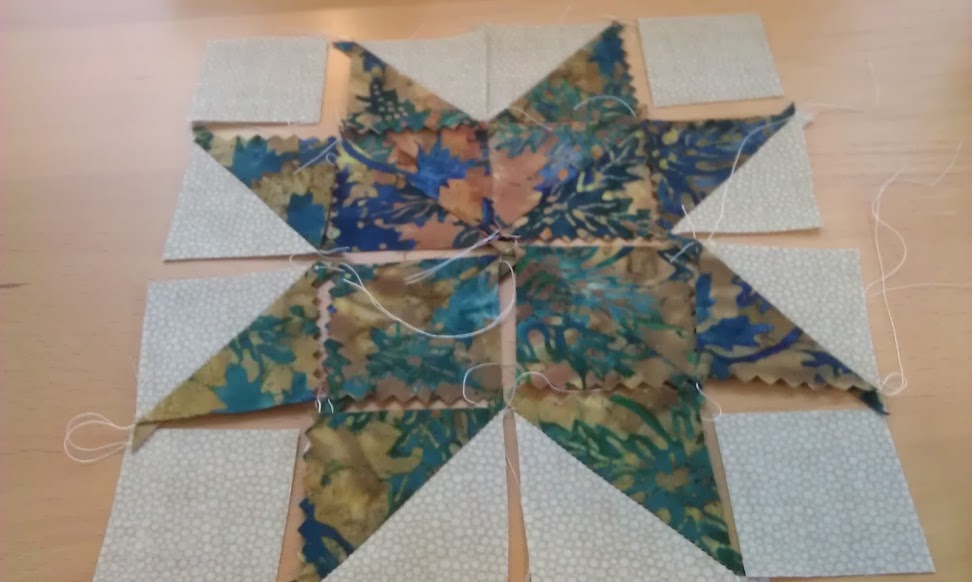
Cracker Blocks arranged in a 4 color woven pattern.

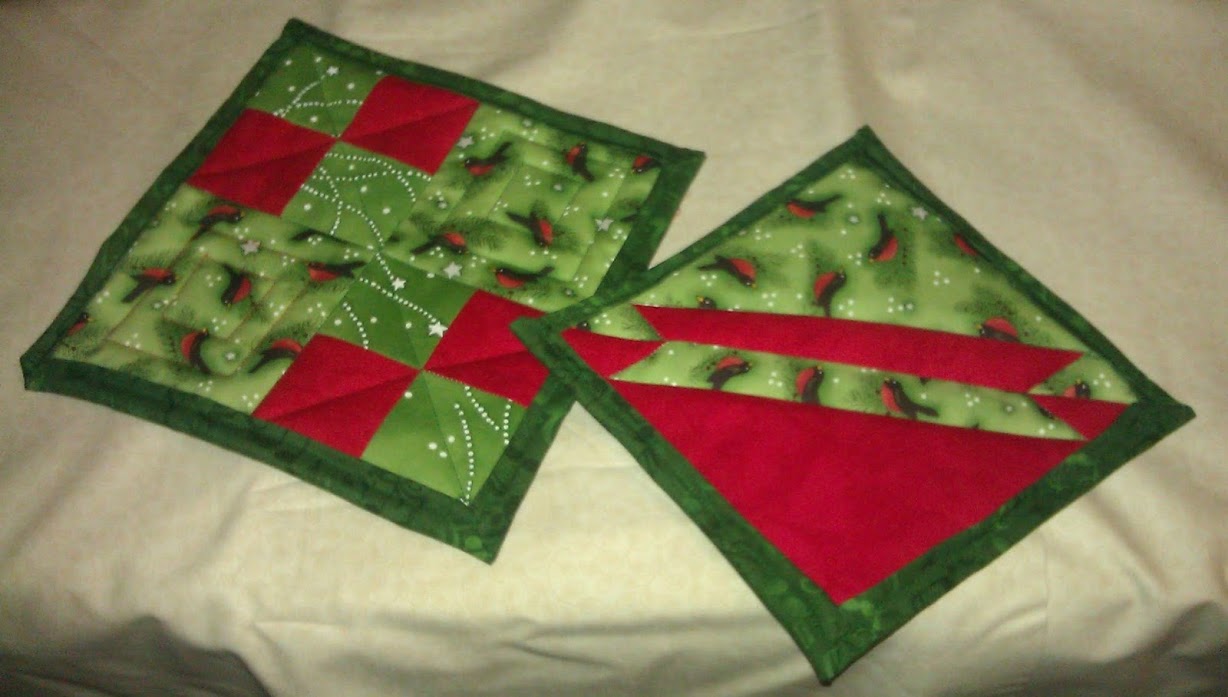
The design is called a cracker quilt.  I found several people that think that this is the eating cracker related, but from what I’ve read and the design elements I believe its more a Gift Cracker related.  Where the cracker design you see is a combination of the two long colored bars capped by their matching triangles in the first square and continues into the same colored triangles of the next square forming the gift cracker shape.

For my quilting, I did stitch in the ditch outlining the diamond shape of each orange square, and the inner blue rectangles, and then I did a couple variations of echo quilting on my blue squares:

A bit of a detail photo

I learned many new things while making this one… things like when you are making points, you should stitch your seam just behind the prior stitches and not through those stitches to get the best results.  And my two dark oranges… don’t photo and look so disparate as I thought they would.    For those of you that like such things… here’s a link to the gallery of in progress photos.

September: So much to do…. how about some leaves and berries?

So September has just flown by, and unfortunately the memory card to the good camera is having issues and so I need to get a new one… so this means rather poor quality photos this post.

My design this month was more traditional in nature although the implementation felt a little masochistic… which sometimes family holidays are that way aren’t they?

Leaves and Berries

I started with an attempt at a three color braided by cabling look for my cuff, and ended with a braided hanging loop.  Braiding is not a problem… but working three skeins of yarn and remember which is cable over and cable under and how to space.. that was a bit of gymnastics:

Cuff and hanging loop… they look similar but are done very differently.

When I got down to the heel I thought how nice it was to bring those colors back down the sock a bit more… so I went with a heel of alternating red and green.  This wasn’t too bad at all in my opinion, though it was a bit interesting as I started to turn the heel.

Heel detail.

And I finished it off with my new favorite thing to knit… some leaves with some berries.  Leaves are surprisingly easy to do, and while I did flirt with trying to make some more holly shaped leaves, or a wreath of leaves, I didn’t feel like this was the best project for them.  (So now I have some pre-knit spare leaves in my yarn stash.)

Leaves and berries!

I can’t say as I’m super thrilled with this one, but it is a whole stocking and it was a bit more to learn and try than some of the others so I’m putting it in the win column.

What you haven’t seen is a nearly complete third quilt, which will be a gift…. a cross stitch gift I have about 1/2 done… and my counterpane project I am designing and building. I am now on pane #3.  The first pane took quite some time as I was designing, the second pane I was writing out the pattern and now I’m knitting from the pattern to make sure I got it right.

I am also slowly but surely working on getting my etsy shop ready for a relauch with all these stockings.  After all something needs to feed my yarn habit!